HP Photosmart 470 Photosmart 475 series User Guide - Page 23
Tools, Cartridge status, Do not touch here, Insert the cartridge - series ink
 |
View all HP Photosmart 470 manuals
Add to My Manuals
Save this manual to your list of manuals |
Page 23 highlights
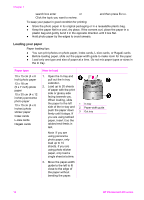
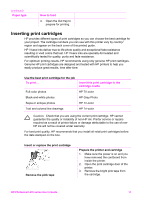
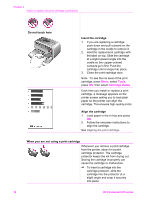
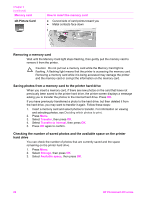
Chapter 2 Insert or replace the print cartridge (continued) Do not touch here Insert the cartridge 1. If you are replacing a cartridge, push down and pull outward on the cartridge in the cradle to remove it. 2. Hold the replacement cartridge with the label on top. Slide the cartridge at a slight upward angle into the cradle so the copper-colored contacts go in first. Push the cartridge until it snaps into place. 3. Close the print cartridge door. Note To see the ink level of the print cartridge, press Menu, select Tools, press OK, then select Cartridge status. Each time you install or replace a print cartridge, a message appears on the printer screen asking you to load plain paper so the printer can align the cartridge. This ensures high-quality prints. Align the cartridge 1. Load paper in the In tray and press OK. 2. Follow the onscreen instructions to align the cartridge. See Aligning the print cartridge. When you are not using a print cartridge Whenever you remove a print cartridge from the printer, store it in a print cartridge protector. The cartridge protector keeps the ink from drying out. Storing the cartridge improperly can cause the cartridge to malfunction. ➔ To insert a cartridge into the cartridge protector, slide the cartridge into the protector at a slight angle and snap it securely into place. 18 HP Photosmart 470 series
-
 1
1 -
2
-
3
-
4
-
5
-
6
-
7
-
8
-
9
-
10
-
11
-
12
-
13
-
14
-
15
-
16
-
17
-
 18
18 -
 19
19 -
 20
20 -
 21
21 -
 22
22 -
 23
23 -
 24
24 -
 25
25 -
 26
26 -
 27
27 -
 28
28 -
29
-
30
-
31
-
32
-
33
-
34
-
35
-
36
-
37
-
38
-
39
-
40
-
41
-
42
-
43
-
44
-
45
-
46
-
47
-
48
-
49
-
50
-
51
-
52
-
53
-
54
-
55
-
56
-
57
-
58
-
59
-
60
-
61
-
62
-
63
-
64
-
65
-
66
-
67
-
68
-
69
-
70
-
71
-
72
-
73
-
74
-
75
-
76
-
77
 |
 |
