HP Photosmart 470 Photosmart 475 series User Guide - Page 36
Improving the quality of your photos, Adaptive lighting
 |
View all HP Photosmart 470 manuals
Add to My Manuals
Save this manual to your list of manuals |
Page 36 highlights
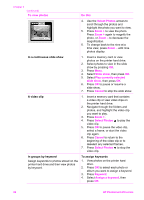
Improving the quality of your photos The printer provides a variety of preferences and effects that can improve the quality of your printed photos. The settings do not change your original photo. They only affect printing. Problem and solution How to do it Red-eye in flash photos Red-eye removal Remove the red-eye effect that mars some photos taken with a flash. 1. Press Menu. 2. Select Improve image, then press OK. 3. Select Remove red-eye, then press OK. Blurred photos SmartFocus Sharpen blurred photos. It is turned on by default. Use these instructions to turn it on if it is currently off. This preference affects all printed photos. 1. Press Menu. 2. Select Preferences, then press OK. 3. Select SmartFocus, then press OK. 4. Select On, then press OK. Photos with poor lighting and contrast 1. Adaptive lighting 2. Improve the lighting and contrast in 3. prints. This preference affects all printed photos. 4. Press Menu. Select Preferences, then press OK. Select Adaptive lighting, then press OK. Select On, then press OK. Photos with poor brightness Photo brightness Improve the brightness level in photos. 1. Press Menu. 2. Select Improve image, then press OK. 3. Select Photo brightness, then press OK. 4. Use the Select Photos arrows to adjust photo brightness to the desired level, then press OK. Poor-quality photos Auto enhance 1. Press Menu. 2. Select Improve image, then press OK. 3. Select Auto enhance, then press OK. 4. Select one of the enhancement options: - Recommended - Option 2 - Option 3 5. Press OK. Poor-quality video clips Video enhancement 1. Press Menu. 2. Select Preferences, then press OK. HP Photosmart 470 series User's Guide 31
-
 1
1 -
2
-
3
-
4
-
5
-
6
-
7
-
8
-
9
-
10
-
11
-
12
-
13
-
14
-
15
-
16
-
17
-
18
-
19
-
20
-
21
-
22
-
23
-
24
-
25
-
26
-
27
-
28
-
29
-
30
-
 31
31 -
 32
32 -
 33
33 -
 34
34 -
 35
35 -
 36
36 -
 37
37 -
 38
38 -
 39
39 -
 40
40 -
 41
41 -
42
-
43
-
44
-
45
-
46
-
47
-
48
-
49
-
50
-
51
-
52
-
53
-
54
-
55
-
56
-
57
-
58
-
59
-
60
-
61
-
62
-
63
-
64
-
65
-
66
-
67
-
68
-
69
-
70
-
71
-
72
-
73
-
74
-
75
-
76
-
77
 |
 |
