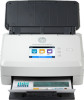
HP Scanjet N7000 User Guide - Page 34
Set up Scan to Network Folder, Step one: Gather network information
 |
View all HP Scanjet N7000 manuals
Add to My Manuals
Save this manual to your list of manuals |
Page 34 highlights
Set up Scan to Network Folder The following steps describe how to set up Scan to Network Folder. ● Step one: Gather network information ● Step two: Access the HP Embedded Web Server (EWS) ● Step three: Configure the Scan to network feature Step one: Gather network information Before you begin to set up the Scan to Network Folder feature, gather the following information and get prepared. NOTE: To set up the Scan to Network Folder feature, the product must have an active network connection to the same network as the computer that will run the setup process. Administrators need the following items before beginning the configuration process. ● Administrative access to the product ● The fully-qualified domain name (FQDN) (e.g., \\servername.us.companyname.net\scans) of the destination folder or the IP address of the server (e.g., \\16.88.20.20\scans). NOTE: The use of the term "server" in this context refers to the computer where the shared folder resides. Step two: Access the HP Embedded Web Server (EWS) To access the HP Embedded Web Server (EWS), complete the following steps: 1. From the Home screen on the product control panel, touch the Network or icon according to your network connection method, and then touch Wireless or Wired (LAN) to display the IP address or host name. 2. Open a web browser, and in the address line, type the IP address or host name exactly as it displays on the product control panel. Press the Enter key on the computer keyboard. The EWS opens. Figure 2-3 Example of an IP address in a web browser NOTE: If the web browser displays a message indicating that accessing the website might not be safe, select the option to continue to the website. Accessing this website will not harm the computer. 24 Chapter 2 Use the scanner ENWW
-
 1
1 -
2
-
3
-
4
-
5
-
6
-
7
-
8
-
9
-
10
-
11
-
12
-
13
-
14
-
15
-
16
-
17
-
18
-
19
-
20
-
21
-
22
-
23
-
24
-
25
-
26
-
27
-
28
-
 29
29 -
 30
30 -
 31
31 -
 32
32 -
 33
33 -
 34
34 -
 35
35 -
 36
36 -
 37
37 -
 38
38 -
 39
39 -
40
-
41
-
42
-
43
-
44
-
45
-
46
-
47
-
48
-
49
-
50
-
51
-
52
-
53
-
54
-
55
-
56
-
57
-
58
-
59
-
60
-
61
-
62
-
63
-
64
-
65
-
66
-
67
-
68
-
69
-
70
-
71
-
72
-
73
-
74
-
75
-
76
-
77
-
78
-
79
-
80
-
81
-
82
-
83
-
84
-
85
-
86
-
87
-
88
-
89
-
90
-
91
-
92
-
93
-
94
-
95
-
96
-
97
-
98
-
99
-
100
-
101
-
102
-
103
-
104
-
105
-
106
-
107
-
108
-
109
-
110
 |
 |
