Konica Minolta AccurioLabel 190 bizhub PRESS C71cf/AccurioLabel 190 Quick Guid - Page 104
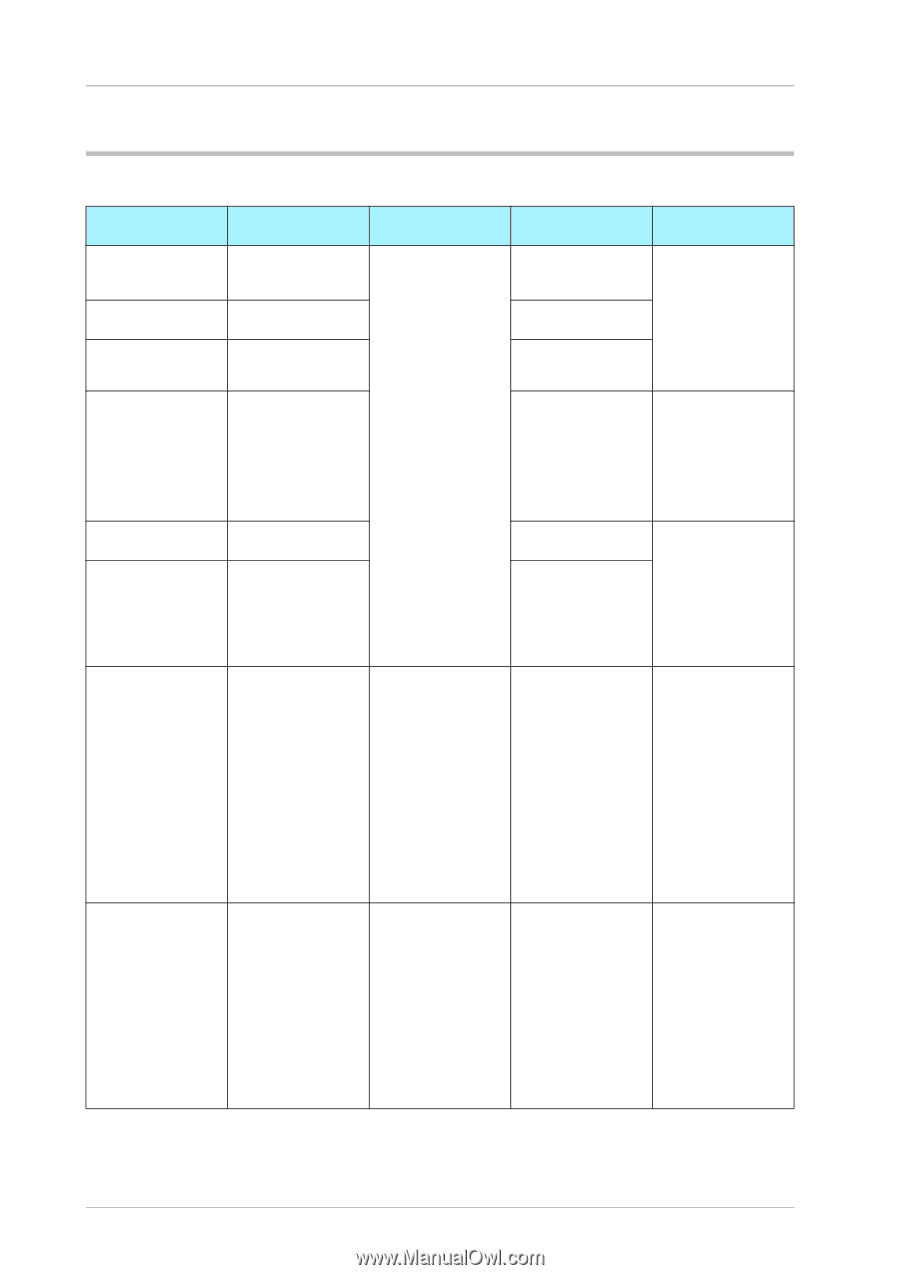
JAM Code List, Clear Paper Jams, JAM Code, Jam location num, Where to check, Function, Instructions
 |
View all Konica Minolta AccurioLabel 190 manuals
Add to My Manuals
Save this manual to your list of manuals |
Page 104 highlights
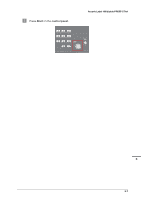
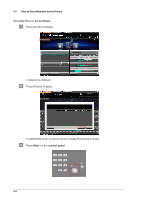
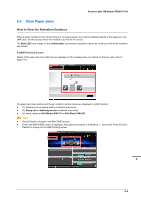
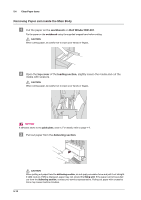
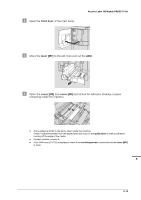
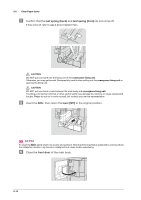
5.4 Clear Paper Jams JAM Code List If a JAM code is displayed, clear the jam following the instructions described below. JAM Code J-1711 J-1712 J-1713 J-1714 J-1755 J-1756 J-3105 J-3112 Jam location number 61 Where to check Feeding and conveying section 61 61 62 61 61 62 Fixing/delivering section 61 Feeding and con- veying section Function Instructions Paper does not reach to the pretransfer sensor. Conveyer sensor error. Pretransfer sensor error. Delivering rollers do not spin. Conveyer sensor error. Pretransfer sensor error. Paper winds fusing unit. Remove paper inside the main body, and then open and close the front door of the main body. For instructions on how to remove paper, refer to page 5-12. Check the condition and tension value of paper set , and then open and close the front door of the main body. For details, refer to page 5-26. Remove paper inside the main body, and then open and close the front door of the main body. For instructions on how to remove paper, refer to page 5-12. Remove paper inside the main body, and then open and close the front door of the main body. For details, refer to page 5-28. Centering improper. Important: If the paper cannot be pulled out from the delivering section, contact your service representative. Remove paper inside the main body, and then open and close the front door of the main body. For instructions on how to remove paper, refer to page 5-12. Adjust the position of set media, if necessary. For details, refer to page 4-16. 5-10
-
 1
1 -
2
-
3
-
4
-
5
-
6
-
7
-
8
-
9
-
10
-
11
-
12
-
13
-
14
-
15
-
16
-
17
-
18
-
19
-
20
-
21
-
22
-
23
-
24
-
25
-
26
-
27
-
28
-
29
-
30
-
31
-
32
-
33
-
34
-
35
-
36
-
37
-
38
-
39
-
40
-
41
-
42
-
43
-
44
-
45
-
46
-
47
-
48
-
49
-
50
-
51
-
52
-
53
-
54
-
55
-
56
-
57
-
58
-
59
-
60
-
61
-
62
-
63
-
64
-
65
-
66
-
67
-
68
-
69
-
70
-
71
-
72
-
73
-
74
-
75
-
76
-
77
-
78
-
79
-
80
-
81
-
82
-
83
-
84
-
85
-
86
-
87
-
88
-
89
-
90
-
91
-
92
-
93
-
94
-
95
-
96
-
97
-
98
-
 99
99 -
 100
100 -
 101
101 -
 102
102 -
 103
103 -
 104
104 -
 105
105 -
 106
106 -
 107
107 -
 108
108 -
 109
109 -
110
-
111
-
112
-
113
-
114
-
115
-
116
-
117
-
118
-
119
-
120
-
121
-
122
-
123
-
124
-
125
-
126
-
127
-
128
-
129
-
130
-
131
-
132
-
133
-
134
-
135
-
136
-
137
-
138
-
139
-
140
-
141
-
142
-
143
 |
 |