Netgear AC779S User Guide - Page 22
Connect with the Micro-USB Cable, Making a Tethered Connection
 |
View all Netgear AC779S manuals
Add to My Manuals
Save this manual to your list of manuals |
Page 22 highlights
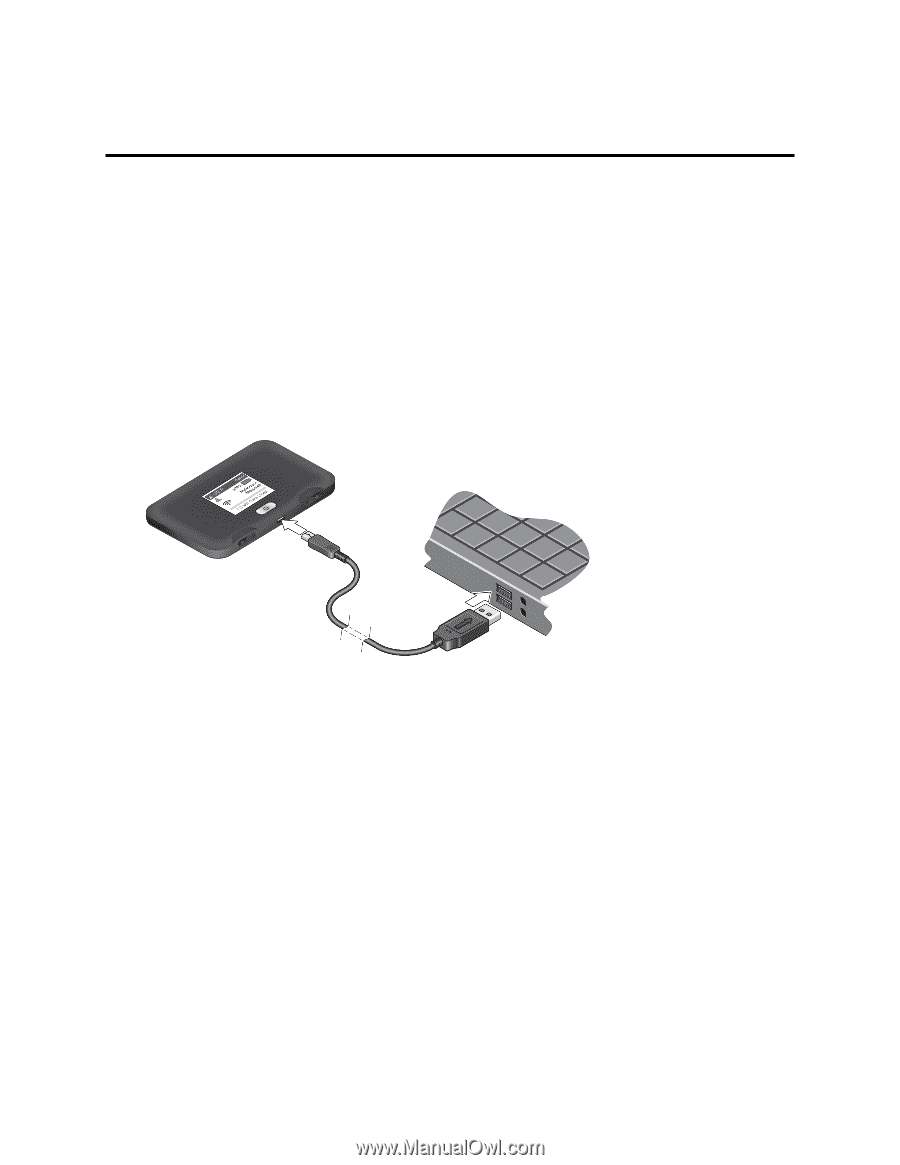
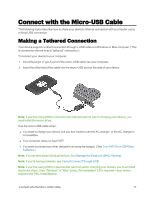
Connect with the Micro-USB Cable The following topics describe how to share your device's Internet connection with a computer using a direct USB connection. Making a Tethered Connection Your device supports a direct connection through a USB cable to a Windows or Mac computer. (This is commonly referred to as a "tethered" connection.) To connect your device to your computer: 1. Insert the larger (Type A) end of the micro-USB cable into your computer. 2. Insert the other end of the cable into the micro-USB port on the side of your device. Note: If you'll be using USB to connect to the Internet (and not just for charging your device), you must install the device driver. Use the micro-USB cable when: n You want to charge your device, but you don't want to use the AC charger, or the AC charger is not available. n Your computer does not have WiFi. n You want to prevent any other devices from using the hotspot. (See Turn WiFi On or Off When Tethered.) Note: You can also block individual devices. See Manage the Block List (MAC Filtering). Note: If you're having problems, see Cannot Connect Through USB. Note: If you'll be using USB for data transfer (and not just for charging your device), you must install the device driver. (See "Windows" or "Mac" below.) No Installation CD is required-your device supports the TRU-Install feature. Connect with the Micro-USB Cable 17
-
 1
1 -
2
-
3
-
4
-
5
-
6
-
7
-
8
-
9
-
10
-
11
-
12
-
13
-
14
-
15
-
16
-
 17
17 -
 18
18 -
 19
19 -
 20
20 -
 21
21 -
 22
22 -
 23
23 -
 24
24 -
 25
25 -
 26
26 -
 27
27 -
28
-
29
-
30
-
31
-
32
-
33
-
34
-
35
-
36
-
37
-
38
-
39
-
40
-
41
-
42
-
43
-
44
-
45
-
46
-
47
-
48
-
49
-
50
-
51
-
52
-
53
-
54
-
55
-
56
-
57
-
58
-
59
-
60
-
61
-
62
-
63
-
64
-
65
-
66
-
67
-
68
-
69
-
70
-
71
-
72
-
73
-
74
-
75
-
76
-
77
-
78
-
79
-
80
-
81
-
82
-
83
-
84
-
85
-
86
-
87
-
88
-
89
-
90
-
91
-
92
-
93
-
94
-
95
-
96
-
97
-
98
-
99
-
100
-
101
-
102
-
103
-
104
-
105
-
106
-
107
-
108
-
109
-
110
-
111
-
112
-
113
-
114
-
115
-
116
-
117
-
118
-
119
-
120
-
121
 |
 |