Netgear WAC124 User Manual For Firmware version less than 1.0.4.2 - Page 14
Position the antennas for best WiFi performance, Access point/router label - reset
 |
View all Netgear WAC124 manuals
Add to My Manuals
Save this manual to your list of manuals |
Page 14 highlights
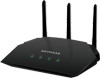
AC2000 802.11ac Wireless Access Point/Router WAC124 Viewed from left to right, the back panel contains the following components: • USB 2.0 port. One USB 2.0 port to connect a storage device or printer to the access point/router. • LAN ports 4 through 1. Four Gigabit Ethernet RJ-45 LAN ports numbered LAN4 through LAN1 to connect the access point/router to Ethernet devices such as a computer and a switch. • Internet port. One Internet (WAN) port to connect the access point/router to a router, network switch, or network hub in your network (see Connect the access point/router to your existing router and log in for the first time on page 17). This port must provide the Internet connection to the access point/router. If you want to use the access point/router in router mode, do not connect this port to an Internet modem until after you complete the initial log-in process (see Use the access point/router in router mode on page 23). • WPS button. Press the WPS button to join the access point/router's WiFi network without typing the WiFi password. For more information, see Use WPS to add a device to the WiFi network on page 70. • Reset button. Press the Reset button to reset the access point/router to factory default settings. For more information, see Use the Reset button on page 138. • Power On/Off button. Press the Power On/Off button to provide power to the access point/router. • DC power connector. Connect the power adapter that came in the product package to the DC power connector. Position the antennas for best WiFi performance You can swivel the three access point/router antennas in any direction. For best WiFi performance, we recommend that you experiment with various antenna positions. For example, you could position the center antenna vertically and aim the other two antennas outward at 45-degree angles. Access point/router label The access point/router label on the bottom panel of the access point/router shows the default login information, default WiFi network name (SSID), default WiFi passphrase, serial number and MAC address of the access point/router, and other information. Hardware Overview of the 14 Access Point/Router User Manual
-
 1
1 -
2
-
3
-
4
-
5
-
6
-
7
-
8
-
 9
9 -
 10
10 -
 11
11 -
 12
12 -
 13
13 -
 14
14 -
 15
15 -
 16
16 -
 17
17 -
 18
18 -
 19
19 -
20
-
21
-
22
-
23
-
24
-
25
-
26
-
27
-
28
-
29
-
30
-
31
-
32
-
33
-
34
-
35
-
36
-
37
-
38
-
39
-
40
-
41
-
42
-
43
-
44
-
45
-
46
-
47
-
48
-
49
-
50
-
51
-
52
-
53
-
54
-
55
-
56
-
57
-
58
-
59
-
60
-
61
-
62
-
63
-
64
-
65
-
66
-
67
-
68
-
69
-
70
-
71
-
72
-
73
-
74
-
75
-
76
-
77
-
78
-
79
-
80
-
81
-
82
-
83
-
84
-
85
-
86
-
87
-
88
-
89
-
90
-
91
-
92
-
93
-
94
-
95
-
96
-
97
-
98
-
99
-
100
-
101
-
102
-
103
-
104
-
105
-
106
-
107
-
108
-
109
-
110
-
111
-
112
-
113
-
114
-
115
-
116
-
117
-
118
-
119
-
120
-
121
-
122
-
123
-
124
-
125
-
126
-
127
-
128
-
129
-
130
-
131
-
132
-
133
-
134
-
135
-
136
-
137
-
138
-
139
-
140
-
141
-
142
-
143
-
144
-
145
-
146
-
147
-
148
-
149
-
150
-
151
-
152
-
153
-
154
-
155
-
156
-
157
-
158
-
159
-
160
-
161
-
162
-
163
-
164
-
165
-
166
-
167
-
168
-
169
-
170
-
171
-
172
-
173
-
174
-
175
-
176
-
177
-
178
-
179
-
180
-
181
-
182
-
183
-
184
-
185
-
186
-
187
-
188
-
189
-
190
-
191
-
192
-
193
-
194
-
195
-
196
-
197
-
198
-
199
-
200
-
201
-
202
-
203
-
204
-
205
-
206
-
207
-
208
-
209
-
210
-
211
-
212
-
213
-
214
-
215
-
216
-
217
-
218
-
219
-
220
-
221
-
222
-
223
-
224
-
225
-
226
-
227
-
228
-
229
-
230
-
231
-
232
-
233
-
234
-
235
-
236
-
237
-
238
-
239
-
240
-
241
-
242
-
243
-
244
-
245
-
246
-
247
-
248
-
249
-
250
-
251
-
252
-
253
-
254
-
255
-
256
-
257
-
258
-
259
-
260
-
261
-
262
-
263
 |
 |
