Nikon COOLPIX P510 User Manual - Page 201
Welcome Screen, Press, or the, button.
 |
View all Nikon COOLPIX P510 manuals
Add to My Manuals
Save this manual to your list of manuals |
Page 201 highlights
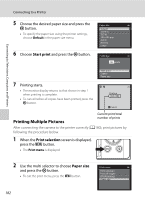
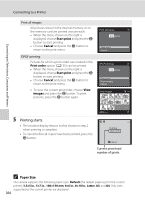
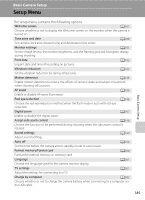
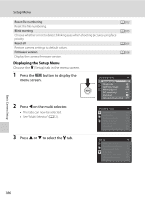
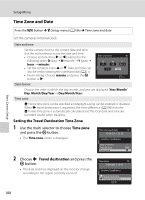
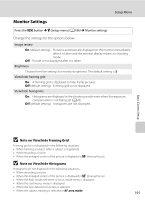
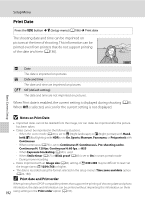
Setup Menu 4 Press K or the k button. • The setup menu items can now be selected. • Use the multi selector to select items and set functions on menus (A12). • To exit the setup menu, press the d button or press J and switch to another tab. Set up Welcome screen Time zone and date Monitor settings Print date Vibration reduction Motion detection AF assist Welcome Screen Press the d button M z (Setup menu) (A186) M Welcome screen Choose whether or not to display the Welcome screen on the monitor when the camera is turned on. None (default setting) Displays the shooting or playback screen without displaying the Welcome screen. COOLPIX Displays the Welcome screen before displaying the shooting or playback screen. Select an image Select a picture that you have shot to display as the Welcome screen. Display the picture selection screen, choose a picture (A140), and press the k button to register it. • Because the selected picture is stored in the camera, the picture appears in the Welcome screen even if the original picture is deleted. • Pictures shot with Image size (A84) of I 3984×2656, u 3968×2232, O 1920×1080 and H 2992×2992 cannot be selected. • Pictures recorded with easy panorama cannot be selected. • Pictures reduced to 160×120 or smaller using Small picture editing (A154) or cropping (A156) cannot be selected. Basic Camera Setup 187
-
 1
1 -
2
-
3
-
4
-
5
-
6
-
7
-
8
-
9
-
10
-
11
-
12
-
13
-
14
-
15
-
16
-
17
-
18
-
19
-
20
-
21
-
22
-
23
-
24
-
25
-
26
-
27
-
28
-
29
-
30
-
31
-
32
-
33
-
34
-
35
-
36
-
37
-
38
-
39
-
40
-
41
-
42
-
43
-
44
-
45
-
46
-
47
-
48
-
49
-
50
-
51
-
52
-
53
-
54
-
55
-
56
-
57
-
58
-
59
-
60
-
61
-
62
-
63
-
64
-
65
-
66
-
67
-
68
-
69
-
70
-
71
-
72
-
73
-
74
-
75
-
76
-
77
-
78
-
79
-
80
-
81
-
82
-
83
-
84
-
85
-
86
-
87
-
88
-
89
-
90
-
91
-
92
-
93
-
94
-
95
-
96
-
97
-
98
-
99
-
100
-
101
-
102
-
103
-
104
-
105
-
106
-
107
-
108
-
109
-
110
-
111
-
112
-
113
-
114
-
115
-
116
-
117
-
118
-
119
-
120
-
121
-
122
-
123
-
124
-
125
-
126
-
127
-
128
-
129
-
130
-
131
-
132
-
133
-
134
-
135
-
136
-
137
-
138
-
139
-
140
-
141
-
142
-
143
-
144
-
145
-
146
-
147
-
148
-
149
-
150
-
151
-
152
-
153
-
154
-
155
-
156
-
157
-
158
-
159
-
160
-
161
-
162
-
163
-
164
-
165
-
166
-
167
-
168
-
169
-
170
-
171
-
172
-
173
-
174
-
175
-
176
-
177
-
178
-
179
-
180
-
181
-
182
-
183
-
184
-
185
-
186
-
187
-
188
-
189
-
190
-
191
-
192
-
193
-
194
-
195
-
 196
196 -
 197
197 -
 198
198 -
 199
199 -
 200
200 -
 201
201 -
 202
202 -
 203
203 -
 204
204 -
 205
205 -
 206
206 -
207
-
208
-
209
-
210
-
211
-
212
-
213
-
214
-
215
-
216
-
217
-
218
-
219
-
220
-
221
-
222
-
223
-
224
-
225
-
226
-
227
-
228
-
229
-
230
-
231
-
232
-
233
-
234
-
235
-
236
-
237
-
238
-
239
-
240
-
241
-
242
-
243
-
244
-
245
-
246
-
247
-
248
-
249
-
250
-
251
-
252
 |
 |
