Nokia 6681 User Guide - Page 59
Calendar, <GRAPHIC>, Via Bluetooth - specifications
 |
View all Nokia 6681 manuals
Add to My Manuals
Save this manual to your list of manuals |
Page 59 highlights
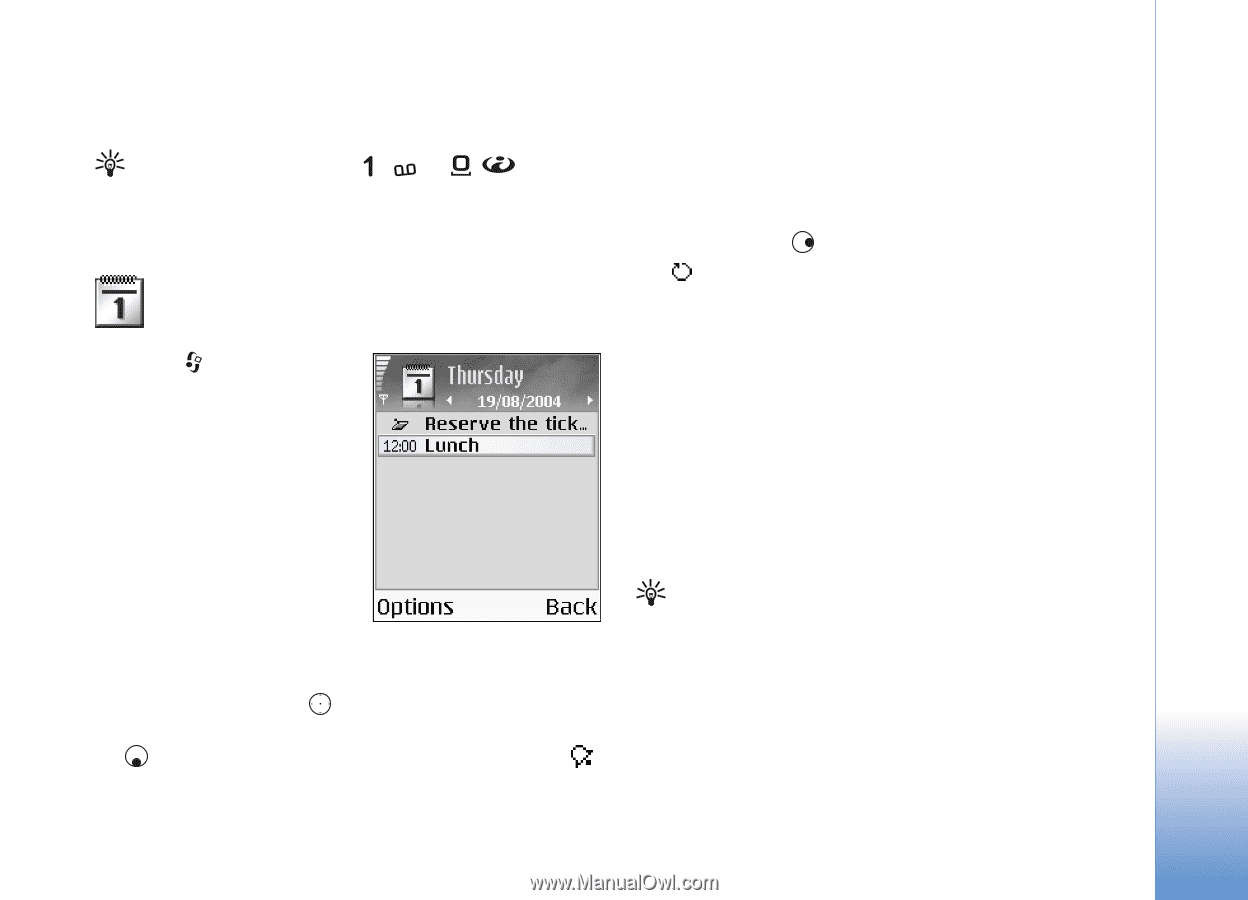
Calendar Calendar Shortcut: Press any key ( - ) in any calendar view. A meeting entry opens, and the characters you enter are added to the Subject field. Create calendar entries 1 Press , and select Calendar > Options > New entry and from the following: Meeting-To remind you of an appointment that has a specific date and time. Memo-To write a general entry for a day. Anniversary-To remind you of birthdays or special dates. Anniversary entries are repeated every year. 2 Fill in the fields. Use to move between fields. Alarm (meetings and anniversary)-Select On, and press to fill in the Alarm time and Alarm date fields. in the day view indicates an alarm. To stop a calendar alarm, select Silence to turn off the calendar alarm tone. The reminder text stays on the screen. Select Stop to end the calendar alarm. Select Snooze to set the alarm to snooze. Repeat-Press to change the entry to be repeating ( is shown in the day view). Repeat until-You can set an end date for the repeated entry. Synchronisation: Private-After synchronisation the calendar entry can be seen only by you and it will not be shown to others with online access to view the calendar. Public-The calendar entry is shown to others who have access to view your calendar online. None-The calendar entry will not be copied to your PC when you synchronise. 3 To save the entry, select Done. Tip! To send a calendar note to a compatible phone, select Options > Send > Via text message, Via multimedia, Via Bluetooth, or Via e-mail (available only if the correct e-mail settings are in place). Copyright © 2005 Nokia. All rights reserved. 59
-
 1
1 -
2
-
3
-
4
-
5
-
6
-
7
-
8
-
9
-
10
-
11
-
12
-
13
-
14
-
15
-
16
-
17
-
18
-
19
-
20
-
21
-
22
-
23
-
24
-
25
-
26
-
27
-
28
-
29
-
30
-
31
-
32
-
33
-
34
-
35
-
36
-
37
-
38
-
39
-
40
-
41
-
42
-
43
-
44
-
45
-
46
-
47
-
48
-
49
-
50
-
51
-
52
-
53
-
 54
54 -
 55
55 -
 56
56 -
 57
57 -
 58
58 -
 59
59 -
 60
60 -
 61
61 -
 62
62 -
 63
63 -
 64
64 -
65
-
66
-
67
-
68
-
69
-
70
-
71
-
72
-
73
-
74
-
75
-
76
-
77
-
78
-
79
-
80
-
81
-
82
-
83
-
84
-
85
-
86
-
87
-
88
-
89
-
90
-
91
-
92
-
93
-
94
-
95
-
96
-
97
-
98
-
99
-
100
-
101
-
102
-
103
-
104
-
105
-
106
-
107
-
108
-
109
-
110
-
111
-
112
-
113
 |
 |