Panasonic KX-MB1500 Operating Instructions - Page 14
Push down to lock the plate
 |
View all Panasonic KX-MB1500 manuals
Add to My Manuals
Save this manual to your list of manuals |
Page 14 highlights
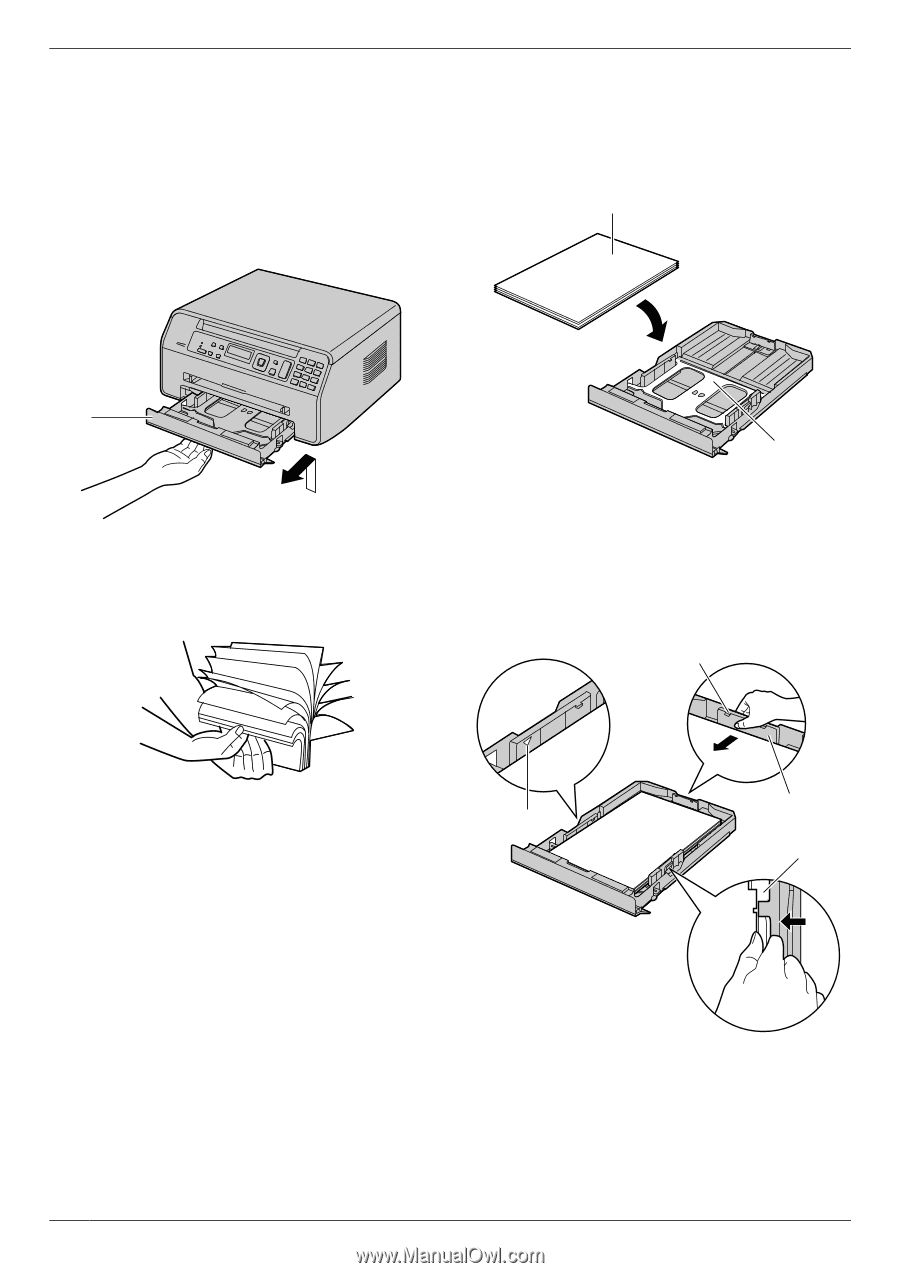
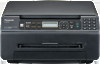
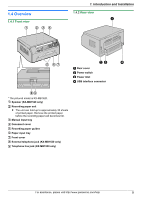
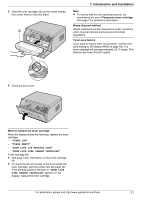
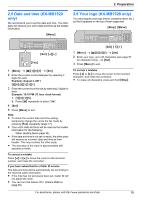
1. Introduction and Installation R The unit is set for printing letter-size plain paper by default. - To use other paper sizes, change the recording paper size setting (feature #380 on page 48). - To use thin paper, change the recording paper type setting (feature #383 on page 49). 1 Lift the paper input tray (A), and pull it completely out. 3 Load the paper, print-side down (A). Important: R Push down to lock the plate (B) in the paper input tray, if necessary. A A 2 Before loading a stack of paper, fan the paper to prevent paper jams. B 4 Adjust the recording paper guides. Pinch the rear guide (A), then slide it to match the paper size mark. Pinch the right guide (B), then slide it to adjust the width to the size of the recording paper. R Make sure that the recording paper is under the paper limit mark (C), and the paper should not be loaded over the snubbers (D). D A C B 14 For assistance, please visit http://www.panasonic.com/help
-
 1
1 -
2
-
3
-
4
-
5
-
6
-
7
-
8
-
 9
9 -
 10
10 -
 11
11 -
 12
12 -
 13
13 -
 14
14 -
 15
15 -
 16
16 -
 17
17 -
 18
18 -
 19
19 -
20
-
21
-
22
-
23
-
24
-
25
-
26
-
27
-
28
-
29
-
30
-
31
-
32
-
33
-
34
-
35
-
36
-
37
-
38
-
39
-
40
-
41
-
42
-
43
-
44
-
45
-
46
-
47
-
48
-
49
-
50
-
51
-
52
-
53
-
54
-
55
-
56
-
57
-
58
-
59
-
60
-
61
-
62
-
63
-
64
-
65
-
66
-
67
-
68
-
69
-
70
-
71
-
72
-
73
-
74
-
75
-
76
-
77
-
78
-
79
-
80
 |
 |