Panasonic KX-MB1500 Operating Instructions - Page 25
Easy Print Utility - pdf
 |
View all Panasonic KX-MB1500 manuals
Add to My Manuals
Save this manual to your list of manuals |
Page 25 highlights
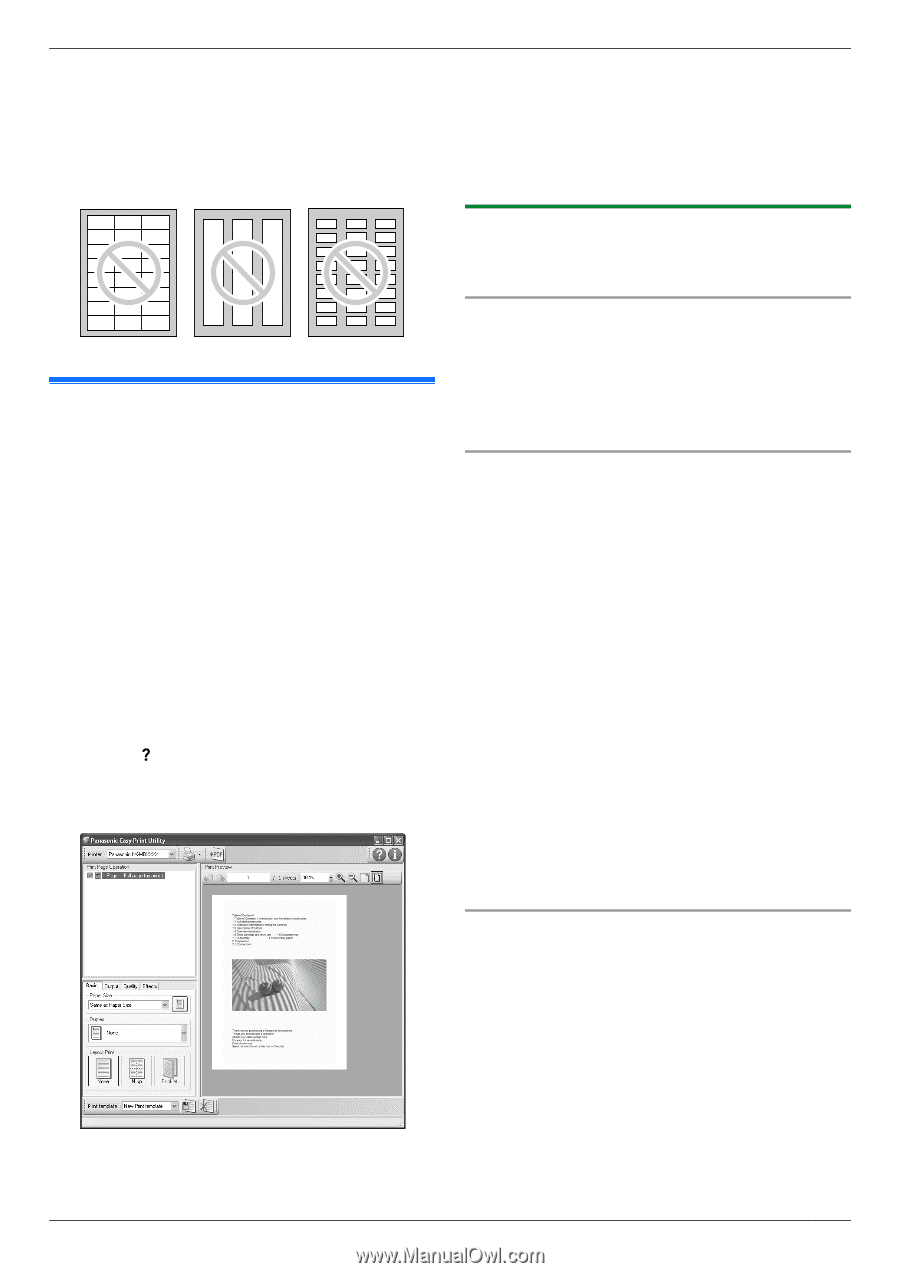
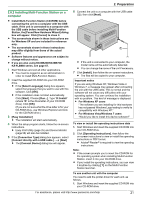
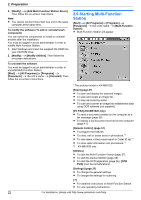
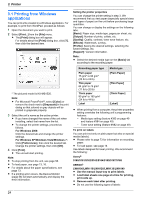
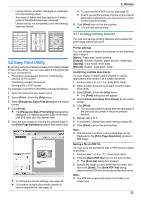
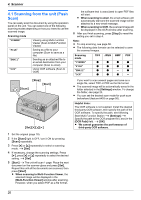
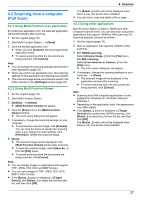
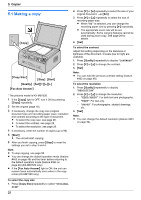
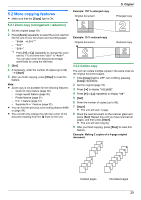
3. Printer - Labels that are wrinkled, damaged or separated from the backing sheet. - Any sheet of labels that has spaces in it where some of the labels have been removed. - Labels that do not completely cover the backing sheet as follows: 3.2 Easy Print Utility By printing using the Panasonic Easy Print Utility instead of the printer driver, you can use useful printing features for your convenience. - Preventing unnecessary prints by checking the preview on PC screen - Combining multiple documents - Saving a file in PDF format For example, to print from WordPad, proceed as follows: 1 Open the document you want to print. 2 Select [Print...] from the [File] menu. 3 Select [Panasonic Easy Print Driver] as the active printer. 4 Click [Print]. R The [Panasonic Easy Print Utility] dialog will be displayed. For details about the Easy Print Utility, click [ ], then click the desired item. 5 View the print image by clicking the desired page in the [Print Page Operation] window (left column list). R To change the printer settings, see page 25. R To combine multiple documents created in various applications, see page 25. R To save the file in PDF format, see page 25. R Even if you set the number of prints on the original application beforehand, you may have to re-set it for the Easy Print Utility. 6 Click [Print] icon on the print toolbar. R The unit will start printing. 3.2.1 Ecology printing features You can use various printing features and preview the print image without test print. Printer settings You can change or display the settings on the following tabs in step 5. [Basic]: Paper size, layout printing [Output]: Number of prints, paper source, media type [Quality]: Color mode, toner save [Effects]: Header, watermark, footer Combining multiple documents You can display multiple pages created in various applications and handle it as a single document. 1. Perform step 1 to 4 on "3.2 Easy Print Utility". 2. Open another document you want to add to Easy Print Utility. 3. Select [Print...] from the [File] menu. R The [Print] dialog box will appear. 4. Select [Panasonic Easy Print Driver] as the active printer. 5. Click [Print]. R The document will be added after the last page of the previous document in the print preview window. 6. Repeat step 2 to 5. 7. If necessary, change the printer settings (page 25). 8. Click [Print] icon on the print toolbar. Note: R The maximum number of documents that can be displayed in the [Print Page Operation] window is 999 pages. Saving a file as PDF file You can save the previewed files in PDF format instead of printing it. 1. Perform step 1 to 4 on "3.2 Easy Print Utility". 2. Click the [Save PDF file] icon on the print toolbar. R The [Save As] dialog box appears. 3. Specify the folder to save, enter the file name, and then click [Save]. The [Save PDF file] dialog appears while PDF files are being created and saved. Note: R The PDF file created with Easy Print Utility is an image type. 25
-
 1
1 -
2
-
3
-
4
-
5
-
6
-
7
-
8
-
9
-
10
-
11
-
12
-
13
-
14
-
15
-
16
-
17
-
18
-
19
-
 20
20 -
 21
21 -
 22
22 -
 23
23 -
 24
24 -
 25
25 -
 26
26 -
 27
27 -
 28
28 -
 29
29 -
 30
30 -
31
-
32
-
33
-
34
-
35
-
36
-
37
-
38
-
39
-
40
-
41
-
42
-
43
-
44
-
45
-
46
-
47
-
48
-
49
-
50
-
51
-
52
-
53
-
54
-
55
-
56
-
57
-
58
-
59
-
60
-
61
-
62
-
63
-
64
-
65
-
66
-
67
-
68
-
69
-
70
-
71
-
72
-
73
-
74
-
75
-
76
-
77
-
78
-
79
-
80
 |
 |