Panasonic KX-MB1500 Operating Instructions - Page 24
Printing from Windows, applications
 |
View all Panasonic KX-MB1500 manuals
Add to My Manuals
Save this manual to your list of manuals |
Page 24 highlights
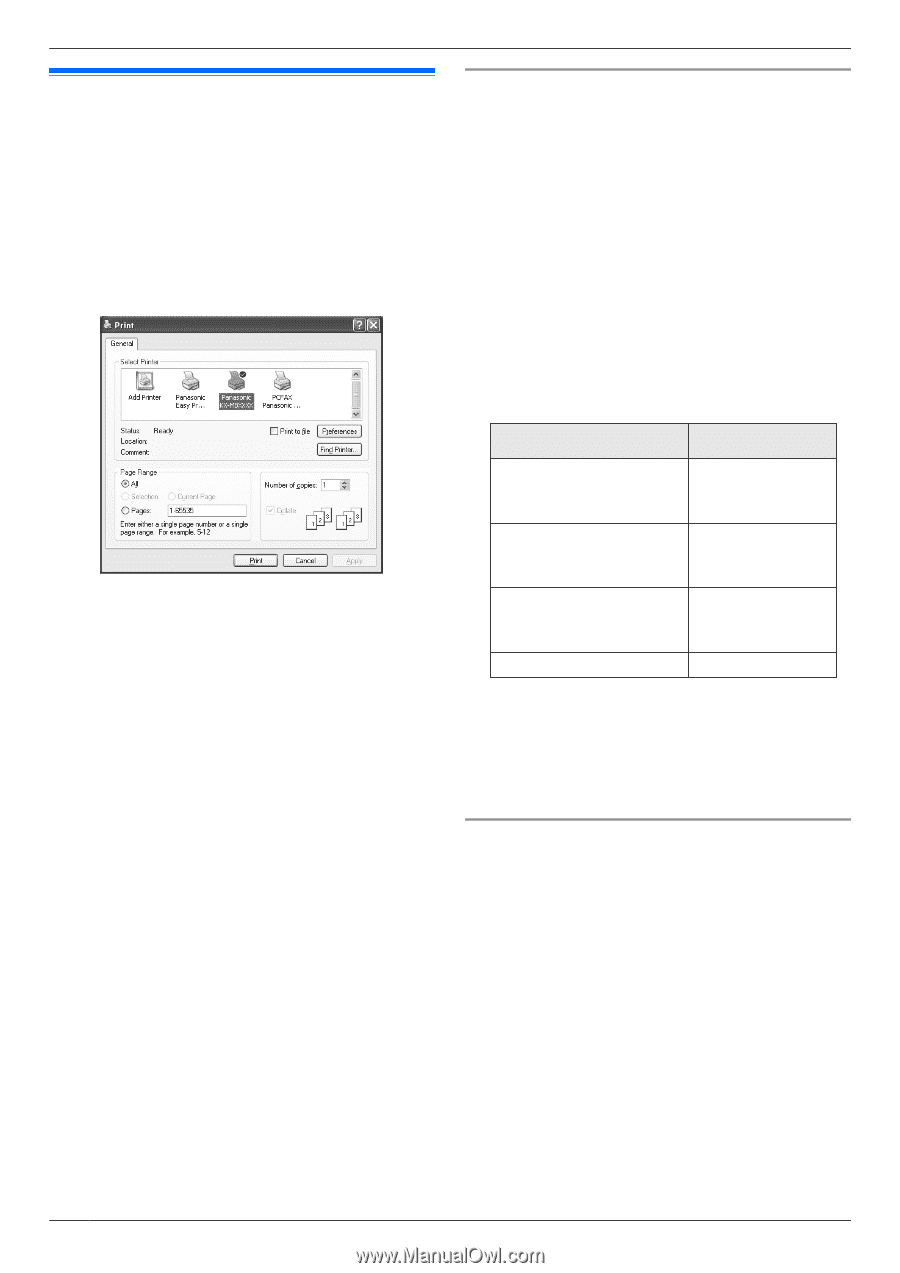
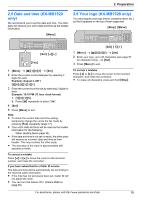
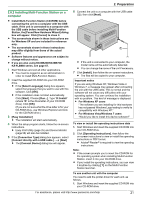
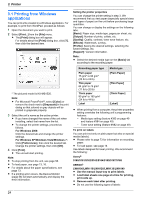
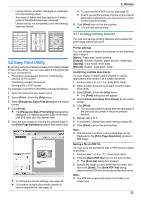
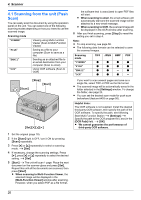
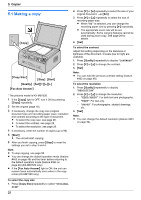
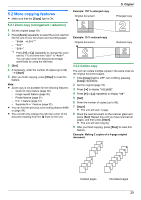
3. Printer 3.1 Printing from Windows applications Setting the printer properties You can change the printer setting in step 3. We recommend that you test paper (especially special sizes 3. . Printer You can print a file created in a Windows application. For example, to print from WordPad, proceed as follows: and types of paper) on the unit before purchasing large quantities. You can change or display the settings on the following 1 Open the document you want to print. tabs. 2 Select [Print...] from the [File] menu. R The [Print] dialog box will appear. For details about the [Print] dialog box, click [?], then click the desired item. [Basic]: Paper size, media type, pages per sheet, etc. [Output]: Number of prints, collate, etc. [Quality]: Quality, contrast, toner save feature, etc. [Effects]: Watermark, overlay. [Profile]: Saving the desired settings, selecting the saved settings, etc. [Support]: Version information. Note: R Select the desired media type on the [Basic] tab according to the recording paper. * The pictured model is KX-MB1520. Note: R For Microsoft PowerPoint®, select [Color] or remove the check next to [Grayscale] in the print dialog so that colored or gray objects will be printed in grayscale properly. 3 Select the unit's name as the active printer. R If you have changed the name of the unit when installing, select that name from the list. R To change the printer settings, proceed as follows. For Windows 2000: Click the desired tab and change the printer settings. For Windows XP/Windows Vista/Windows 7: Click [Preferences], then click the desired tab. Change the printer settings, then click [OK]. 4 Click [Print]. R The unit will start printing. Note: R To stop printing from the unit, see page 58. R To load paper, see page 13, 16. R For details about the paper specifications, see page 73. R If a printing error occurs, the Device Monitor (page 58) will start automatically and display the error information. Recording paper type Plain paper 75 g/m² to 90 g/m² (20 lb to 24 lb) Thin paper 64 g/m² to 75 g/m² (17 lb to 20 lb) Thick paper 90 g/m² to 165 g/m² (24 lb to 44 lb) Label Media type [Plain Paper] [Thin Paper] [Thick Paper] [Label] R When printing from a computer, the printer properties setting overrides the following unit's programming features: - Media type setting (feature #383 on page 49 and feature #384 on page 49) - Toner save setting (feature #482 on page 49) To print on labels You can print not only on plain paper but also on special media (labels). R Please refer to page 73 for information on recording paper. R To load paper, see page 16. Use labels designed for laser printing. We recommend the following: Avery® 5160/5161/5162/5163/5164/5165/5167/5168 XEROX® LWH100/LWH110/LWH120/LWH130/LWH140 R Use the manual input tray to print labels. R Load label sheets one page at a time for printing, print-side up. R Remove each label after printing. R Do not use the following types of labels: 24
-
 1
1 -
2
-
3
-
4
-
5
-
6
-
7
-
8
-
9
-
10
-
11
-
12
-
13
-
14
-
15
-
16
-
17
-
18
-
 19
19 -
 20
20 -
 21
21 -
 22
22 -
 23
23 -
 24
24 -
 25
25 -
 26
26 -
 27
27 -
 28
28 -
 29
29 -
30
-
31
-
32
-
33
-
34
-
35
-
36
-
37
-
38
-
39
-
40
-
41
-
42
-
43
-
44
-
45
-
46
-
47
-
48
-
49
-
50
-
51
-
52
-
53
-
54
-
55
-
56
-
57
-
58
-
59
-
60
-
61
-
62
-
63
-
64
-
65
-
66
-
67
-
68
-
69
-
70
-
71
-
72
-
73
-
74
-
75
-
76
-
77
-
78
-
79
-
80
 |
 |