Panasonic NV-GS400 Operating Instructions
Panasonic NV-GS400 Manual
 |
View all Panasonic NV-GS400 manuals
Add to My Manuals
Save this manual to your list of manuals |
Panasonic NV-GS400 manual content summary:
- Panasonic NV-GS400 | Operating Instructions - Page 1
Panasonic® Operating Instructions Digital Video Camera Model No. NV-GS40OGN PAL LEICA DICOMAP Si! MultlMedlaCardTM Before use, please read these instructions completely. t1' Pingddge VQT0J84 - Panasonic NV-GS400 | Operating Instructions - Page 2
Camera AG. • Ail other company and product names in the operating Instructions are trademarks or registered trademarks of their respective corporations. Files recorded on a MultiMediaCard or SD Memory Card there are no user serviceable parts inside. Refer servicing to qualified service personnel. IF - Panasonic NV-GS400 | Operating Instructions - Page 3
46 Using the DV Cable for Recording 47 19 Printing pictures with directly connecting 19 to the printer (PictBridge) 47 21 With a PC 22 Copying Still Pictures to a PC 49 22 Using as a Web Camera 49 23 Using MotionDV STUDIO 49 24 Using SD Viewer 50 24 Using a Card in a Personal - Panasonic NV-GS400 | Operating Instructions - Page 4
"SD-Jukebox" software for recording music are included. (However, this Movie Camera ti cannot play back music.) 20) SD Memory Card (RP-SD032.1 RP-SD064/RP-SD128/RP-SDH256/ RP-SDH512/RP-SDH01O) 21) PC Card Adaptor for SD Memory Card (BN-SDABPE) 22) USB Reader Writer for SD Memory Card (BN - Panasonic NV-GS400 | Operating Instructions - Page 5
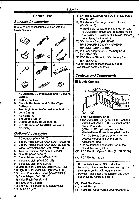
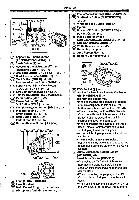
[BACK LIGHT] -25-, -47- C) Card Access Lamp [ACCESS] -u- C) Multi Button /Review Button [ill] -36-, -39- 0000000 item ) L' '35 32 (22 ) Lens (LEICA DICOMAR) (23) Lens Hood -64(n Multi Manual 40 41 42 43 (-1 37 USB Socket is ] 44(38) Socket the battery for the Movie Camera. (a) Audio-Video Input - Panasonic NV-GS400 | Operating Instructions - Page 6
Camera on an 0. optional tripod. CD DV Terminal [DV] -46, -47*Connect this to the digital video equipment. () S-Video Input/Output Socket [S-VIDEO malfunction and does not affect the recorded picture. (-) Battery Elect Button [PUSH BATT] -9C) Battery Holder (57) Shoulder Strap Holders ./o- 6 O ZSIF - Panasonic NV-GS400 | Operating Instructions - Page 7
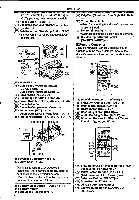
Picture/Picture-In-Picture Button [MULTI/P-IN-P] -34-, -40C) Rewind/Review Button [li] -36-, -39C) Pause Button [II] -37-, convenience. This controller allows the Movie Camera to be for left-handed users. (AID CI 89 0-r illilIW--s- used batteries according to manufacturer's instructions. WARNING - Panasonic NV-GS400 | Operating Instructions - Page 8
do not match, [REMOTE] Indication is displayed. III Using the Battery Before use, fully charge the Battery. *We recommend using Panasonic's Battery. *We cannot guarantee the quality of this Movie Setup on the Movie Camera: Camera when batteries of other companies are Set [REMOTE] on the [INITIAL - Panasonic NV-GS400 | Operating Instructions - Page 9
time becomes longer than usual. • 2 Attach the charged Battery to the Movie Camera. • In the following cases, the available recording time you use accessories applicable to the Smart Accessory Shoe (Stereo Zoom Microphone, Video DC Light, etc.). Disconnecting the Power Source Set the [OFF/ON - Panasonic NV-GS400 | Operating Instructions - Page 10
a hand strap.) •When you are not recording, be sure to cover the Lens with the Lens Cap for protection. 2 Detach the end of the Grip Belt. @r 3 Slide avoid dropping the Movie Camera. 1 Pull the end of the Shoulder Strap through the Shoulder Strap Holder ( 7) on the Movie Camera. i • Reattach the - Panasonic NV-GS400 | Operating Instructions - Page 11
on, never attempt to open the Card Slot Cover, to pull out the Card, to turn off the Movie Camera. Such actions will damage the Card, and recorded data, and cause the Movie Camera to malfunction. Turning on the Movie Camera When the Movie Camera is turned on with the Lens Cap on, the Automatic White - Panasonic NV-GS400 | Operating Instructions - Page 12
. : Picture Playback Mode Use this mode when playing back the recorded still picture on a card. : PC Mode Use this mode when you want to connect the Movie Camera to your Personal Computer. Using the Viewfinder/LCD Monitor • Using the Viewfinder Before using the Viewfinder, adjust the field of view - Panasonic NV-GS400 | Operating Instructions - Page 13
images. • For other notes concerning this Item, see -64.. Using the Menu Screen To facilitate the selection of a desired function or setup, this Movie Camera displays various function setups on Menus. • When operating the menu with the Viewfinder, set [LCD/EVF] » [EVF ON/AUTO] » [ON] or rotate the - Panasonic NV-GS400 | Operating Instructions - Page 14
(The above procedure will not be repeated in the following Instructions.) List of Menus The figures of the Menus are for CAMERA] Camera Setup Sub-Menu [PROG.AE] Auto Exposure Mode -27- [CMS] Image Stabilizer -24[D.ZOOM] Digital Zoom -24- [SELF TIMER] Self-timer Recording -22[USB FUNCTION] USB - Panasonic NV-GS400 | Operating Instructions - Page 15
-Video Input/Output Setup Sub-Menu [AV JACK] AV Socket -45[A.DUB INPUT] Audio Dubbing Input -45[DV OUT] Analog-Digital Conversion Output -613) [DIGITAL] Playback Digital Setup Sub-Menu [EFFECT ON] Digital Effect On/Off -39[EFFECT SEL] Digital Effect Selection -39[TITLE IN] Adding a Title -414) [CARD - Panasonic NV-GS400 | Operating Instructions - Page 16
input Adding a Title -41- signals supplied. 4) [CARD] •When recording involves the use of the Card Setup Sub-Menu S-Video or AV Input Socket. [PICTURE SIZE] •When pictures with no camera data are Picture Size -21- recorded using the DV Terminal. [PICT QUALITY] •When displaying a list of - Panasonic NV-GS400 | Operating Instructions - Page 17
Controller Mode -8- Setting Date and Time Since the internal clock of the Movie Camera has a slight imprecision, make sure to check the time before recording. 1 Set [TAPE RECORDING MENU] or [CARD RECORDING MENU] » [INITIAL] » [CLOCK SET] » [YES]. ..0 ,..2tECT UrNu.fxlf 1) [DELETE] Deleting a File - Panasonic NV-GS400 | Operating Instructions - Page 18
power the clock for approximately 3 months. WARNING THE LITHIUM BATTERY IN THIS UNIT MUST ONLY BE REPLACED BY QUALIFIED PERSONNEL. IF THIS IS NECESSARY, CONTACT THE PANASONIC CUSTOMER CARE CENTRE ON 132600 FOR YOUR NEAREST AUTHORIZED SERVICE CENTRE. LP Mode A desired recording speed can be selected - Panasonic NV-GS400 | Operating Instructions - Page 19
set the Mode Dial to Card Recording Mode [0]. When recording with the [AUTO/MANUAUAE LOCK] Switch (31) set to [AUTO], the Movie Camera automatically adjusts the focus and white balance. In some cases, they cannot be adjusted automatically and need to be adjusted manually. (-28-, -3,9-) Recording on - Panasonic NV-GS400 | Operating Instructions - Page 20
operate. II Digital Still Picture You can record Images stilled by Digital Still Picture card simultaneously, the progressive function is not activated. IN Recording Yourself By opening the LCD Monitor and rotating it frontward (to the lens side), you can let the subject In front of the Movie Camera - Panasonic NV-GS400 | Operating Instructions - Page 21
Card (Photoshot) Still pictures can be recorded on the Memory Card from the Movie Camera. The size of images that are recorded using this Movie Camera does not appear in Manual Focus Mode. Selecting the Size of Photoshot Images 1 Tape Recording Mode: Set [TAPE RECORDING MENU] » [CARD] » [PICTURE - Panasonic NV-GS400 | Operating Instructions - Page 22
-timer Recording When you set the sell-timer, the recording starts automatically after 10 seconds on the Card. 1 Set [TAPE RECORDING MENU] or [CARD RECORDING MENU] » [CAMERA] 5> [SELF TIMER] » [ON]. •You can also activate Continuous Photoshot Function after pressing the [PHOTO SHOT] Button halfway - Panasonic NV-GS400 | Operating Instructions - Page 23
Is lx, the Movie Camera can focus on a subject that is as close as approximately 4 cm from the Lens. Small subjects like insects can Pis MZ] (Manual Zoom Mode) Indication appear. (When [10.MZ] Indication appears, the Movie Camera Is set to Auto Focus Mode.) 2 Turn the Multi Manual Ring ( 24 - Panasonic NV-GS400 | Operating Instructions - Page 24
• (16) FADE •24x: Digital zooming to 24x • 600x: Digital zooming to 600x 24xvd• =1 bra I• 2 Push the [WIT] Lever ap towards [W] or towards [T] to zoom in or out. -vol./JOG+ To CancelImage Stabilizer Function Set [TAPE RECORDING MENU] or [CARD RECORDING MENU] » [CAMERA] » [OIS] » [OFF]. • For - Panasonic NV-GS400 | Operating Instructions - Page 25
from behind the subject being recorded.) 1 Press the [BACK LIGHT] Button *The [REVERSE THE LCD MONITOR] Indication appears. 2 Rotate the LCD Monitor frontward (to the lens side). 0 Pt 0 ni LIGHT •The screen becomes white and the Viewfinder turns on. 25 - Panasonic NV-GS400 | Operating Instructions - Page 26
. To Cancel the Wind Noise Reduction Function Set [TAPE RECORDING MENU] or [CARD RECORDING MENU] » [RECORDING] » [WIND CUT] » [OFF]. •For format TV. (The image looks vertically Stretched on the screen of the Movie Camera.) Wide Function The Image is recorded with an aspect ratio of 16:9. 1 Press - Panasonic NV-GS400 | Operating Instructions - Page 27
/MANUAL/AE LOCK] Switch (31) to [MANUAL]. AJfO .144/4LIAL (31) AE LOP! •The [MNL] Indication appears. 2 Set [TAPE RECORDING MENU] or [CARD RECORDING MENU] » [CAMERA] , the White Balance can be adjusted manually. When the Movie Camera is turned on with the Lens Cap on, the Automatic White Balance - Panasonic NV-GS400 | Operating Instructions - Page 28
Adjustment is one of the functions of the 3CCD system. It automatically adjusts the hue of black Manually White Balance Adjustment recognizes the colour of light and adjust so that the white colour will become pure white. The Movie Camera determines the hue of light that comes through the Lens - Panasonic NV-GS400 | Operating Instructions - Page 29
Mode, the Card Slow Shutter Mode is activated. 'The Slow Shutter Mode is cancelled and the shutter speed is set to 1/25 when the [OFF/ON] Switch or the Mode Dial is operated. • In the Slow Shutter Mode: •the White Balance cannot be changed. •the Movie Camera focuses on the subject manually. •When - Panasonic NV-GS400 | Operating Instructions - Page 30
prevents the person's face from becoming brighter or darker. 1 Push the [W/T] Lever 3D toward [T] to zoom in on the subject. 2 Set the [AUTO/MANUAL/AE LOCK] Switch (-1--) to [AE LOCK]. 0 0 Ago, .4uAL (_!)) 31 AE Loa •The [ [mock]] Indication flashes and then lights. The brightness of the picture - Panasonic NV-GS400 | Operating Instructions - Page 31
see -58-. Advanced Functions T▪his Movie Camera comes with 5 professional functions (Advanced Functions you start recording. 1 Set [TAPE RECORDING MENU] or [CARD RECORDING MENU] » [ADVANCED] » [ZEBRA] » [ during recording. 1 Set the [AUTO/MANUAL/AE LOCK] Switch (Ai) to [MANUAL]. 0 (J..) O 'AE LOCK 2 - Panasonic NV-GS400 | Operating Instructions - Page 32
» [COLOUR BAR] » [ON]. a 16 •The colour bars are not recorded onto the card. • For other notes concerning this item, see -58- Using the Auto Pop-up Flash your favourite scene. Adjusting Brightness of the Video Flash Set [TAPE RECORDING MENU] or [CARD RECORDING MENU] » [CAMERA] » _ [FLASH LEVEL] » a - Panasonic NV-GS400 | Operating Instructions - Page 33
Pop-up Flash or Video Flash VW-FLH3E (optional). 1 Set [TAPE RECORDING MENU] or [CARD RECORDING MENU] » [CAMERA] » [RED EYE] CARD RECORDING MENU) » [CAMERA] » [RED EYE] » [OFF]. • For other notes concerning this item, see -59•. Digital Effect Functions This Movie Camera is equipped with Digital - Panasonic NV-GS400 | Operating Instructions - Page 34
-Picture Mode: Recording Mode 1 Set [TAPE RECORDING MENU] » [DIGITAL] » [EFFECT1] » [P-IN-P]. fnt You can manually capture and record 9 small still pictures. 1 Set [TAPE RECORDING MENU] » [DIGITAL] » [EFFECT1] » [MULTI]. 1L a (16) ll 2 Aim the Movie Camera at the scene you want to capture and - Panasonic NV-GS400 | Operating Instructions - Page 35
Recording Mode 2 Press the Recording Start/Stop Button ( ) to start recording. 3 Press the Recording Start/Stop Button (47) to pause the recording. • The last scene is stored in memory. The [WIPE] or [MIX] Indication changes to [ WIPE ] or [Mr 4 Press the Recording Start/Stop Button (47) to restart - Panasonic NV-GS400 | Operating Instructions - Page 36
to start playback. •The [IS).] Indication appears. •For other notes concerning this item, see -59-. Finding a Scene You Want to Play Back Cue/Review Playback 19 5T J • If a cassette recorded with a copyright protection signal is played back, the picture is distorted by mosaic-like patterns. To - Panasonic NV-GS400 | Operating Instructions - Page 37
. (-7-) To Resume NormalPlayback Press the [P.] Button • During Cue or Review Playback, fast-moving images may show a noise like a mosaic. • the Movie Camera is left in the Slow Playback Mode for more than 12 minutes, the Movie Camera switches to the Stop Mode to protect the video heads from - Panasonic NV-GS400 | Operating Instructions - Page 38
Still Playback Mode for more than 6 minutes, the Movie Camera switches to the Stop Mode to protect the video heads from excessive wear and tear. Index Search Function To facilitate searching for desired scenes, this Movie Camera automatically records index signals during recording, as explained in - Panasonic NV-GS400 | Operating Instructions - Page 39
the [SELECT] Button on the Remote Controller and clear the digital effect indication. Wipe Mode and Mix Mode 1 Press the [II-] Button (WI). PLAY f£ , 84 ) TT a. (...) LI PYLE IM L 11 Playing Back a Card It plays back files recorded on a Card. 1 Set the Mode Dial (.D4 to Picture Playback Mode - Panasonic NV-GS400 | Operating Instructions - Page 40
the Mode Dial () to Tape Recording Mode or Card Recording Mode. Set the Lens to the image you want to use for creating a title. (44). or O 1 Tape Playback Mode: Search for the image you want to use for creating a title and set the Movie Camera to the Still Playback Mode. @ILI) e 2 Press the - Panasonic NV-GS400 | Operating Instructions - Page 41
this item, see -60-. Adding a Title A title can be added to the picture. It is displayed in Tape/Card Recording Mode and Tape/Picture Playback Mode. 4 1 Set [DIGITAL] » [TITLE IN] » [ON]. 2 Press the [MENU] Button (L). 0 •A list of titles is displayed. 131IE • File Name 0 4 Press the [11 - Panasonic NV-GS400 | Operating Instructions - Page 42
• Press the [ENTER] Button again to cancel. •The SD Memory Card has a write protection switch. (-so-) • For other notes concerning this item, see -6o-. Deleting the Files Recorded on a Card Using the Movie Camera, you can delete the files recorded on a Card. After the file Is deleted, it cannot be - Panasonic NV-GS400 | Operating Instructions - Page 43
» [YES]. Card. Make sure that valuable pictures are stored on PC before proceeding. •A Card formatted an other equipment (e.g. PC) might be Card formatted by this Movie Camera on other unit. In this case, format the Card on the unit which will use the [S-VIDEO fNf 0 [VIDEO IN) [AUDIO IN] 0 or DV - Panasonic NV-GS400 | Operating Instructions - Page 44
Playback Mode To Make the Indications Appear on the TV Screen Press the [OSD] Button (I) on the Remote Controller. (§1 ) [l or °METH= 1Val a l 0 • For other notes concerning this I em, see -60-. 44 - Panasonic NV-GS400 | Operating Instructions - Page 45
Recording from a Tape onto a Card Still pictures can be recorded on the Memory Card from scenes that have already been recorded I") PAUSE INDESXTOPDJDEZ Zaill (ITO 0440 O0® s 2 Start playback and set the Movie Camera to Still Playback Mode at the scene you wish to record, and press the [PHOTO - Panasonic NV-GS400 | Operating Instructions - Page 46
DV Cable, the Indications may not appear.) •Also read the operating Instructions of the DVD Recorder or the VCR carefully. Movie Camera please refer to the 46 [S-VIDEO OUT] [VIDEO OUT] [AUDIO OUT] IQ AV MAUI AIMS py SAPJECI I WOUT EMJ AV Cable S-Video Cable Movie Camera: 1 Set [TAPE PLAYBACK MENU - Panasonic NV-GS400 | Operating Instructions - Page 47
Using the DV Cable for Recording (Digital Dubbing) By connecting this Movie Camera to other digital video equipment that has a DV Input/Output Terminal with a DV Cable VW the Movie Camera to the printer, prepare the printer compatible with PictBridge. (Also read the operating instructions of the - Panasonic NV-GS400 | Operating Instructions - Page 48
Multi-Picture Mode. slit 16 al) •You cannot set the paper size which Is not supported on the printer. 6 Press the ]►►] Button (T3) or [Ail] Button (21) to printed properly. • Disconnecting the USB cable • Removing the Card •Switching the operation mode •If the Movie Camera is disabled while it is - Panasonic NV-GS400 | Operating Instructions - Page 49
procedures, please refer to USB Connection Kit's operating instructions. Using MotionDV STUDIO Using the MotionDV STUDIO software allows you to capture video recorded on a tape or Images viewed through the lens of a Movie Camera. Il With USB Cable (Windows XP SP1 or later/Windows 2000 SP4 or later - Panasonic NV-GS400 | Operating Instructions - Page 50
[PLAYBACK] » [USB FUNCTION] » [MOTION DV]. • It enters MotionDV STUDIO Mode. 4 Connect the DV Cable to DV Terminal ( ),. 5 Start the MotlonDV STUDIO. •You cannot output the video input from the DV terminal to the display of the PC. Using SD Viewer The SD Viewer software allows images on a Card to be - Panasonic NV-GS400 | Operating Instructions - Page 51
Others Others Indications • Various functions and the Movie Camera status are shown on the screen. Remaining Battery Power •When the battery power becomes low, the Indication changes. When the battery is discharged completely, the ( Indication flashes. R0:45: Remaining Tape Time • - Panasonic NV-GS400 | Operating Instructions - Page 52
with this Movie Camera, the size display card is being read (Red): An unauthorized card is inserted. Video Flash turned on -32- +: Video Flash (setting to [+]) - Video Flash (setting to [-]) -32- Video Flash (setting to [AUTO]) -32- Video Tape Recording Mode • Digital Effect Modes in [ - Panasonic NV-GS400 | Operating Instructions - Page 53
This may CARD LOCKED: solve the problem. The write protection switch on the SD CARD FULL: Memory Card is set to [LOCK]. Card does not have sufficient memory DISCONNECT USB CABLE: remaining. You are attempting to turn the Mode Dial in Select Picture Playback Mode and delete PC Mode with - Panasonic NV-GS400 | Operating Instructions - Page 54
possible to use the Digital Effect Modes of [ Battery and reattach it. •When you record pictures in the Tape Recording Mode, the brightness of the picture may differ from the one recorded in the Card Recording Mode. •The sound cannot be recorded. • The file format supported by this Movie Camera - Panasonic NV-GS400 | Operating Instructions - Page 55
large. In this case, back up your important data on PC, and format your card by this Movie Camera. \X.404,4 2.4. 44. 44011. 4 • Intervals of recording pictures may become large depending on the card. We recommend using Panasonic SD Memory Card. • When the [PICTURE SIZE] is set to the size - Panasonic NV-GS400 | Operating Instructions - Page 56
or further from the Movie Camera. •When the Night View Functions are digital zoom range, or when recording with a conversion lens attached, the Image Stabilizer Function may not work effectively. ▪ Backlight Compensation Function •When setting the Iris manually when recording on the card. •The Wide/Pro- - Panasonic NV-GS400 | Operating Instructions - Page 57
instructions . • During Digital Still Picture Mode software Camera is focusing on the subject. •When you take picture of people with night views, you can achieve adequate brightness for both people and the background in the picture by using the flash In the Card Slow Shutter Mode. is Manual - Panasonic NV-GS400 | Operating Instructions - Page 58
cannot use the Picture Adjustment when setting the Digital Effect 2. •You cannot use the Picture manually. •Tele Conversion Lens (VW-LT4314NE; optional) or Wide Conversion Lens (VW-LW4307ME; optional) can block flash light and may cause vignetting effect. •The Movie Camera, even when its Video - Panasonic NV-GS400 | Operating Instructions - Page 59
the screen of the Movie Camera. •The brightness of the Vide Flash cannot be adjusted. •Also refer to the operating instructions of the Video Flash carefully. Red Eye Reduction Digital Effect Functions •Signals of images to which digital effects are added during playback cannot be output from the DV - Panasonic NV-GS400 | Operating Instructions - Page 60
carried out by this Movie Camera is only effective for this Movie Camera. •The SD Memory Card has a write protection switch Digital Effect. Audio Dubbing • The blank section of a tape cannot be dubbed. •Sounds sent through the DV PC using the PC's software, only the original sound (ST1) may be - Panasonic NV-GS400 | Operating Instructions - Page 61
Black streaks may appear at the 4 edges of the 5 To protect the Lens, attach the supplied Image. Lens Cap. Analog-Digital Conversion •When the Movie Camera is connected with other digital video equipment through its DV Terminal, images recorded in analog form from other external equipment can be - Panasonic NV-GS400 | Operating Instructions - Page 62
the AC Adaptor and Battery always clean. • Condensation If you turn the Movie Camera on when condensation occurs on . Leave the Movie Camera for about 30 minutes. •However, you can use the Card Recording Mode or Picture • condensation occurs on the lens or the Movie Camera, it also may occur - Panasonic NV-GS400 | Operating Instructions - Page 63
hours Using Mini-DV Format Digital Video Head Cleaner 1 Insert the Head Cleaner into the Movie Camera in the same manner as a Video Cassette. 2 on operating I Optimal Use of the Battery Battery Characteristics This Battery is a rechargeable lithium Ion battery. Its ability to generate power is - Panasonic NV-GS400 | Operating Instructions - Page 64
content may be damaged. • After use, be sure to remove the Card from the Movie Camera. • Do not touch the terminals on the back of the Card with your fingers. Do not allow dirt, dust or water to enter It. 0 LCD MonitorNiewfinder/Lens Hood LCD Monitor • In a place with drastic temperature changes - Panasonic NV-GS400 | Operating Instructions - Page 65
Instructions of your accessories. • Be sure to keep the Lens Hood attached to the Movie Camera so as to shut out unnecessary light. Before Requesting Repair (Problems and Solutions) Power 1: The Movie Camera not operate correctly. In this case, use the Manual Focus Mode to adjust the focus. (-67-) - Panasonic NV-GS400 | Operating Instructions - Page 66
, Review or Slow Motion Playback. • This phenomenon is characteristic of digital video systems. It is not a malfunction. 3: Although the Movie Camera is correctly connected to a TV, playback Images cannot be seen. • Have you selected "Video Input" on the TV? Please read the operating instructions of - Panasonic NV-GS400 | Operating Instructions - Page 67
with S-VHS or VHS video or a lo TV for playback. the last scene was recorded. (In this case, when the Cassette is inserted, the zero display ▪ Focus Auto Focus Adjustment The Auto Focus System automatically moves forward and backward the focusing lens inside the Movie Camera to bring the subject - Panasonic NV-GS400 | Operating Instructions - Page 68
Specifications Specifications Digital Video Camera Information for your safety Power Source: DC 7.9/7.2 V Power Consumption: Recording 4.8 W (When using Viewfinder) 6.0 W (When using LCD Monitor) Recording Format: Mini DV (Consumer-use Digital Video SD Format) Tape Used: 6.35 mm digital video tape - Panasonic NV-GS400 | Operating Instructions - Page 69
Specifications Maximum number of still pictures recordable on an SD Memory Card (optional) 4 PICTURE SIZE 640X480 1280x960 1600x1200 2288x1728 PICTURE QUALITY FINE NORMAL ECONOMY FINE NORMAL ECONOMY FINE NORMAL ECONOMY FINE NORMAL ECONOMY 8 MB 45 95 190 9 - Panasonic NV-GS400 | Operating Instructions - Page 70
a 70
-
 1
1 -
 2
2 -
 3
3 -
 4
4 -
 5
5 -
 6
6 -
 7
7 -
8
-
9
-
10
-
11
-
12
-
13
-
14
-
15
-
16
-
17
-
18
-
19
-
20
-
21
-
22
-
23
-
24
-
25
-
26
-
27
-
28
-
29
-
30
-
31
-
32
-
33
-
34
-
35
-
36
-
37
-
38
-
39
-
40
-
41
-
42
-
43
-
44
-
45
-
46
-
47
-
48
-
49
-
50
-
51
-
52
-
53
-
54
-
55
-
56
-
57
-
58
-
59
-
60
-
61
-
62
-
63
-
64
-
65
-
66
-
67
-
68
-
69
-
70
 |
 |

Panasonic®
Operating
Instructions
Digital
Video
Camera
Model
No.
NV-GS40OGN
PAL
LEICA
DICOMAP
Si!
MultlMedlaCardTM
Before
use,
please
read
these
instructions
completely.
t'
1
Pingddge
VQT0J84