Panasonic NV-GS400 Operating Instructions - Page 13
Iihip
 |
View all Panasonic NV-GS400 manuals
Add to My Manuals
Save this manual to your list of manuals |
Page 13 highlights
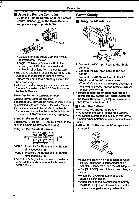
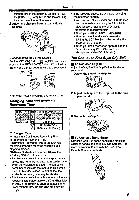
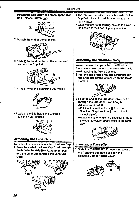
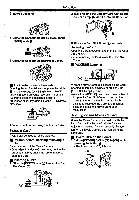
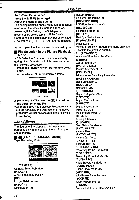
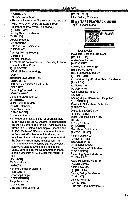
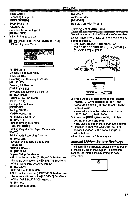
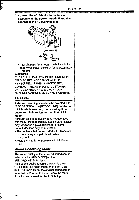
Before Use Adjusting Brightness and Colour Level When [LCD/EVF SET] on the [LCD/EVF] Sub-Menu is set to [YES], the following items are displayed. EVF BRIGHTNESS lia:SELE •ZIO/SC,SPTVP SZI/ENU:EX IT LCD Brigh ness [LCD BRIGHTNESS] Adjusts the brightness of the image on the LCD screen. LCD Colour Level [LCD COLOUR LEVEL] Adjusts the colour saturation of the image on the LCD screen. Brightness of the Viewfinder [EVF BRIGHTNESS] Adjusts the brightness of the image in the Viewfinder. To Adjust Press the [II/II] Button and select the item to be adjusted, and then press the [41/1,110] Button to raise or lower the number of vertical bars in the Bar Indication. •A larger number of vertical bars indicates stronger brightness or colour saturation. To Increase the Brightness of the Entire LCD Monitor Press the [POWER LCD] Button. When you press the [POWER LCD] Button, the LCD monitor becomes bright about twice as much as usual. ED LCD (30) The Power LCD Lamp (k) lights up. •When turning the power on with using AC Adaptor, [POWER LCD] function is automatically effective. 'When you rotate the LCD Monitor 180° and then close it, it resumes normal brightness. To Resume Normal Brightness Press the [POWER LCD] Button again. To Change the Picture Quality of the LCD Monitor Set the [LCD Al] on the [LCD/EVF] Sub-Menu to [ON] or [OFF]. [ON]: The screen image becomes clear and vivid. (The effect varies according to the recording scene.) •When Power LCD Lamp lights up, [LCD Al] is automatically set to [ON]. You cannot change this setting. •These adjustments do not affect the recorded images. • For other notes concerning this Item, see -64.. Using the Menu Screen To facilitate the selection of a desired function or setup, this Movie Camera displays various function setups on Menus. • When operating the menu with the Viewfinder, set [LCD/EVF] » [EVF ON/AUTO] » [ON] or rotate the LCD monitor by 180°. 1 Press the [MENU] Button C). 0 (16) ii •The Menu corresponding to the Mode selected by using the Mode Dial C) is displayed. (44). B4°14e4 2 Press the [II/M] Button to select a desired Sub-Menu. • Press the [II/M] Button to display the highlighted item. 3 Press the [0+] Button to display the selected Sub-Menu. [IIHIP]- 4 Press the [II/M] Button to select the item. 5 Press the Button to display the selected item. 6 Press the [IUM] Button to select the desired mode and press [ENTER] Button to determine the setting. • While a Menu is displayed, you cannot record or play back. Menus can be displayed during playback but not during recording. The above operations can be done using the [MENU] V] Button, [A, -4, >, Buttons and [ENTER] Button on the Remote Controller. (-6-) To Return the Previous Screen Press the NM] Button. 13
-
 1
1 -
2
-
3
-
4
-
5
-
6
-
7
-
 8
8 -
 9
9 -
 10
10 -
 11
11 -
 12
12 -
 13
13 -
 14
14 -
 15
15 -
 16
16 -
 17
17 -
 18
18 -
19
-
20
-
21
-
22
-
23
-
24
-
25
-
26
-
27
-
28
-
29
-
30
-
31
-
32
-
33
-
34
-
35
-
36
-
37
-
38
-
39
-
40
-
41
-
42
-
43
-
44
-
45
-
46
-
47
-
48
-
49
-
50
-
51
-
52
-
53
-
54
-
55
-
56
-
57
-
58
-
59
-
60
-
61
-
62
-
63
-
64
-
65
-
66
-
67
-
68
-
69
-
70
 |
 |
