Panasonic NV-GS400 Operating Instructions - Page 52
ZEBRA, 1P.AD.11, ITW,CRI7, 1UXGA, 1OXGA, Initializing, Modes
 |
View all Panasonic NV-GS400 manuals
Add to My Manuals
Save this manual to your list of manuals |
Page 52 highlights
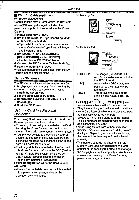
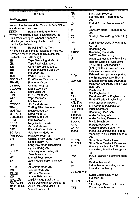
Others WIND CUT: (ZEBRA 1P.AD.11 ITW,CRI7 : IsoFr sati PICTURE: TITLE: WEB a Wind Noise Reduction -26- Zebra Pattern -31- Picture Adjustment -31- Progressive Photoshot Mode -20Tele Macro -23Soft Skin Mode -26Picture -39Title picture -41- WEB CAMERA Mode (recording) WEBEI: WEB CAMERA Mode (playback) -49- PRINT (Highlighted): PictBridge Mode -47- VOLUME: Volume adjustment -36- 15:30:45: Date/Time Indication N (F, E): Photoshot Picture Quality (during Photoshot recording) (F] means Fine, [N] means Normal and [E] means Economy. -22- 0: Remaining Number of Photoshot pictures C2m: Continuous Photoshot Recording -22- cb-w: Lock Setting -42- • (White): DPOF Setting completed (set to 1 or more picture) -42- 2288 [2288x 1728] Image size I16001 [1600x 1200] Image size j1280 [1280x960] Image size [640X480] Image size • For Images not recorded with this Movie Camera, the size display is determined as follows according to the number of horizontal pixels. [=: 640 or more, less than 800 (The size is not displayed at under 640 pixels.) 800 or more, less than 1024 SXGA 1UXGA 1OXGA 1024 or more, less than 1280 1280 or more, less than 1600 1600 or more, less than 2048 2048 or more (Cyan): Photoshot Mode 71 (Red): While Photoshot recording is activated [Kral (Green): While the card is being read (Red): An unauthorized card is inserted. Video Flash turned on -32- +: Video Flash (setting to [+]) - Video Flash (setting to [-]) -32- Video Flash (setting to [AUTO]) -32- Video Flash (setting to [+] and [AUTO]) -32- 52 Video Flash (setting to [-] and [AUTO]) -32- Video Flash turned off (when lighted yellow, the Flash Sensor determined that the light is needed) -32-, -58Red Eye Reduction -33- To Change the Counter Display Mode By changing [C.DISPLAY] on the [DISPLAY] Sub-Menu, you can change the Counter Display Mode to Tape Counter Indication [COUNTER] (0:00.00), Memory Counter Indication [MEMORY] (M0:00.00), and Time Code Indication [TIMECODE] (0h00m00s00f). (-1.5-) By repeatedly pressing the [DISPLAY] Button on the Remote Controller, you can change the Counter Display Mode. •You cannot reset the counter when the [C.DISPLAY] is set to [TIME CODE]. IN To Display Date/Time Indication To display Date/Time Indication, set the appropriate Date/Time in [DATE/TIME] on the [DISPLAY] Sub-Menu. (-is-) You can also press the [DATE/TIME] Button of the Remote Controller repeatedly to display or change the Date/Time Indication. MT° Change the Display Mode By changing [DISPLAY] on the [DISPLAY] Sub-Menu, you can change the Display Mode to All Function Display [ALL] and Minimum Display [OFF]. (-Is-) Progressive Photoshot You cannot use the Progressive Photoshot Function in the following cases. When using Tape Recording Mode • Digital Effect Modes in [EFFECT1] • Difital Zoom range • 1/750 s or faster shutter speed *When the Iris is [6dE3] or more •Frame Mode • Wide/Pro-Cinema Mode •When the [(ti)] Indication is displayed and the brightness of the subject is insufficient •When the Night View Functions is ON *When the Portrait Mode is used Initializing the Modes You can change the Menu settings back to the shipping condition. 1 Set [TAPE RECORDING MENU] or [CARD RECORDING MENU)» [INITIAL] » [INITIAL SET] » [YES]. •The initializing takes a little while. •After the initializing Is completed, the [COMPLETED] Indication appears.
-
 1
1 -
2
-
3
-
4
-
5
-
6
-
7
-
8
-
9
-
10
-
11
-
12
-
13
-
14
-
15
-
16
-
17
-
18
-
19
-
20
-
21
-
22
-
23
-
24
-
25
-
26
-
27
-
28
-
29
-
30
-
31
-
32
-
33
-
34
-
35
-
36
-
37
-
38
-
39
-
40
-
41
-
42
-
43
-
44
-
45
-
46
-
 47
47 -
 48
48 -
 49
49 -
 50
50 -
 51
51 -
 52
52 -
 53
53 -
 54
54 -
 55
55 -
 56
56 -
 57
57 -
58
-
59
-
60
-
61
-
62
-
63
-
64
-
65
-
66
-
67
-
68
-
69
-
70
 |
 |
