Panasonic NV-GS400 Operating Instructions - Page 17

PICTURE, PLAYBACK, MENU], Setting, internal, Lithium, Battery, Recharge

Page 17 highlights

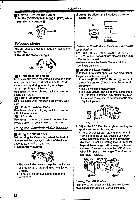
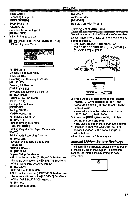
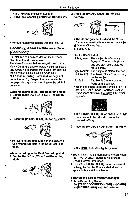
Before Use [REC LAMP] Recording Lamp -19[BEEP SOUND] Beep Sound -54[CLOCK SET] Date and Time Setting -17[INITIAL SET] Initial Setting Mode -52- O [PICTURE PLAYBACK MENU] Picture Playback Mode fALEA3Y,;5EL4 4,5,1,P,4VRE*4P.t4. - AALJIJ4L. E1O1EV,AeN7 WSRVAY ,1101)"!Clf [AV JACK] AV Socket -66[REMOTE] Remote Controller Mode -8- Setting Date and Time Since the internal clock of the Movie Camera has a slight imprecision, make sure to check the time before recording. 1 Set [TAPE RECORDING MENU] or [CARD RECORDING MENU] » [INITIAL] » [CLOCK SET] » [YES]. ..0 ,..2tECT UrNu.fxlf 1) [DELETE] Deleting a File Sub-Menu [FILE BY SEL] Selecting and Deleting a File -42[ALL FILES] Deleting All Files -43[TITLE BY SEL] Selecting and Deleting a Title -422) [EDITING] Editing a File Sub-Menu [FILE LOCK] Setting the Lock-42[DPOF SET] Setting DPOF -42[CARD FORMAT] Formatting a Card -433) [PRINT] Printing Setting Sub-Menu [THIS PICTURE] Printing Only the Displayed Picture -48[DATE] Printing with Recording Date -484) [DIGITAL] Playback Digital Setup Sub-Menu [TITLE IN] Adding a Title -415) [DISPLAY] Display Setup Sub-Menu •AII of the Items on the [DISPLAY] Sub-Menu are the same as those on the [DISPLAY] Sub-Menu of the [TAPE RECORDING MENU]. 6) [LCD/EVF] LCD/EVF Setup Sub-Menu •All of the Items on the [LCD/EVF] Sub-Menu are the same as those on the [LCD/EVF] Sub-Menu of the [TAPE PLAYBACK MENU]. 7) [INITIAL] Initial Setup Sub-Menu .0hTH 10 DAV .0VB MIN. 30 M/s:SELECT

  • 1
  • 2
  • 3
  • 4
  • 5
  • 6
  • 7
  • 8
  • 9
  • 10
  • 11
  • 12
  • 13
  • 14
  • 15
  • 16
  • 17
  • 18
  • 19
  • 20
  • 21
  • 22
  • 23
  • 24
  • 25
  • 26
  • 27
  • 28
  • 29
  • 30
  • 31
  • 32
  • 33
  • 34
  • 35
  • 36
  • 37
  • 38
  • 39
  • 40
  • 41
  • 42
  • 43
  • 44
  • 45
  • 46
  • 47
  • 48
  • 49
  • 50
  • 51
  • 52
  • 53
  • 54
  • 55
  • 56
  • 57
  • 58
  • 59
  • 60
  • 61
  • 62
  • 63
  • 64
  • 65
  • 66
  • 67
  • 68
  • 69
  • 70

Before
Use
[REC
LAMP]
Recording
Lamp
-19-
[BEEP
SOUND]
Beep
Sound
-54-
[CLOCK
SET]
Date
and
Time
Setting
-17-
[INITIAL
SET]
Initial
Setting
Mode
-52-
O
[PICTURE
PLAYBACK
MENU]
Picture
Playback
Mode
fALEA3Y,;5EL
4
,
51
,
,VE4.4
-
ALI4.
11E
,
7
4,P4R*Pt.
AJJLEOVAeN
WSRVAY
,1101)"!Clf
..0
,..2tECT
UrNu.fxlf
1)
[DELETE]
Deleting
a
File
Sub
-Menu
[FILE
BY
SEL]
Selecting
and
Deleting
a
File
-42-
[ALL
FILES]
Deleting
All
Files
-43-
[TITLE
BY
SEL]
Selecting
and
Deleting
a
Title
-42-
2)
[EDITING]
Editing
a
File
Sub
-Menu
[FILE
LOCK]
Setting
the
Lock-42-
[DPOF
SET]
Setting
DPOF
-42-
[CARD
FORMAT]
Formatting
a
Card
-43-
3)
[PRINT]
Printing
Setting
Sub
-Menu
[THIS
PICTURE]
Printing
Only
the
Displayed
Picture
-48-
[DATE]
Printing
with
Recording
Date
-48-
4)
[DIGITAL]
Playback
Digital
Setup
Sub
-Menu
[TITLE
IN]
Adding
a
Title
-41-
5)
[DISPLAY]
Display
Setup
Sub
-Menu
•AII
of
the
Items
on
the
[DISPLAY]
Sub
-Menu
are
the
same
as
those
on
the
[DISPLAY]
Sub
-Menu
of
the
[TAPE
RECORDING
MENU].
6)
[LCD/EVF]
LCD/EVF
Setup
Sub
-Menu
•All
of
the
Items
on
the
[LCD/EVF]
Sub
-Menu
are
the
same
as
those
on
the
[LCD/EVF]
Sub
-Menu
of
the
[TAPE
PLAYBACK
MENU].
7)
[INITIAL]
Initial
Setup
Sub
-Menu
[AV
JACK]
AV
Socket
-66-
[REMOTE]
Remote
Controller
Mode
-8-
Setting
Date
and
Time
Since
the
internal
clock
of
the
Movie
Camera
has
a
slight
imprecision,
make
sure
to
check
the
time
before
recording.
1
Set
[TAPE
RECORDING
MENU]
or
[CARD
RECORDING
MENU]
»
[INITIAL]
»
[CLOCK
SET]
»
[YES].
.0hTH
10
DAV
.0VB
MIN.
30
M/s:SELECT
<C/Pb:ECTIll
D/YEMU,EYITJ
2
Press
the
[II/IIII]
Button
to
select
[YEAR],
[MONTH],
[DAY],
[HOUR]
or
[MIN.]
and
press
the
[•04/1•10-]
Button
to
set
it
to
the
desired
value.
•Year
will
cycle
in
the
order
shown
below.
2000, 2001,
...,
2089,
2000„..
3
Press
the
[MENU]
Button
(AC
to
finish
setting
the
date
and
time.
*The
clock
operation
starts
from
[00]
second.
•lf
the
built-in
battery
is
weak,
the
[ice]
or
[--]
indication
flashes.
In
this
case,
charge
the
built-in
battery.
•The
clock
uses
the
24
-hour
system.
internal
Lithium
Battery
Recharge
The
internal
lithium
battery
sustains
the
operation
of
the
clock.
When
the
[(&)
or
[--]
Indication
flashes,
the
internal
lithium
battery
Is
near
exhaustion.
17