Panasonic NV-GS400 Operating Instructions - Page 43
Button, Playing, Formatting
 |
View all Panasonic NV-GS400 manuals
Add to My Manuals
Save this manual to your list of manuals |
Page 43 highlights
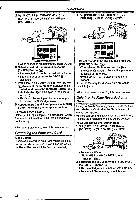
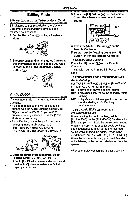
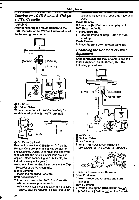
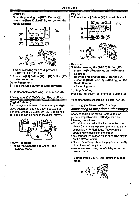
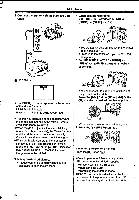
Playback Mode 3 Press the [PHOTO SHOT] Button (D. 4 • A verification message appears. 4 Select [YES] and press the [ENTER] Button (J1). *The selected file Is deleted from the Card. • If [NO] is selected, the file selection is cancelled. To Select and Delete All Files 1 Set [PICTURE PLAYBACK MENU] » [DELETE] » [ALL FILES] » [YES]. Card. Make sure that valuable pictures are stored on PC before proceeding. •A Card formatted an other equipment (e.g. PC) might be unusable or It might take more time for recording. We recommend that you use this equipment to format the Card. Playing Back on Your TV By connecting your Movie Camera with your TV, the recorded scenes can be viewed on your TV screen. • Before connecting them, turn off the power of both the Movie Camera and TV. 1 Connect the [AV IN/OUT] Socket of the Movie Camera and the Video and Audio Input Sockets of the TV. S L 8.1 0 Cm-) •A verification message appears. 2 Select [YES] and press the [ENTER] Button (19). •All tiles of Picture Playback Mode are erased. •A locked file cannot be erased. • If there are many files in a Card, it takes several minutes for deleting. Formatting a Card If a Card becomes unreadable by the Movie Camera, format it for reuse. Formatting erases all the data recorded on a Card. 1 Set [PICTURE PLAYBACK MENU] » [EDITING] » [CARD FORMAT] » [YES]. S Ci' t) •A confirmation message appears, select [YES] and formatting will be carried out. V5C AMP OP WA, rW- ElFrrig--- Errigr- rrff 1 •When the formatting is completed, the screen becomes white. • It may not be able to use the Card formatted by this Movie Camera on other unit. In this case, format the Card on the unit which will use the [S-VIDEO fNf 0 [VIDEO IN) [AUDIO IN] 0 or DV IS OUT KO..7 PHONES 0 •. •Connect to the TV with the AV Cable 0. make a connection with the TV. If the TV has an S-Video Socket, connect the S-Video Cable e, too. • Plug the AV Cable as shown Q so that the cord hangs down. 'H •When plugging the pin plug of the AV Cable into the [AV IN/OUT] Socket, plug it in as far as it goes. 43
-
 1
1 -
2
-
3
-
4
-
5
-
6
-
7
-
8
-
9
-
10
-
11
-
12
-
13
-
14
-
15
-
16
-
17
-
18
-
19
-
20
-
21
-
22
-
23
-
24
-
25
-
26
-
27
-
28
-
29
-
30
-
31
-
32
-
33
-
34
-
35
-
36
-
37
-
 38
38 -
 39
39 -
 40
40 -
 41
41 -
 42
42 -
 43
43 -
 44
44 -
 45
45 -
 46
46 -
 47
47 -
 48
48 -
49
-
50
-
51
-
52
-
53
-
54
-
55
-
56
-
57
-
58
-
59
-
60
-
61
-
62
-
63
-
64
-
65
-
66
-
67
-
68
-
69
-
70
 |
 |
