Panasonic NV-GS400 Operating Instructions - Page 22
Quick, Start, timer, Recording
 |
View all Panasonic NV-GS400 manuals
Add to My Manuals
Save this manual to your list of manuals |
Page 22 highlights
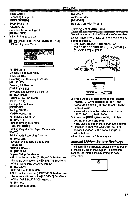
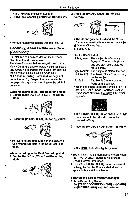
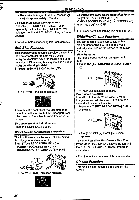
Recording Mode .1 [640X480]. *When [ON] Is selected, the still pictures can be Card Recording Mode: recorded In approximately 0.7 second intervals Set [CARD RECORDING MENU] » [CARD] until the [PHOTO SHOT] Button is released or » [PICTURE SIZE] » [2288x 1728], 10 pictures are recorded. (You cannot use the - [1600x1200), [1280x960] or [640x 480]. Continuous Photoshot function if the shutter speed is set to 1/2, 1/3, 1/6 or 1/12.) sil o Selecting the Quality of Photoshot Images 1 Set [TAPE RECORDING MENU], [TAPE PLAYBACK MENU] or [CARD RECORDING MENU] » [CARD] » [PICT QUALITY] » a desired Image quality. •For other notes concerning this item, see -54-. Quick Start By pressing the [QUICK START] Button (45), and the Movie Camera will be ready for recording in approximately 1.7 seconds after the Movie Camera is turned on. 1 Press the [QUICK START] Button •The Quick Start Recording Lamp lights up. 0 0 a El Continuous Photoshot The still pictures can be recorded on a Card at a regular Intervals. •Available only with [640x480) picture size. 1 Set [CARD RECORDING MENU] » [CARD] » [BURST MODE] » [ON]. CIO lit •The [1.2A] Indication appears. 2 Keep pressing the [PHOTO SHOT] Button (a). O() C:)(733STORT 0 2 Set the [OFF/ON] Switch (LC to [OFF]. •The Quick Start Recording Lamp remains lit. *59 C41) 3 Set the [OFF/ON] Switch (48) to [ON]. •The Movie Camera will be ready for recording in approximately 1.7 seconds. To Cancel the Quick Start Keep the [QUICK START] Button pressed for approximately 2 seconds and make sure the Quick Start Recording Lamp is not lit. •For other notes concerning this item, see -55, Self-timer Recording When you set the sell-timer, the recording starts automatically after 10 seconds on the Card. 1 Set [TAPE RECORDING MENU] or [CARD RECORDING MENU] » [CAMERA] 5> [SELF TIMER] » [ON]. •You can also activate Continuous Photoshot Function after pressing the [PHOTO SHOT] Button halfway. In this case, if the Image Stabilizer Function (-24-) is set to [ON], the Image Stabilizer Function works more effective. 22 srl 16 FADE •The [ .:)] indication appears.
-
 1
1 -
2
-
3
-
4
-
5
-
6
-
7
-
8
-
9
-
10
-
11
-
12
-
13
-
14
-
15
-
16
-
 17
17 -
 18
18 -
 19
19 -
 20
20 -
 21
21 -
 22
22 -
 23
23 -
 24
24 -
 25
25 -
 26
26 -
 27
27 -
28
-
29
-
30
-
31
-
32
-
33
-
34
-
35
-
36
-
37
-
38
-
39
-
40
-
41
-
42
-
43
-
44
-
45
-
46
-
47
-
48
-
49
-
50
-
51
-
52
-
53
-
54
-
55
-
56
-
57
-
58
-
59
-
60
-
61
-
62
-
63
-
64
-
65
-
66
-
67
-
68
-
69
-
70
 |
 |
