Panasonic NV-GS400 Operating Instructions - Page 5
Panasonic NV-GS400 Manual
 |
View all Panasonic NV-GS400 manuals
Add to My Manuals
Save this manual to your list of manuals |
Page 5 highlights
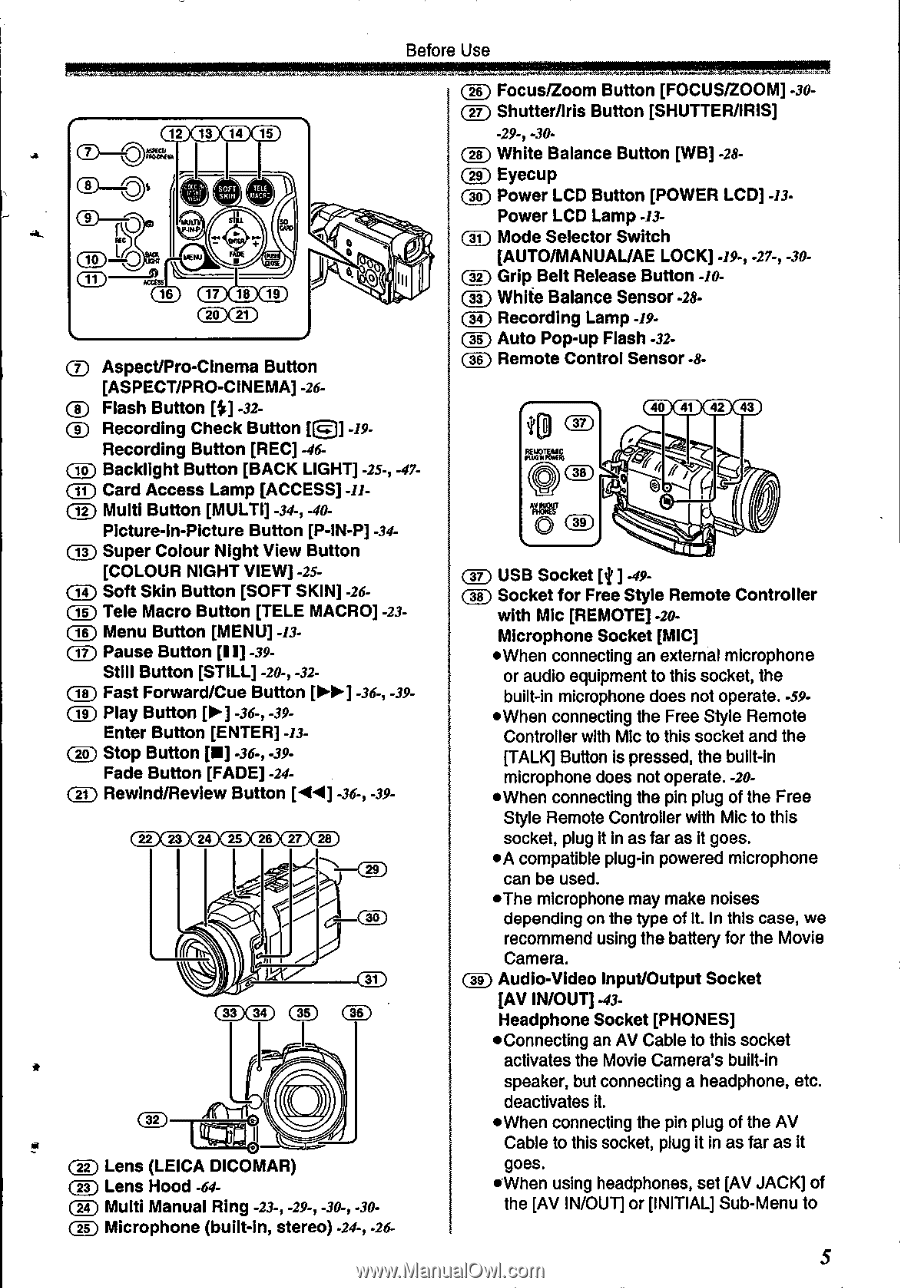
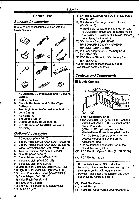
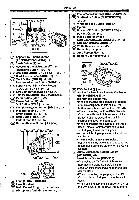
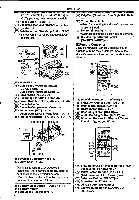
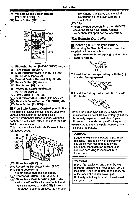
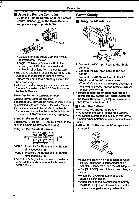
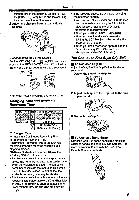
Before Use 12 19 14 0 - 0810 I 0-©' O 16 CP 0 C3 C) Aspect/Pro-Cinema Button [ASPECT/PRO-CINEMA] -26- CI Flash Button []C] -32® Recording Check Button cu -19- Recording Button [REC] -46(1o) Backlight Button [BACK LIGHT] -25-, -47- C) Card Access Lamp [ACCESS] -u- C) Multi Button [MULTI] -34-, -4oPicture-In-Picture Button [P-IN-P] -34- (13) Super Colour Night View Button [COLOUR NIGHT VIEW] -25- 1a Soft Skin Button [SOFT SKIN] -26(15) Tele Macro Button [TELE MACRO] -23- C) Menu Button [MENU] -13- (17 ) Pause Button [II] -39Still Button [STILL] -20-, -32- (n Fast Forward/Cue Button [1•10.] -36-, -39(n Play Button [Ill -36-, -39- Enter Button [ENTER] -13(20) Stop Button [M] -36-, -34- Fade Button [FADE] -24(21) Rewind/Review Button [ill] -36-, -39- 0000000 item ) L' '35 32 (22 ) Lens (LEICA DICOMAR) (23) Lens Hood -64(n Multi Manual Ring -23-, -29-, -30-, -30( ) Microphone (built-In, stereo) -24-, -26. (26) Focus/Zoom Button [FOCUS/ZOOM] -30- C) Shutter/Iris Button [SHUTTER/IRIS] -29-, -30(n) White Balance Button [WB] -28(29) Eyecup (30) Power LCD Button [POWER LCD] -13- Power LCD Lamp -13(a1) Mode Selector Switch [AUTO/MANUAL/AE LOCK] -19-, -27-, -30(32) Grip Belt Release Button -to(33) White Balance Sensor -28(1_4) Recording Lamp -19as) Auto Pop-up Flash -32(as) Remote Control Sensor -8- 40 41 42 43 (-1 37 USB Socket is ] 44(38) Socket for Free Style Remote Controller with Mic [REMOTE] -20Microphone Socket [MIC] •When connecting an external microphone or audio equipment to this socket, the built-in microphone does not operate. -59•When connecting the Free Style Remote Controller with Mic to this socket and the [TALK] Button is pressed, the built-in microphone does not operate. -20//When connecting the pin plug of the Free Style Remote Controller with Mic to this socket, plug it in as far as It goes. f•A compatible plug-in powered microphone can be used. •The microphone may make noises depending on the type of It. In this case, we recommend using the battery for the Movie Camera. (a) Audio-Video Input/Output Socket [AV IN/OUT] -43Headphone Socket [PHONES] *Connecting an AV Cable to this socket activates the Movie Camera's built-in speaker, but connecting a headphone, etc. deactivates it. •When connecting the pin plug of the AV Cable to this socket, plug it in as far as It goes. 'When using headphones, set [AV JACK] of the [AV IN/OUT] or [INITIAL] Sub-Menu to 5
-
 1
1 -
 2
2 -
 3
3 -
 4
4 -
 5
5 -
 6
6 -
 7
7 -
 8
8 -
 9
9 -
 10
10 -
 11
11 -
12
-
13
-
14
-
15
-
16
-
17
-
18
-
19
-
20
-
21
-
22
-
23
-
24
-
25
-
26
-
27
-
28
-
29
-
30
-
31
-
32
-
33
-
34
-
35
-
36
-
37
-
38
-
39
-
40
-
41
-
42
-
43
-
44
-
45
-
46
-
47
-
48
-
49
-
50
-
51
-
52
-
53
-
54
-
55
-
56
-
57
-
58
-
59
-
60
-
61
-
62
-
63
-
64
-
65
-
66
-
67
-
68
-
69
-
70
 |
 |