Panasonic NV-GS400 Operating Instructions - Page 47
Iin Im
 |
View all Panasonic NV-GS400 manuals
Add to My Manuals
Save this manual to your list of manuals |
Page 47 highlights
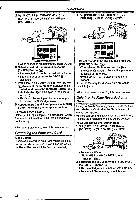
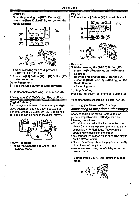
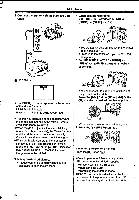
Editing Mode Controller. Or while pressing the [REC] Button press the [BACK LIGHT] Button is on the Movie Camera. 1TY •AEC isILB W I( -; ; I I 04.) na. FAME MILIAN CD CD in m Player: (4) 2 Press the [Poi Button to sta t playback. n• • rye (j) ;Pt: SMY (=) III ±5 P INDEX PP. /OM ® f roc 1 ii •When recording on a card, press the [PHOTO SHOT] Button. 5 Press the [II] Button (=) or [M] Button (82) to stop recording. Other Equipment: 6 Press the Stop Button to stop playback. • For other notes concerning this Item, see -61-. Using the DV Cable for Recording (Digital Dubbing) By connecting this Movie Camera to other digital video equipment that has a DV Input/Output Terminal with a DV Cable VW-CD1E (optional) 0, dubbing can be done in the digital format. DV Player/Recorder: 1 Insert the Cassette and set to Tape Playback Mode. r T) 0 ii Recorder: 3 While pressing the [IREC] Button (T), press the [10] Button (ti) on the Remote Controller. Or while pressing the [REC] Button O3, press the [BACK LIGHT] Button cp on the Movie Camera. • Recording starts. To Stop Dubbing Press the [II) Button (a) or the [M] Button Ca2). • For other notes concerning this item, see -61-. Printing pictures with directly connecting to the printer (PictBridge) After connecting the Movie Camera and the printer compatible with PictBridge, start the following procedures. •To print pictures with directly connecting the Movie Camera to the printer, prepare the printer compatible with PictBridge. (Also read the operating instructions of the printer.) •You cannot print images which cannot be played on the Movie Camera. • Check the settings about the paper size, quality of print, etc. on the printer. •We recommend using the AC Adapter as the power source. 1 Set the Mode Dial (4) to Picture Playback Mode. 74) \D, 47
-
 1
1 -
2
-
3
-
4
-
5
-
6
-
7
-
8
-
9
-
10
-
11
-
12
-
13
-
14
-
15
-
16
-
17
-
18
-
19
-
20
-
21
-
22
-
23
-
24
-
25
-
26
-
27
-
28
-
29
-
30
-
31
-
32
-
33
-
34
-
35
-
36
-
37
-
38
-
39
-
40
-
41
-
 42
42 -
 43
43 -
 44
44 -
 45
45 -
 46
46 -
 47
47 -
 48
48 -
 49
49 -
 50
50 -
 51
51 -
 52
52 -
53
-
54
-
55
-
56
-
57
-
58
-
59
-
60
-
61
-
62
-
63
-
64
-
65
-
66
-
67
-
68
-
69
-
70
 |
 |
