Panasonic NV-GS400 Operating Instructions - Page 28
Adjusting, White, Balance, Manually, Cat_i
 |
View all Panasonic NV-GS400 manuals
Add to My Manuals
Save this manual to your list of manuals |
Page 28 highlights
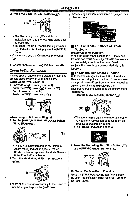
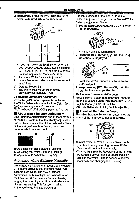
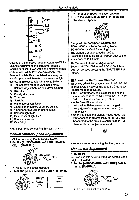
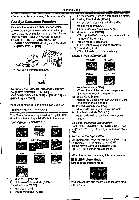
Recording Mode 2 Repeatedly press the [WB] Button (28) to select a desired White Balance Mode. WB For light outside the functional Auto White Balance Adjustment range, use the Manual White Balance Adjustment Mode. 1 Set the [AUTO/MANUAL/AE LOCK] Switch al) to [MANUAL], 1) 2) AUTO @DI AELOCK 3) 4) te„ •The [MNL] Indication appears. 2 Press the [.WB] Button 2a-) until the [ L!BA ] Indication is displayed. • If you hold down the [WB] Button when the [AUTO/MANUAUAE LOCK] Switch is set to [MANUAL] or [AE LOCK], the Manual White Balance Adjustment Mode OA) is set. 1) Automatic White Balance Adjustment 2) Indoor Mode (recording under incandescent lamp) [4:] 3) Outdoor Mode [*] 4) The White Balance setting that was previously set manually [02] To Resume Automatic Adjustment Press the [WB] Button repeatedly until none of the White Balance Mode Indications ([2A), [*], [,,94) appear any more. Or, set the [AUTO/MANUAUAE LOCK] Switch to [AUTO]. IN About Black Balance Adjustment Black Balance Adjustment is one of the functions of the 3CCD system. It automatically adjusts the hue of black colour in the picture. When the Black Balance Adjustment is activated, the screen becomes dark for a moment. ( "73 MNL ll Cat_i) 3 Point the Movie Camera at a full-screen white subject. 4 Keep pressing [WB] Button C?1) until the [ezi) Indication stops flashing. To Resume Automatic Adjustment Press the [W13] Button repeatedly until none of the White Balance Mode Indications ([eA], [A]) appear any more. Or, set the [AUTO/MANUALJAE LOCK] Switch to [AUTO]. About White Balance Sensor The White Balance Sensor Ca) determines the nature of the light source during recording. 33 ... se Adjusting the Black Balance (Blinking) Adjusting the White Balance (Blinking) Q Adjustment is completed. (Lighting) Adjusting White Balance Manually White Balance Adjustment recognizes the colour of light and adjust so that the white colour will become pure white. The Movie Camera determines the hue of light that comes through the Lens and White Balance Sensor, thereby judging the recording condition, and selects the closest hue setting. This function is called Automatic White Balance Adjustment. • Do not cover the White Balance Sensor with your hand during recording because White Balance will not function normally. •The red light from the Recording Lamp (21) will be reflected off your hand or object, possibly causing the White Balance sensor to operate incorrectly and changing the colouring. 28
-
 1
1 -
2
-
3
-
4
-
5
-
6
-
7
-
8
-
9
-
10
-
11
-
12
-
13
-
14
-
15
-
16
-
17
-
18
-
19
-
20
-
21
-
22
-
 23
23 -
 24
24 -
 25
25 -
 26
26 -
 27
27 -
 28
28 -
 29
29 -
 30
30 -
 31
31 -
 32
32 -
 33
33 -
34
-
35
-
36
-
37
-
38
-
39
-
40
-
41
-
42
-
43
-
44
-
45
-
46
-
47
-
48
-
49
-
50
-
51
-
52
-
53
-
54
-
55
-
56
-
57
-
58
-
59
-
60
-
61
-
62
-
63
-
64
-
65
-
66
-
67
-
68
-
69
-
70
 |
 |
