Panasonic NV-GS400 Operating Instructions - Page 31
Advanced, Functions
 |
View all Panasonic NV-GS400 manuals
Add to My Manuals
Save this manual to your list of manuals |
Page 31 highlights
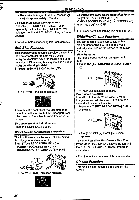
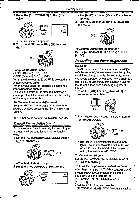
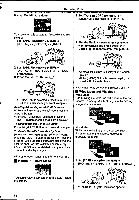
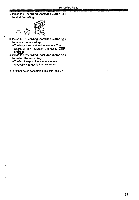
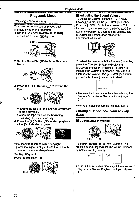
Recording Mode after the AE Lock has been set. (The brightness setting may be changed.) • For other notes concerning this item, see -58-. Advanced Functions T▪his Movie Camera comes with 5 professional functions (Advanced Functions) which come in handy for recording. • Zebra Pattern Using the Zebra Pattern makes it easy to adjust the brightness of the picture to an optimum level, even before you start recording. 1 Set [TAPE RECORDING MENU] or [CARD RECORDING MENU] » [ADVANCED] » [ZEBRA] » [ON]. SILL („Lil) • Diagonal white bands (Zebra Pattern) and [jzEBRA] Indication appear on parts of the picture which are overexposed (extremely brightly lit and shiny subjects). 2 Set [TAPE RECORDING MENU] or [CARD RECORDING MENU] » [ADVANCED] » [PICTURE ADJ.] » [YES]. AA. 16 FADE • o oA ri - PTCTO-51- 115- J- 1 I-I I I I I , COLOUR I.) I I I I •I 1.1 EXPOSURE • (-) I I I I I 1.1 CONTRAST V - I I II I 1.] IWN,SELECT .00/00 , , SETUP • When the level of the Bar Indication Is set to the position other than [7], the [FAIN] indication appears. •The setting procedure is the same as for [LCD/EVF SET] on the ILCD/EVFI Sub-Menu. (-7l.) Microphone Sensitivity Level You can adjust the microphone sensitivity for recording. 1 Set [TAPE RECORDING MENU] » [ADVANCED] » [MIC LEVEL] » [YES]. :01.16 201FE!,F.1 iu •To prevent recording of overexposed, whitish pictures, manually adjust the iris/gain (-29-) so that the Zebra Pattern disappears. The recorded picture may become dark. •The Zebra Pattern is not recorded. Picture Adjustment This enables the sharpness and colour levels of the pictures to be adjusted during recording. 1 Set the [AUTO/MANUAL/AE LOCK] Switch (Ai) to [MANUAL]. 0 (J..) O 'AE LOCK 2 Press the [lUIN] Button to select the [MNL (AGC', NO-AGC)]. • AGC*: Auto Gain Control •When you set [MODE] to any other setting than [AUTO], the Microphone Sensitivity Level appears. MEDI=LESEE=171, MODE AUTO IIMEIMMEENIMI MNL(NO-AGC) (MAIN E I I I I I I I I I I Ii .-- e (MIC) iT2N;SELECT AUTO: AGC is activated, and the recording level is adjusted automatically. MNL (AGC): The desired recording level can be set. AGC will also be activated to reduce the amount of distortion in the audio. MNL (NO-AGC): AGC is not activated and so natural recording can be performed. Adjust in such a way that 31
-
 1
1 -
2
-
3
-
4
-
5
-
6
-
7
-
8
-
9
-
10
-
11
-
12
-
13
-
14
-
15
-
16
-
17
-
18
-
19
-
20
-
21
-
22
-
23
-
24
-
25
-
 26
26 -
 27
27 -
 28
28 -
 29
29 -
 30
30 -
 31
31 -
 32
32 -
 33
33 -
 34
34 -
 35
35 -
 36
36 -
37
-
38
-
39
-
40
-
41
-
42
-
43
-
44
-
45
-
46
-
47
-
48
-
49
-
50
-
51
-
52
-
53
-
54
-
55
-
56
-
57
-
58
-
59
-
60
-
61
-
62
-
63
-
64
-
65
-
66
-
67
-
68
-
69
-
70
 |
 |
