Pioneer VSX-1018AH-K Owner's Manual - Page 41
The System Setup menu, Surround back speaker setting, Manual MCACC setup - 7 1 home theater receiver
 |
View all Pioneer VSX-1018AH-K manuals
Add to My Manuals
Save this manual to your list of manuals |
Page 41 highlights
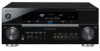
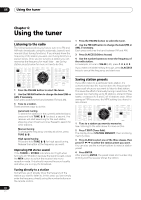
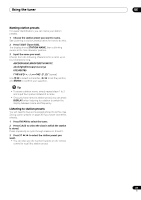
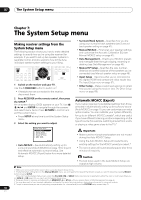
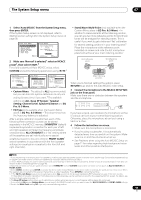
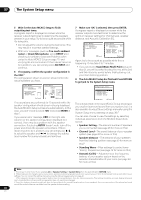
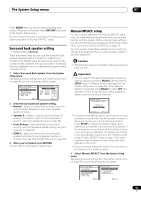
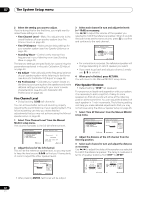
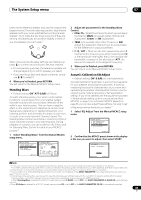
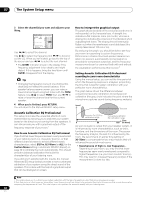
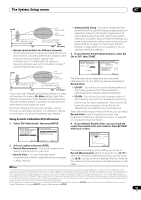
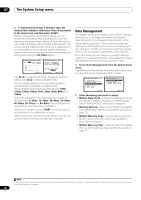
The System Setup menu 07 Press ENTER after you have finished checking each screen. When you're finished, select RETURN to go back to the System Setup menu. Be sure to disconnect the microphone from this receiver upon completion of the Auto MCACC setup. Surround back speaker setting • Default setting: Normal There are several ways you can use the surround back speaker channels with this system. In addition to a normal home theater setup where they are used for the surround back speakers, they can be used for bi-amping the front speakers or as an independent speaker system in another room. 1 Select 'Surround Back System' from the System Setup menu. See Making receiver settings from the System Setup menu on page 38 if you're not already at this screen. System Setup MENU 1 . Auto MCACC 2 . Surround Back System 3 . Manual MCACC 4 . Data Management 5 . Manual SP Setup 6 . Input Setup 7 . Other Setup :Exit 2.Surround Back System Normal Front : Normal Center : Normal Surr : Normal SB : Normal :Finish 2 Select the surround back speaker setting. • Normal - Select for normal home theater use with surround back speakers in your main (speaker system A) setup. • Speaker B - Select to use the (surround back) B speaker terminals to listen to stereo playback in another room (see Speaker B setup on page 58). • Front Bi-Amp - Select this setting if you're biamping your front speakers (see Bi-amping your front speakers on page 59). • ZONE 2 - Select to use the (surround back) B speaker terminals for an independent system in another zone (see MULTI-ZONE listening on page 60). 3 When you're finished, press RETURN. You will return to the System Setup menu. Manual MCACC setup You can use the settings in the Manual MCACC setup menu to make detailed adjustments when you're more familiar with the system. Before making these settings, you should have already completed Automatically setting up for surround sound (Auto MCACC) on page 10. You only need to make these settings once (unless you change the placement of your current speaker system or add new speakers). Caution • The test tones used in the System Setup are output at high volume. Important • You will need to first specify the MCACC preset you want to adjust by pressing MCACC before pressing SETUP (step 2 in Making receiver settings from the System Setup menu on page 38). When Manual MCACC is selected while MCACC is set to OFF, the selection screen for the MCACC memory appears. Select a memory to adjust manually. 3.Manual MCACC Select MCACC memory. MCACC OFF M1.MEMORY 1 ENTER:Next :Cancel • For some of the settings below, you'll have to connect the setup microphone to the front panel and place it about ear level at your normal listening position. Press SETUP to display the System Setup menu before you connect the microphone to this receiver. If the microphone is connected while the System Setup menu is not being displayed, the display will change to the Auto MCACC setup menu. See Problems when using the Auto MCACC Setup on page 11 for notes regarding high background noise levels and other possible interference. • If you're using a subwoofer, switch it on and turn up the volume to the middle position. 1 Select 'Manual MCACC' from the System Setup menu. See Making receiver settings from the System Setup menu on page 38 if you're not already at this screen. System Setup MENU 1 . Auto MCACC 2 . Surround Back System 3 . Manual MCACC 4 . Data Management 5 . Manual SP Setup 6 . Input Setup 7 . Other Setup :Exit 3.Manual MCACC a . Fine Channel Level b . Fine SP Distance c . Standing Wave d . EQ Adjust e . EQ Professional :Return 41 En
-
 1
1 -
2
-
3
-
4
-
5
-
6
-
7
-
8
-
9
-
10
-
11
-
12
-
13
-
14
-
15
-
16
-
17
-
18
-
19
-
20
-
21
-
22
-
23
-
24
-
25
-
26
-
27
-
28
-
29
-
30
-
31
-
32
-
33
-
34
-
35
-
 36
36 -
 37
37 -
 38
38 -
 39
39 -
 40
40 -
 41
41 -
 42
42 -
 43
43 -
 44
44 -
 45
45 -
 46
46 -
47
-
48
-
49
-
50
-
51
-
52
-
53
-
54
-
55
-
56
-
57
-
58
-
59
-
60
-
61
-
62
-
63
-
64
-
65
-
66
-
67
-
68
-
69
-
70
-
71
-
72
-
73
-
74
-
75
-
76
-
77
-
78
-
79
-
80
-
81
-
82
-
83
-
84
-
85
-
86
-
87
-
88
-
89
-
90
-
91
-
92
-
93
-
94
-
95
-
96
-
97
-
98
-
99
-
100
 |
 |