Pioneer VSX-1018AH-K Owner's Manual - Page 55
Listening to XM Radio, Using XM HD Surround, Saving channel presets, Using the XM Menu
 |
View all Pioneer VSX-1018AH-K manuals
Add to My Manuals
Save this manual to your list of manuals |
Page 55 highlights
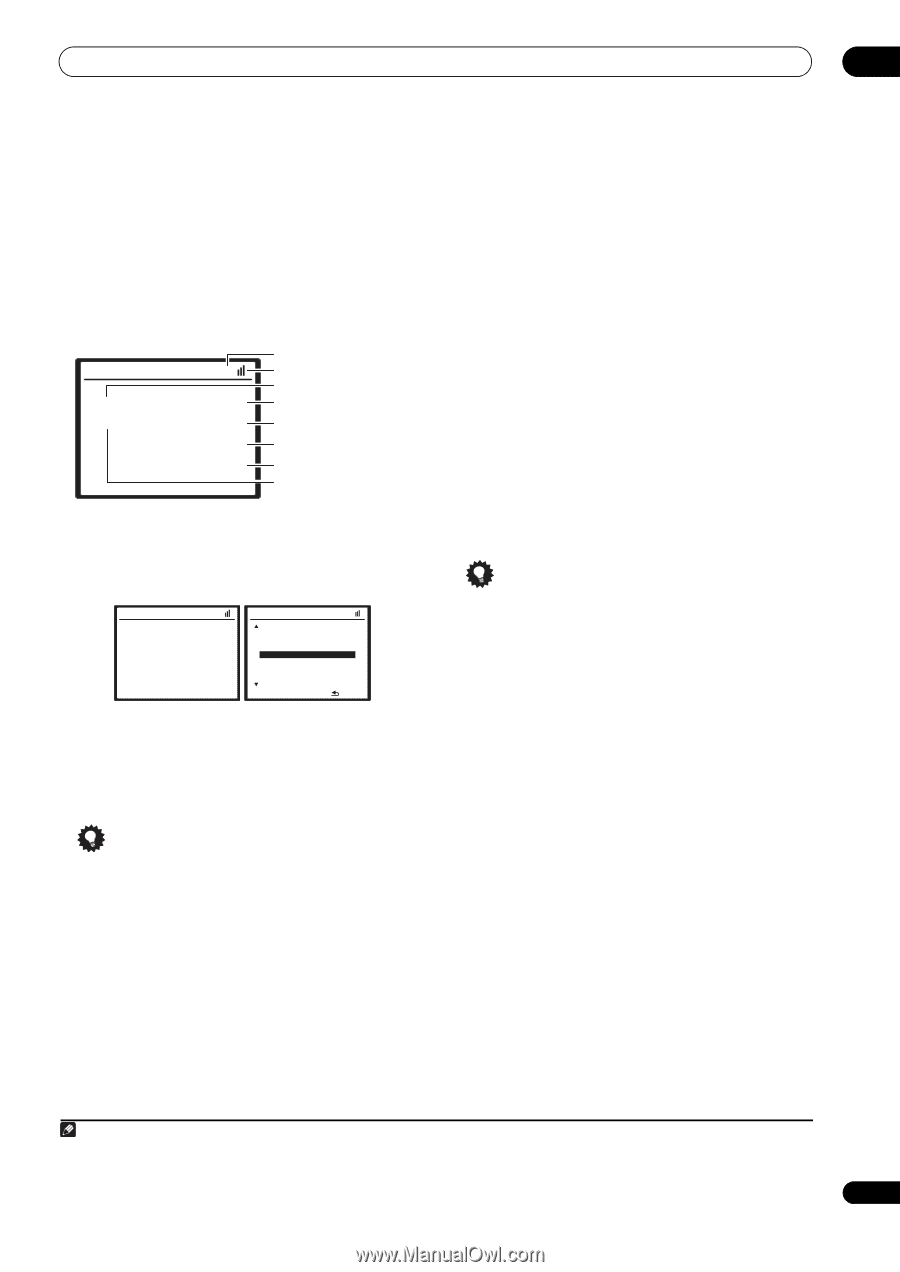
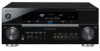
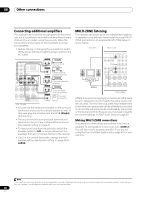
Other connections 08 • If after pressing XM the display shows Check XM Tuner or Check Antenna, try disconnecting the receiver and tuner connections, and then plugging them back in.1 Listening to XM Radio After connecting, you will be able to use this receiver to select channels and navigate categories using the onscreen display.2 The information displayed is as follows: XM Satellite Radio A Hits A1 The Blend XM025 Elton John Candle In the Wind Current preset class Signal strength Category Preset number Channel number Artist name Song name Channel name Selecting channels and browsing by genre From the XM Channel List, you can browse XM Radio channels in the order that they appear, or you can narrow your channel search by genre.3 XM Satellite Radio A Hits A1 The Blend XM025 Elton John Candle In the Wind XM Channel List UP 000 RADIO ID 001 XM Preview 004 The 40s [ 005 The 50s 006 The 60s 007 The 70s 008 The 80s DOWN ENTER ] : Exit • Use / to select a channel, then press ENTER to listen to the XM radio broadcast. • To browse by genre, first press CATEGORY, use / to select a genre, then press ENTER. • To cancel and exit any time, press RETURN. Tip • You can select channels directly by pressing D.ACCESS, then the three-digit channel number. • You can press DISPLAY to change XM Radio information in the front panel display. • The currently selected channel is automatically chosen (without pressing ENTER) after 5 seconds. Using XM HD Surround XM HD Surround uses Neural Surround™, THX® technologies to achieve optimal surround sound from XM radio. XM HD Surround Sound is available on select XM channels only. • While listening to XM Radio, press AUTO/DIRECT for XM HD Surround listening. XM HD Surround can be selected also with the STANDARD button. Saving channel presets This receiver can memorize up to 30 channels, stored in three banks, or classes, (A, B and C) of 10 channels each. 1 Select the channel you want to memorize. See Selecting channels and browsing by genre above. 2 Press T.EDIT. The display shows a blinking memory class. 3 Press CLASS to select one of the three classes, then press / to select the channel preset you want. You can also use the number buttons to select a preset. • The default for all presets is XM001. 4 Press ENTER. After pressing ENTER, the preset class and number stop blinking and the receiver stores the XM channel. Tip • You can also press MEM (Memory) during reception display to save the information of up to five songs. See Using the XM Menu below to recall this information. Listening to channel presets You will need to have some presets stored to do this. 1 Press CLASS to select the class in which the channel is stored. Press repeatedly to cycle through classes A, B and C. 2 Press / to select the channel preset you want. You can also use the number buttons on the remote control to recall the channel preset. Using the XM Menu The XM Menu provides additional XM Radio features. 1 Press TOP MENU. 2 Use / to select a menu item, then press ENTER. Choose between the following menu items: • Channel Skip/Add - Use / and ENTER to select channels you would like to remove/restore from/to the channel list. • Antenna Aiming - Check the strength of satellite and terrestrial reception. Note 1 You can check the strength of reception in Using the XM Menu above. 2 It's easiest if you have your TV switched on to take advantage of the OSDs. You can, however, use just the front panel display to do everything if you prefer. 3 Select XM000 (RADIO ID) from the on-screen display to check the Radio ID of the XM Mini-Tuner. 55 En
-
 1
1 -
2
-
3
-
4
-
5
-
6
-
7
-
8
-
9
-
10
-
11
-
12
-
13
-
14
-
15
-
16
-
17
-
18
-
19
-
20
-
21
-
22
-
23
-
24
-
25
-
26
-
27
-
28
-
29
-
30
-
31
-
32
-
33
-
34
-
35
-
36
-
37
-
38
-
39
-
40
-
41
-
42
-
43
-
44
-
45
-
46
-
47
-
48
-
49
-
 50
50 -
 51
51 -
 52
52 -
 53
53 -
 54
54 -
 55
55 -
 56
56 -
 57
57 -
 58
58 -
 59
59 -
 60
60 -
61
-
62
-
63
-
64
-
65
-
66
-
67
-
68
-
69
-
70
-
71
-
72
-
73
-
74
-
75
-
76
-
77
-
78
-
79
-
80
-
81
-
82
-
83
-
84
-
85
-
86
-
87
-
88
-
89
-
90
-
91
-
92
-
93
-
94
-
95
-
96
-
97
-
98
-
99
-
100
 |
 |