Pioneer VSX-1018AH-K Owner's Manual - Page 70
SR+ Setup for Pioneer flat panel TVs, OSD Adjustment
 |
View all Pioneer VSX-1018AH-K manuals
Add to My Manuals
Save this manual to your list of manuals |
Page 70 highlights
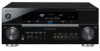
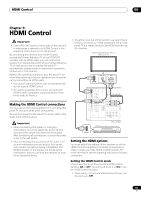
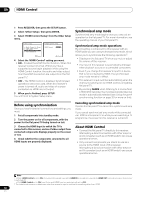
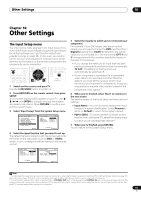
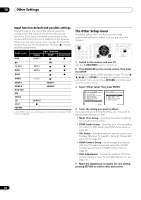
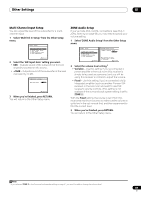
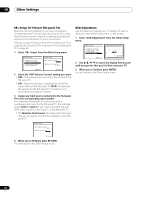
10 Other Settings SR+ Setup for Pioneer flat panel TVs Make the following settings if you have connected a Pioneer flat panel TV to this receiver using an SR+ cable. Note that the number of function settings available will depend on the flat panel TV you've connected. See also Using this receiver with a Pioneer flat panel TV on page 63 and Using the SR+ mode with a Pioneer flat panel TV on page 64. 1 Select 'SR+ Setup' from the Other Setup menu. 7.Other Setup a . Multi Ch In Setup b . ZONE Audio Setup c . SR+ Setup d . HDMI Control Setup e . OSD Adjustment 7c.SR+ Setup PDP Volume Control OFF Monitor Out Connect [ OFF ] :Return :Finish 2 Select the 'PDP Volume Control' setting you want. • OFF - The receiver does not control the volume of the flat panel TV. • ON - When the receiver is switched to one of the inputs that use the flat panel TV (DVD, for example), the volume on the flat panel TV is muted so only sound from the receiver is heard. 3 Assign any input source connected to the flat panel TV to the corresponding input number. This matches the receiver's input source with a numbered video input on the flat panel TV. For example, assign DVD to input-2 if you have connected the your DVD video output to video input 2 on the flat panel TV. • The Monitor Out Connect should be set to the input that you've used to connect this receiver to your flat panel TV. OSD Adjustment Use this feature to adjust your TV display if it seems difficult to see all the instructions on the screen. 1 Select 'OSD Adjustment' from the Other Setup menu. 7.Other Setup A A a . Multi Ch In Setup b . ZONE Audio Setup c . SR+ Setup d . HDMI Control Setup e . OSD Adjustment X= 0 , Y= 0 [ Finish ] :Return A :Finish A 2 Use to move the display field around until you get one that you feel best suits your TV. 3 When you're finished, press ENTER. You will return to the Other Setup menu. 7c.SR+ Setup PDP Volume Control [ OFF ] Monitor Out Connect OFF :Finish 4 When you're finished, press RETURN. You will return to the Other Setup menu. 70 En
-
 1
1 -
2
-
3
-
4
-
5
-
6
-
7
-
8
-
9
-
10
-
11
-
12
-
13
-
14
-
15
-
16
-
17
-
18
-
19
-
20
-
21
-
22
-
23
-
24
-
25
-
26
-
27
-
28
-
29
-
30
-
31
-
32
-
33
-
34
-
35
-
36
-
37
-
38
-
39
-
40
-
41
-
42
-
43
-
44
-
45
-
46
-
47
-
48
-
49
-
50
-
51
-
52
-
53
-
54
-
55
-
56
-
57
-
58
-
59
-
60
-
61
-
62
-
63
-
64
-
 65
65 -
 66
66 -
 67
67 -
 68
68 -
 69
69 -
 70
70 -
 71
71 -
 72
72 -
 73
73 -
 74
74 -
 75
75 -
76
-
77
-
78
-
79
-
80
-
81
-
82
-
83
-
84
-
85
-
86
-
87
-
88
-
89
-
90
-
91
-
92
-
93
-
94
-
95
-
96
-
97
-
98
-
99
-
100
 |
 |