Samsung CLP-650N User Manual (user Manual) (ver.1.03) (English) - Page 105
Using Printer Settings Utility, Using Onscreen Help, Changing the Smart Panel Program Settings
 |
UPC - 635753721393
View all Samsung CLP-650N manuals
Add to My Manuals
Save this manual to your list of manuals |
Page 105 highlights
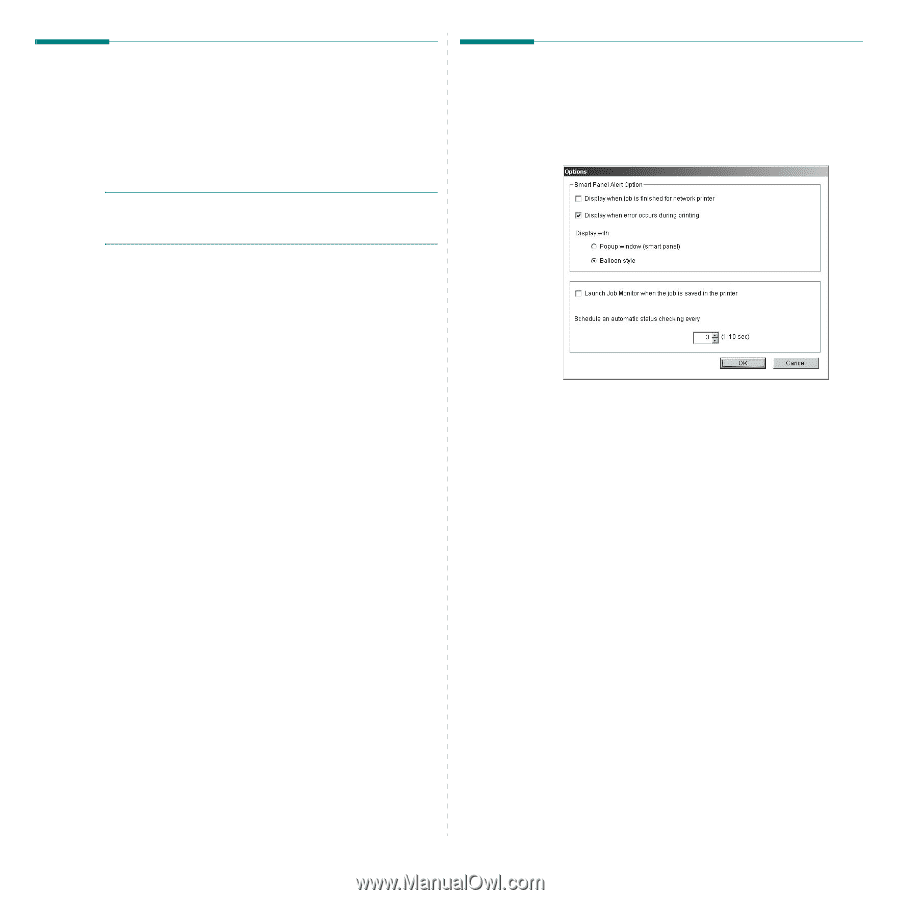
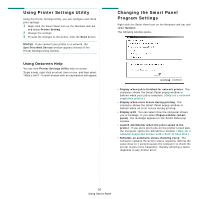
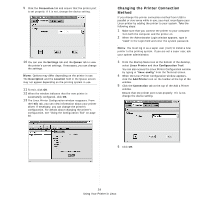
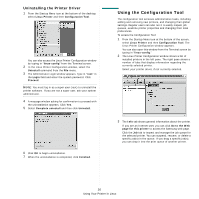
Using Printer Settings Utility Using the Printer Settings Utility, you can configure and check print settings. 1 Right-click the Smart Panel icon on the Windows task bar and select Printer Setting. 2 Change the settings. 3 To send the changes to the printer, click the Send button. NOTES: If you connect your printer to a network, the SyncThru Web Service window appears instead of the Printer Settings Utility window. Using Onscreen Help You can view Printer Settings Utility help on screen. To get a help, right-click on a text item or icon, and then select "What's this?". A small window with an explanation will appear. Changing the Smart Panel Program Settings Right-click the Smart Panel icon on the Windows task bar and select Options. The following window opens. • Display when job is finished for network printer: The computer shows the Smart Panel popup window or balloon when your job is complete. (Only for a network supported printer.) • Display when error occurs during printing: The computer shows the Smart Panel popup window or balloon when an error occurs during printing. • Display with: You can select how the computer shows you a message. If you select Popup window (smart panel), the message appears in the Smart Panel pop window. • Launch Job Monitor when the job is saved in the printer: If you store print jobs on the printer's hard disk, the computer opens the Job Monitor window. (Only for a network supported printer with a built-in hard disk.) • Schedule an automatic status checking every: The computer updates the printer status regularly. Setting the value close to 1 second causes the computer to check the printer status more frequently, thereby allowing a faster response to any printer error. 26 Using Smart Panel
-
 1
1 -
2
-
3
-
4
-
5
-
6
-
7
-
8
-
9
-
10
-
11
-
12
-
13
-
14
-
15
-
16
-
17
-
18
-
19
-
20
-
21
-
22
-
23
-
24
-
25
-
26
-
27
-
28
-
29
-
30
-
31
-
32
-
33
-
34
-
35
-
36
-
37
-
38
-
39
-
40
-
41
-
42
-
43
-
44
-
45
-
46
-
47
-
48
-
49
-
50
-
51
-
52
-
53
-
54
-
55
-
56
-
57
-
58
-
59
-
60
-
61
-
62
-
63
-
64
-
65
-
66
-
67
-
68
-
69
-
70
-
71
-
72
-
73
-
74
-
75
-
76
-
77
-
78
-
79
-
80
-
81
-
82
-
83
-
84
-
85
-
86
-
87
-
88
-
89
-
90
-
91
-
92
-
93
-
94
-
95
-
96
-
97
-
98
-
99
-
 100
100 -
 101
101 -
 102
102 -
 103
103 -
 104
104 -
 105
105 -
 106
106 -
 107
107 -
 108
108 -
 109
109 -
 110
110 -
111
-
112
-
113
-
114
-
115
-
116
-
117
 |
 |