Samsung CLP-650N User Manual (user Manual) (ver.1.03) (English) - Page 17
paper jam., Load paper with the print side facing up. For more
 |
UPC - 635753721393
View all Samsung CLP-650N manuals
Add to My Manuals
Save this manual to your list of manuals |
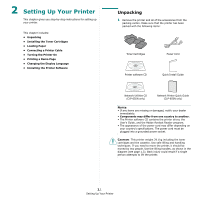
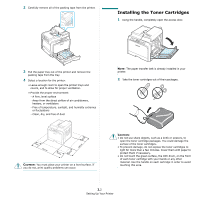
Page 17 highlights
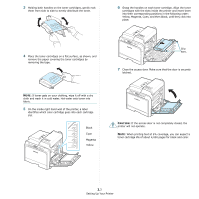
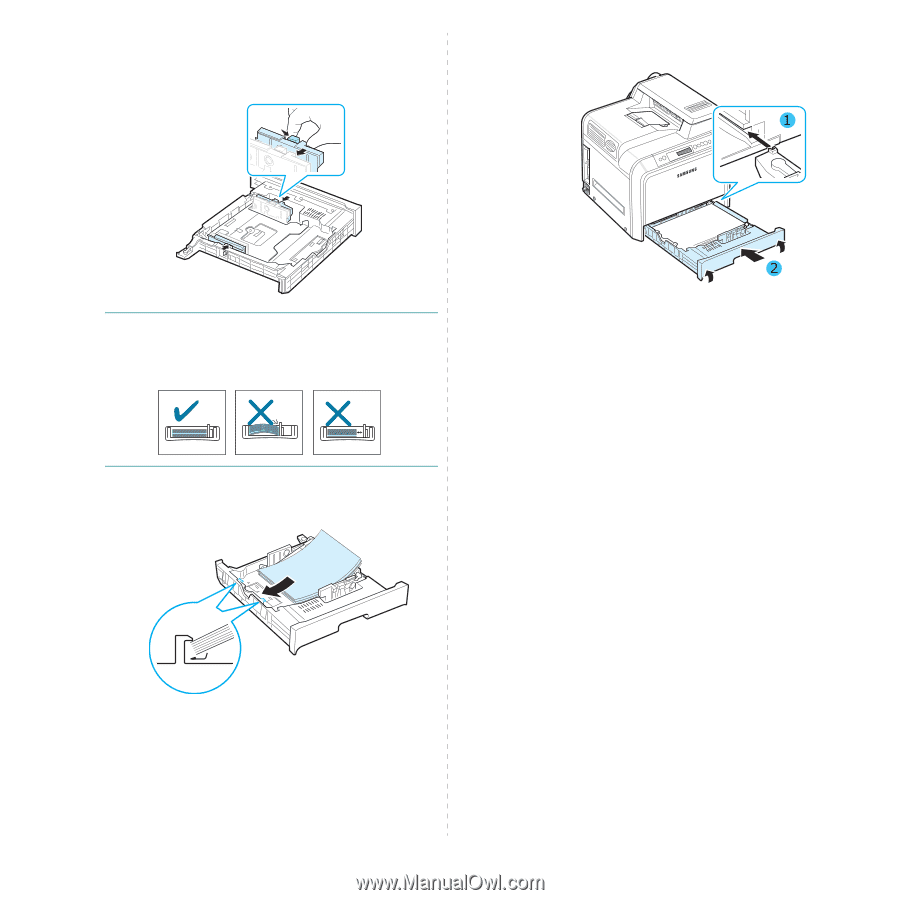
5 Squeeze the paper width guide, as shown and slide it to the stack of paper until it lightly touches the side of the stack. Do not push the guide too tightly against the edge of the paper as it may cause the paper to bend. 7 To replace the tray, lower the rear edge, align it with the slot, and slide it into the printer. NOTES: • Do not push the width guide far enough to cause the material to warp. • If you do not correctly adjust the width guide, it may cause a paper jam. 6 Load paper with the print side facing up. For more information, see steps 4 and 5 on page 2.4. 2.6 Setting Up Your Printer
-
 1
1 -
2
-
3
-
4
-
5
-
6
-
7
-
8
-
9
-
10
-
11
-
 12
12 -
 13
13 -
 14
14 -
 15
15 -
 16
16 -
 17
17 -
 18
18 -
 19
19 -
 20
20 -
 21
21 -
 22
22 -
23
-
24
-
25
-
26
-
27
-
28
-
29
-
30
-
31
-
32
-
33
-
34
-
35
-
36
-
37
-
38
-
39
-
40
-
41
-
42
-
43
-
44
-
45
-
46
-
47
-
48
-
49
-
50
-
51
-
52
-
53
-
54
-
55
-
56
-
57
-
58
-
59
-
60
-
61
-
62
-
63
-
64
-
65
-
66
-
67
-
68
-
69
-
70
-
71
-
72
-
73
-
74
-
75
-
76
-
77
-
78
-
79
-
80
-
81
-
82
-
83
-
84
-
85
-
86
-
87
-
88
-
89
-
90
-
91
-
92
-
93
-
94
-
95
-
96
-
97
-
98
-
99
-
100
-
101
-
102
-
103
-
104
-
105
-
106
-
107
-
108
-
109
-
110
-
111
-
112
-
113
-
114
-
115
-
116
-
117
 |
 |
Setting Up Your Printer
2.
6
5
Squeeze the paper width guide, as shown and slide it to
the stack of paper until it lightly touches the side of the
stack. Do not push the guide too tightly against the edge
of the paper as it may cause the paper to bend.
N
OTE
S
:
• Do not push the width guide far enough to cause the
material to warp.
•
If you do not correctly adjust the width guide, it may cause a
paper jam.
6
Load paper with the print side facing up. For more
information, see steps 4 and 5 on page 2.4.
7
To replace the tray, lower the rear edge, align it with the
slot, and slide it into the printer.