Singer CG-590 Commercial Grade Instruction Manual 2
Singer CG-590 Commercial Grade Manual
 |
View all Singer CG-590 Commercial Grade manuals
Add to My Manuals
Save this manual to your list of manuals |
Singer CG-590 Commercial Grade manual content summary:
- Singer CG-590 Commercial Grade | Instruction Manual 2 - Page 1
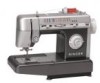
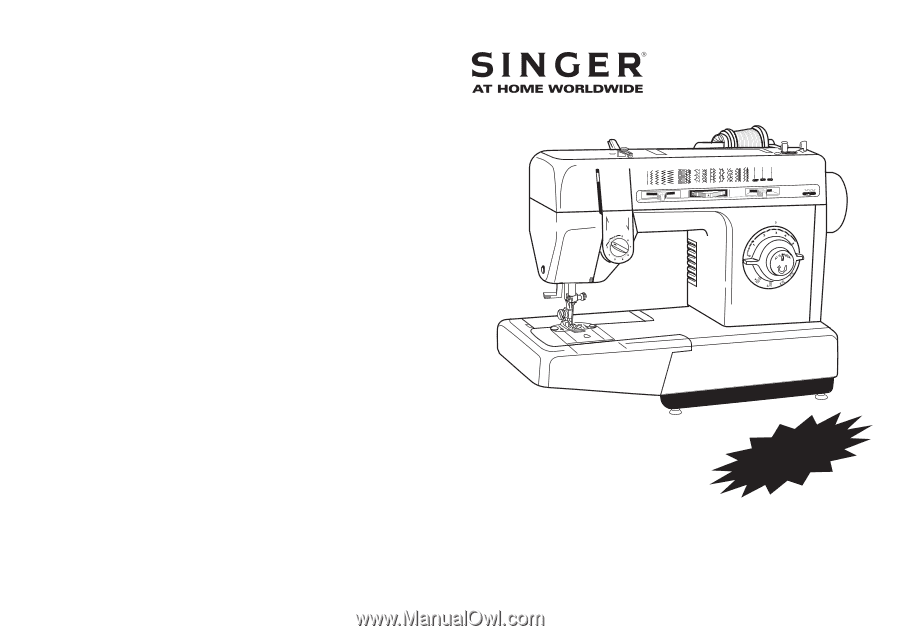
A BC D E F G H Part Number / Pieza Nº. / Pièce Nº: 358457-001 Printed in Brazil/ Impreso en Brasil / Imprimé au Brésil - Eng. / Spa./ Fren. Instruction Book CG-590 Libro de Instrucciones Livret d'Instructions 18 Stitches 18 Puntos 18 Points - Singer CG-590 Commercial Grade | Instruction Manual 2 - Page 2
one of the easiest to use sewing machines ever made. May we recommend that, before you start to use your sewing machine, you discover the many advantages and the ease of operation by going through this instruction book, step by step, seated at your machine. To ensure that you are always provided - Singer CG-590 Commercial Grade | Instruction Manual 2 - Page 3
Dear Customer: We recommend that for future reference you record the Serial Number of your Sewing Machine in the space provided. Refer to illustration at right for location of Serial Number on your machine. Estimado Cliente: Recomendamos para su futura referencia registre el Número de Serie de su Má - Singer CG-590 Commercial Grade | Instruction Manual 2 - Page 4
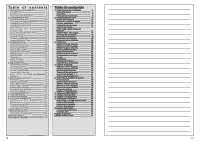
Ta b l e o f c o n t e n t s 1. Getting To Know Your Machine 4 Principal Parts 4 Accessories 6 Important Safety Instructions 8 2. Getting Ready To Sew 10 Operating the Machine 10 Choosing and Changing Needles 10 Changing Presser Feet 12 Changing the Needle Plate 14 Drop Feed 14 - Singer CG-590 Commercial Grade | Instruction Manual 2 - Page 5
et remplacer le support de canette 65 Changer I'ampoule 67 Nettoyer la machine 69 Lubrification de la machine 71 Accessoires facultatifs 73 Pied Coud & Rogne Facultatif 75 Coudre un bouton 77 Que faire si 80 For European Territories: This Singer Serwing Machine was tested according - Singer CG-590 Commercial Grade | Instruction Manual 2 - Page 6
(Free Arm) 14. One-way needle clamp 15. Thread guides 16. Push button reverse 17. Stitch length dial/four- control 27. Electrical lead 28. Machine plug 29. Power and light switch 30. Bobbin winding 25. Placa corredera 26. Controlador velocidad 27. Cordón 28. Enchufe máquina 29. Interruptor fuerza - Singer CG-590 Commercial Grade | Instruction Manual 2 - Page 7
de la bobine? L'enfilage du support de canette est-il correct? Le fil est-il passé dans la fente du support? Saute de point La machine est-elle correctement enfilée? Le tissu 13 22 25 23 24 32 2 1 20 21 19 18 17 16 SINGER asas as as as asasasasas asasass asaasaas asaas asas as as as asasas as - Singer CG-590 Commercial Grade | Instruction Manual 2 - Page 8
accessories furnished with your sewing machine are designed to simplify your sewing projects and increase the versatility of your machine. The letter in Representarión Singer de su localidad (Ver pág. 70). Lista de verificaciones Cuando aparezcan dificultades al coser, consulte este manual para - Singer CG-590 Commercial Grade | Instruction Manual 2 - Page 9
sewing difficulties occur, look back through this manual to make sure you are correctly following the instructions. If you still have a problem, the reminders below may help you to correct it. Needle does not move Is machine connected to electrical supply? Is the power Singer (Voyez page 71). - Singer CG-590 Commercial Grade | Instruction Manual 2 - Page 10
machine from the electrical outlet before removing covers, lubricating or when making any other adjustments mentioned in this Instruction Book. • Do not attempt to adjust the motor belt. Contact your nearest authorized SINGER Service Center should any adjustment be required. • When sewing manual. - Singer CG-590 Commercial Grade | Instruction Manual 2 - Page 11
To suit Button Foot: Button Sewing (H) Needle Plate : General Purpose de la machine. • Utilisez cette machine d'après les instructions du pré support de canette, etc... • Toujours débranchez la machine de à un technicien du Réseau des Services Autorisés SINGER. • En courant, maintenez vos doigts - Singer CG-590 Commercial Grade | Instruction Manual 2 - Page 12
"O" of power switch. To run the machine and control speed, press the foot control (5) with your foot. The harder you press, the faster the machine will sew. To stop machine, remove foot from control. Choosing and changing needles Important: For best results from your sewing machine, use only - Singer CG-590 Commercial Grade | Instruction Manual 2 - Page 13
and length according to your sewing machine manual. After the side cutter Never use a straight stitch. Sewing Instructions 1. Cut a 1x1-inch notch la vez. SINGER asas as as as asasasasas asasass asaasaas support mural adapté. En aucun cas vous ne devez modifier la prise". Mise en marche de la machine - Singer CG-590 Commercial Grade | Instruction Manual 2 - Page 14
foot screw (1) and remove presser foot with shank (2), guiding it toward you and to the right. • To les accessoires complémentaires dans votre magasin SINGER. 3 5 6 1. Plaque à aiguille cette aire. Montage du Protège Doigt Préparation de la Machine: ! Régler l'interrupteur à "O" ! Déviser la vis du - Singer CG-590 Commercial Grade | Instruction Manual 2 - Page 15
is used for cleaning hard to reach areas of your sewing machine. 4. Oil container for machine lubrication. 5. Twin needle and spool pin are used to fábrica en este lugar. Attaching Finger Guard Machine Preparation: ! Set power switch to "O" on machine ! Loosen Presser Foot Screw. Position Finger - Singer CG-590 Commercial Grade | Instruction Manual 2 - Page 16
tubular and hard reach garment areas, is simplified and made easier when you use the free-arm sewing capability of your sewing machine. Desmontaje base de extensión (Base Libre) Para disponer la máquina para este tipo de costura, levante el borde de la derecha (1) de la base, deslí - Singer CG-590 Commercial Grade | Instruction Manual 2 - Page 17
that you will be sewing several times a preveee el coser varias veces durante una week. But if you use your machine more semana, pero (A). La plaque à aiguille point droit (C) peut vous être vendue par votre magasin SINGER. • Relevez l'aiguille et le pied presseur. • Ouvrez la plaque glissière. • - Singer CG-590 Commercial Grade | Instruction Manual 2 - Page 18
Polyester 100% Polyester * Mercerized Size 40 * "Heavy Duty" Cotton-wrapped Polyester Polyester Nylon 2020 14/90 2020 16/100 2020 18/110 Ball-Point 2045 Size 11/80, 14/100, 16/110 Nettoyer la machine Votre machine va vous rendre de nombreux services pendant de longues années. Pour garantir - Singer CG-590 Commercial Grade | Instruction Manual 2 - Page 19
give you many years of dependable service. To ensure this reliability, take a few minutes to keep the machine clean. Limpieza de la má las piezas al descubierto y con un trapo blando límpie: • Take-up lever and thread guides. • Palanca tira-hilos y guías del hilo. • Presser and needle bars. • - Singer CG-590 Commercial Grade | Instruction Manual 2 - Page 20
prevent thread tangling. • Lead thread from spool and snap into thread guide post (3). • Wind thread clockwise around front of bobbin winder tension disc sewing position by pressing on side opposite indent. 1 3 1 2 4 18 Changer l'ampoule Attention: avant de changer l'ampoule, débranchez la machine, - Singer CG-590 Commercial Grade | Instruction Manual 2 - Page 21
the light bulb before operating the machine. This machine is designed to use a 15 emmêle. • Tirez le fil et enclenchez-le dans le guide-fil (3). • Passez le fil entre les disques de tension du rieur vers l'extérieur. • Engagez la canette sur le support du dévidoir et poussez-la vers la droite. • Tenez - Singer CG-590 Commercial Grade | Instruction Manual 2 - Page 22
las instrucciones para "Extracción del hilo de la bobina" de la página 26. 20 Nettoyage de votre 1 machine Retirer et replacer le support de canette Attention: Avant de nettoyer votre machine, débranchez-la. • Relevez le pied presseur el l'aiguille. • Ouvrez la plaque glissière, enlevez la canette - Singer CG-590 Commercial Grade | Instruction Manual 2 - Page 23
machine, remove plug from the socket outlet. • Raise presser foot and needle. • Open slide plate, remove bobbin and remove needle plate (see instruction quina. To replace bobbin case • Guide forked end (A) of bobbin case et posez la canette dans son support comme illustré. 2. En maintenant en - Singer CG-590 Commercial Grade | Instruction Manual 2 - Page 24
porte-bobine auxiliaire. Vous pourrez vous les procurer dans votre magasin SINGER. Réglages recommandés Sélection de point: au choix Position d' sur le dessus de la machine, comme illustré. • Enfilez normalement la machine avec le second fil. • Passez dans les autres guides-fils, sauf le dernier, - Singer CG-590 Commercial Grade | Instruction Manual 2 - Page 25
sew with either one or two thread colors. Your machine machine, as illustrated. • Thread the machine in the usual way. • Pass the thread through the remaining points, making certain to omit the thread guide adquirir estos accesorios en su Centro Singer de Costura. Posiciones recomendadas Selección - Singer CG-590 Commercial Grade | Instruction Manual 2 - Page 26
slightly down and pass the thread through the guide as 8 shown in the illustration 8. Continue fingers. Note: It is recommended that you to set machine for straight stitch, the needle in the center and thread loops or nests under the Fabric when you sew, the thread did not enter the upper tension - Singer CG-590 Commercial Grade | Instruction Manual 2 - Page 27
you use the free-arm feature of your sewing machine. Sleeves • Free-arm sewing takes the difficulty out of topstitching, sleeves, posición más alta. Baje el pie calzador. 9. Passez le fil sur le dernier guide-fil et tournez le volant dans votre direction jusqu'à ce que l'aiguille soit dans - Singer CG-590 Commercial Grade | Instruction Manual 2 - Page 28
para encontrar el cabo del hilo de la bobina. 4. Draw needle thread through left side opening in presser foot. • Pull both threads to back of machine. 4. Guíe el hilo de la aguja hacia el lado izquierdo a través de la ranura del prensatelas. • Tire de ambos hilos hacia la parte posterior de - Singer CG-590 Commercial Grade | Instruction Manual 2 - Page 29
stitches, ending at point (6). • Raise presser foot and remove garment from machine. • Clip thread ends. • Carefully cut buttonhole opening with a seam de canette Lorsque l'aiguille est enfilée et la canette en place dans son support, le fil de canette doit être remonté à traveers le trou de la - Singer CG-590 Commercial Grade | Instruction Manual 2 - Page 30
the stitch. Shorter stitches are best for lightweight fabrics; longer ones for heavy fabrics. To adjust the length of your stitches, turn the dial so . • For reverse stitching, push in the button and hold in place. The machine will stitch in reverse only as long as you keep the button pushed in. - Singer CG-590 Commercial Grade | Instruction Manual 2 - Page 31
making buttonholes on hard-to-reach areas convert machine bed to free-arm sewing. • Mark buttonhole position on fabric as droit Sélecteur de largeur de point Avant de bouger le sélecteur pour positionner votre machine sur le point droit, tournez le volant pour faire remonter l'aiguille. Le sé - Singer CG-590 Commercial Grade | Instruction Manual 2 - Page 32
Adjusting thread tension When an even amount of tension is exerted on both threads, a smooth even stitch, known as a balanced stitch, is produced. Correct tension is important because too much or too litle will weaken your seams or cause your fabric to pucker. Make a test sample with the fabric and - Singer CG-590 Commercial Grade | Instruction Manual 2 - Page 33
Points décoratifs Point Position Largeur Longueur Pied D'aiguille de Point de Point Presseur Plaque à Aiguille Application Point droit 1 12 3 4 5 Tout réglage Universel Universelle Couture général Point zig-zag Point invisible Point zig-zag multiple 12 3 4 5 Tout réglage Universel - Singer CG-590 Commercial Grade | Instruction Manual 2 - Page 34
el elevador del prensatelas en su totalidad y estará preparada para coser. Basting Pin basting and hand basting are easy ways to make temporary seams before machine sewing. • To pin baste, insert pins at stitching line. NEVER place pins on the underside of fabric in contact with the feed. Do not - Singer CG-590 Commercial Grade | Instruction Manual 2 - Page 35
. • Si vous faufilez à la main, faites-le à longs points pour pouvoir les retirer facilement après la couture. Pour piquer droit Servez-vous des lignes guides de la plaque à aiguille pour piquer droit. • La plus utilisée de ces lignes (1) est celle qui se continue aussi sur la plaque glissière. Elle - Singer CG-590 Commercial Grade | Instruction Manual 2 - Page 36
. Guiding and suppo Most fabrics need only to be guided in front of the presser foot. Some fabrics, however, require support while 4 5 12 3 4 5 Special purpose General purpose Heavy-duty general purpose sewing Special purpose General purpose Sweater and swimsuit construction Special purpose - Singer CG-590 Commercial Grade | Instruction Manual 2 - Page 37
General purpose Application General sewing Zig-zag stitch 12 3 4 5 Any General setting purpose General purpose Stretch sewing and embroidery Blind hem sous le pied presseur. Alignez le bord droit le long de la ligne-guide choisie, baissez l'aiguille dans la ligne de piqûre à 1cm du bord - Singer CG-590 Commercial Grade | Instruction Manual 2 - Page 38
Darning Worn or torn spots on garments and household linens can be darned effortlessly and quickly with little practice. When greater control is needed, an embroidery hoop and a special Darning and Embroidery Foot, which may be purchased at your retailer should be used. Zurcido Las partes - Singer CG-590 Commercial Grade | Instruction Manual 2 - Page 39
its neutral position, make a test sample using two layers of scrap fabric. If adjustment is required, stitch slowly and move the selector as you sew. • Move selector to the right to separate stitches of pattern. • Move selector to the left to bring stitches of the pattern together. 48 Equilibrado - Singer CG-590 Commercial Grade | Instruction Manual 2 - Page 40
Baste Stitching Machine Preparation: ! Pattern: Straight Stitch ! Stitch width: Straight ! Stitch length: Longest (5) ! Foot: General Purpose ! Needle Thread Tension: Set at 1 Sewing Instructions: After basting your seam, stitches can be removed easily by pulling on your bobbin thread. Do not forget - Singer CG-590 Commercial Grade | Instruction Manual 2 - Page 41
stitch length dial to the left until the mark ( ) on the dial lines up with the dot ( ) on the machine, as shown. Note: If for any reason the machine does not start sewing your desired pattern after aligning the two dot symbols, push-in on the reverse stitch button. 46 Ajuste longitud del - Singer CG-590 Commercial Grade | Instruction Manual 2 - Page 42
et piquer en suivant le bord de l'appliqué. Pour l'appliqué au point invisible, régler la machine au point Invisible et piquer en suivant le bord de l'appliqué. Si vous utilisez le pied invisible, placer le guide pour qu'il soit positionné au bord de l'appliqué. Pour pivoter autour des courbes et - Singer CG-590 Commercial Grade | Instruction Manual 2 - Page 43
Machine Preparation: ! Pattern: Zigzag ! Stitch width: Variable (Set according to width of cord) ! Stitch length: 1-2 ! Foot: Special Purpose "J" Sewing Instructions: Corded Satin Stitching is simply the technique of zigzagging over a fine cord. Use as a decorative touch on jackets and other sewing - Singer CG-590 Commercial Grade | Instruction Manual 2 - Page 44
esté flojo. En muchos casos se formarán lazos en el reverso del tejido. Aumentar la tensión girando el dial a una posición más alta (3). Your machine is equipped with auto tension. When straight stitching, rarely will the tension need adjusting. For all other stitches you may need to either raise
-
 1
1 -
 2
2 -
 3
3 -
 4
4 -
 5
5 -
 6
6 -
 7
7 -
8
-
9
-
10
-
11
-
12
-
13
-
14
-
15
-
16
-
17
-
18
-
19
-
20
-
21
-
22
-
23
-
24
-
25
-
26
-
27
-
28
-
29
-
30
-
31
-
32
-
33
-
34
-
35
-
36
-
37
-
38
-
39
-
40
-
41
-
42
-
43
-
44
 |
 |
Instruction Book
Libro de Instrucciones
Livret d’Instructions
Libro
de
Instrucciones
Part Number / Pieza Nº. / Pièce Nº: 358457-001
Printed in Brazil/ Impreso en Brasil /
Imprimé au Brésil - Eng. / Spa./ Fren.
CG-590
B
C
D
E
F
G
H
A
18 Stitches
18 Puntos
18 Points