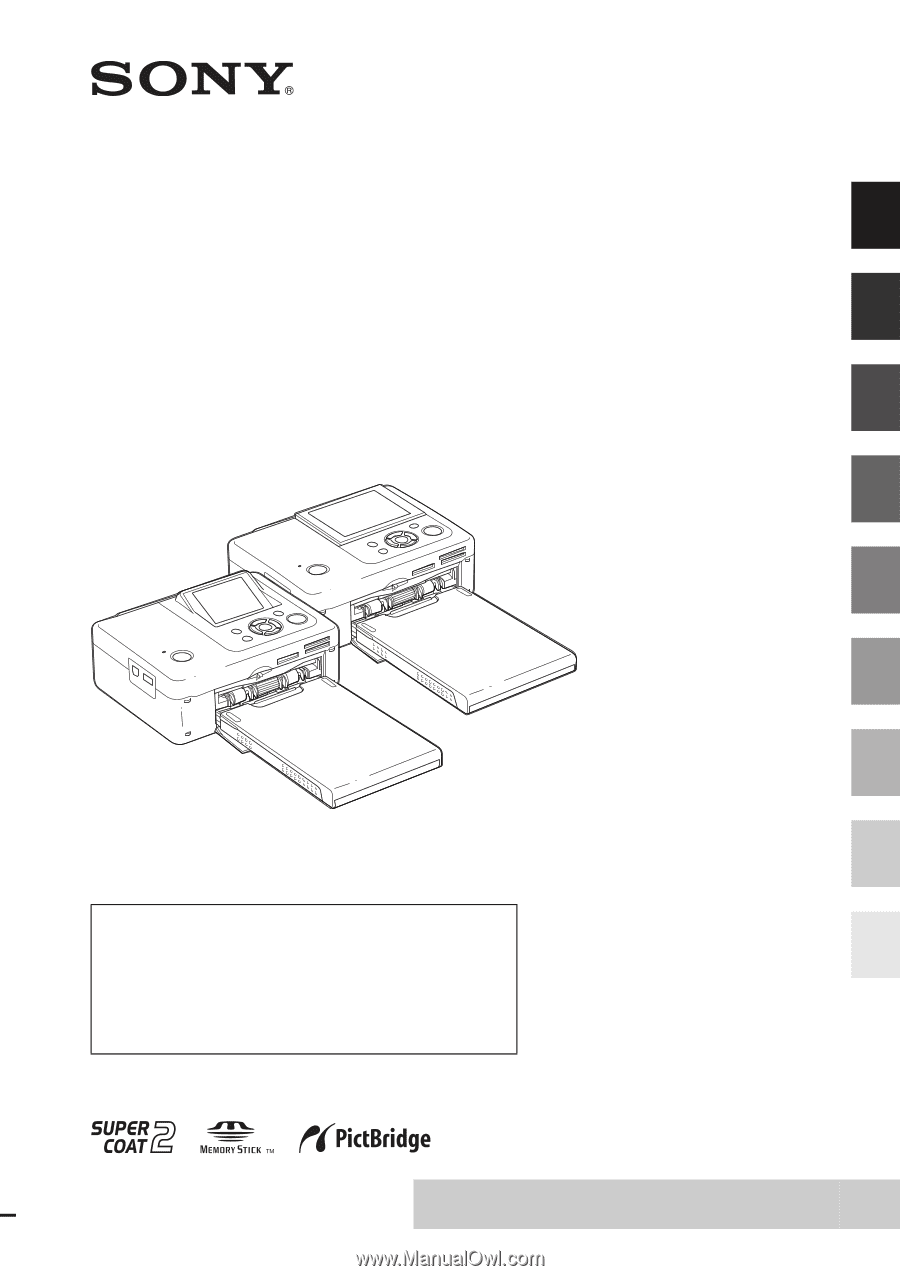
Sony DPPFP67 Operating Instructions
Sony DPPFP67 - Picture Station Photo Printer Manual
 |
UPC - 027242766822
View all Sony DPPFP67 manuals
Add to My Manuals
Save this manual to your list of manuals |
Sony DPPFP67 manual content summary:
- Sony DPPFP67 | Operating Instructions - Page 1
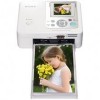
4-129-145-11 (2) Digital Photo Printer DPP-FP67/FP77 Operating Instructions Before operating this unit, please read "Read This First" and "About the Print Packs" supplied and this manual, "Operating Instructions," thoroughly and retain them for future reference. Owner's Record The model and serial - Sony DPPFP67 | Operating Instructions - Page 2
DPP-FP67 CAUTION You are cautioned that any changes or modifications not expressly approved in this manual could void your authority to operate this equipment. If you have any questions about this product, you may call: Sony Customer Information Services the picture of this digital photo printer. - Sony DPPFP67 | Operating Instructions - Page 3
contact your nearest Sony service station. Duplication, edition, or printing of a CD, TV program, copyrighted materials such as pictures or publications, or the copyright holder's claim for damages. When using photo images with this printer, pay special attention not to infringe the provisions of - Sony DPPFP67 | Operating Instructions - Page 4
• Other trademarks and trade names are those of their respective owners. Notice for users Program © 2009 Sony Corporation Documentation © 2009 Sony Corporation All rights reserved. This manual or the software described herein, in whole or in part, may not be reproduced, translated or reduced to any - Sony DPPFP67 | Operating Instructions - Page 5
package 9 Setting the ink ribbon 9 Inserting the print paper 10 Connecting to the AC DPOF Print 26 Making a Calendar 27 Making an ID Photo 28 Changing the settings 29 Setting the Date Print 29 Color Setting 31 Hiding or showing the Printer information display 31 Resetting to the Default - Sony DPPFP67 | Operating Instructions - Page 6
35 Compatible profiles for Bluetooth communication 35 Printing procedures 35 Printing from a PC Printing from a PC 37 Installing the software 37 System requirements 37 Installing the printer driver 38 Installing the PMB (Picture Motion Browser 41 Printing photos from the PMB (Picture Motion - Sony DPPFP67 | Operating Instructions - Page 7
screen 2.4 type DPP-FP67 3.5 type DPP-FP77 E ENTER button F Direction (g/G/f/F) buttons G AUTO TOUCH-UP button (.page 22) H PRINT button/indicator I Paper tray compartment (.page 10) J Paper tray compartment door K "Memory Stick PRO" media (Standard/Duo) slot (.pages17, 63) L xD-Picture Card slot - Sony DPPFP67 | Operating Instructions - Page 8
DPPA-BT1 Bluetooth USB adaptor is not sold. Notes • When you carry the printer, make sure to remove memory cards, USB memory, the paper tray, AC adaptor, and other cables. Otherwise malfunctions may occur. • When using the DPP-FP77, set the LCD panel to its original position. B Ventilation holes - Sony DPPFP67 | Operating Instructions - Page 9
are supplied with your printer. • Paper tray (1) • AC adaptor (1) • USB cable (1) • AC power cord*1 (1) • Cleaning cartridge (1)/Cleaning sheet (1) • CD-ROM (Windows Printer Driver Software Ver.1.0 and PMB (Picture Motion Browser) Ver.4.2) • Operating Instructions (this booklet) • Read This - Sony DPPFP67 | Operating Instructions - Page 10
(shown with arrows) and open the paper tray cover. Do not wind the ribbon in the directions shown here • Do not disassemble the ink ribbon. • Do not pull out the ribbon from the ink ribbon. • Do not remove the ink ribbon while printing. • Avoid placing the ink ribbon in a location subject to high - Sony DPPFP67 | Operating Instructions - Page 11
image twice on the same paper will not make the printed image thicker. - Use the print paper for this printer only. - Do not use print paper ejected without printing. Notes on storing the print paper • To store print paper in the tray, remove the paper tray from the printer and close the slide door - Sony DPPFP67 | Operating Instructions - Page 12
. • Leave enough room around the printer. The print paper emerges from the back a few times during printing. Keep 10 cm (13/32 inch) or more space at the rear of the printer. • Connect the AC adaptor to an easily accessible wall outlet close by. If trouble occurs while using the adaptor, immediately - Sony DPPFP67 | Operating Instructions - Page 13
Preparations Operations in an initial state When the photo printer is turned on without a memory card inserted or a PC connected, the initial display below appears on the screen. When the printer is not operated for 5 seconds, demo mode is displayed. If any other button than the 1 (on/standby) - Sony DPPFP67 | Operating Instructions - Page 14
the printer is accessing Picture Card input USB memory input DPOF print preset indication C Number of selected images/Total number of image D Ink ribbon indication : P size : Cleaning cartridge E Image file information (file format, file size, image number (folder- file number)*) * DCF-compatible - Sony DPPFP67 | Operating Instructions - Page 15
list of the images stored in the selected media. DPP-FP67 DPP-FP77 D DPOF print preset indication Switching an image can change the displayed image by pressing g/G . • To enlarge an image In the image preview window, press ENTER. Each time you press the button, the image is enlarged up to 5 times - Sony DPPFP67 | Operating Instructions - Page 16
clockwise.) Adjusting the picture quality of an image (23) Changing a photo into a monochrome one (29) (This option is available only in ID Photo operations.) Resetting edits 30) On-screen Display (30) Color Setting (31) Printer information display (31) Default Setting (32) (Resets the settings to - Sony DPPFP67 | Operating Instructions - Page 17
Stick" media, ("Memory Stick Duo" media), SD Memory Card, and xD-Picture Card To eject a memory card Remove the memory card from the slot slowly in the memory card inserted first will have the first priority. • The printer supports both standard and small sizes. A "Memory Stick Duo" media adaptor - Sony DPPFP67 | Operating Instructions - Page 18
move or turn off the printer while it is printing; the ink ribbon or print paper may become stuck. If you turn off the power accidentally, keep the paper tray inserted and turn on the printer again. If paper being printed remains in the printer, remove the paper that emerges automatically and resume - Sony DPPFP67 | Operating Instructions - Page 19
Direct printing Enjoying various printing z Operation using the printer buttons AUTO TOUCH-UP MENU Exposure and Red-eye Correction .page 22 Press the AUTO TOUCH-UP button to automatically adjust a photo with problems, such as being backlit, or showing the red-eye phenomenon. A variety of printing - Sony DPPFP67 | Operating Instructions - Page 20
1 Edit .page 23 You can adjust the size, position, hue or other picture property of the selected image. For the icons you can use, see page 16. 2 Layout Print .page 25 You can place multiple photos on split screens to make a print. You can make a print with 2-split, 4-split, 9-split, 13-split or - Sony DPPFP67 | Operating Instructions - Page 21
Direct printing 6 Print setup .page 29 You can change the settings during printing, the printer settings, and on-screen display settings. 21 GB - Sony DPPFP67 | Operating Instructions - Page 22
may not be correctable. In this case, select "Adjust" from the Edit menu to adjust the brightness manually (page 23). • Depending on the image, the red-eye phenomenon may not be corrected. • The automatic red-eye correction of this printer uses the technology of FotoNation Inc. in the U.S.A. 22 GB - Sony DPPFP67 | Operating Instructions - Page 23
then press ENTER. Each time you press the button, the image becomes larger or smaller: : up to 200% : down to 60% 2 Press PRINT. Note The picture quality of an enlarged image may deteriorate depending on its size. Moving an image 1 From the Edit menu (page 20), press g/G to select (Move) and - Sony DPPFP67 | Operating Instructions - Page 24
. • Brightness: Press G to brighten the picture or g to darken it. • Tint: Press G to make the picture greenish or g to make it reddish. • g/G to select (Print) and then press ENTER. Or, press PRINT. The print window is displayed. The print quantity is displayed. 2 Set the print quantity. • To - Sony DPPFP67 | Operating Instructions - Page 25
g/G/f/F to select an image area, then press ENTER. The image list is displayed. 2Press g/G/f/F to select the desired image, then press ENTER. The window used for adjusting the image is displayed. For adjustment, see "Adjusting an image" on page 23. You can adjust the image automatically by pressing - Sony DPPFP67 | Operating Instructions - Page 26
Notes • For how to preset images for printing, refer to the manual of your digital camera. • Some types of digital cameras do not support the DPOF function, or the printer may not support some of the functions of the digital camera. 2 Press g/G to select (Index Print), (Print All), or (DPOF Print - Sony DPPFP67 | Operating Instructions - Page 27
g/G/f/F to select an image area, then press ENTER. The image list is displayed. 2Press g/G/f/F to select the desired image, then press ENTER. The window used for adjusting the image is displayed. For adjustment, see "Adjusting an image" on page 23. You can adjust the image automatically by pressing - Sony DPPFP67 | Operating Instructions - Page 28
1 From the main menu (page 19), press g/G/f/F to select (ID Photo) and then press ENTER. The window used for setting the height and width of an ID photo is displayed. 2Press f/F to select the item that you want to set, and then press ENTER. Item Settings/Procedures Start Y/M Set the first month - Sony DPPFP67 | Operating Instructions - Page 29
window used for adjusting the image position is displayed. For adjustment, see step "Adjusting an image" on page 23. You can also change a color photo card or passport. Please check the requirements for the photo to be used in the instructions before you submit the card or passport. Changing the - Sony DPPFP67 | Operating Instructions - Page 30
image. 3 Press ENTER. The setting is fixed. The Print setup window is displayed again. To redo the operations Press CANCEL. The Print setup window is displayed again. Notes • When you select "Borderless," a standard 4:3 picture shot by a digital camera may be printed with the top and bottom edges - Sony DPPFP67 | Operating Instructions - Page 31
set the level, the darker the picture becomes, as if yellow is added. 3 Press ENTER. The setting is fixed. The Print setup window is displayed again. To redo the operations Press CANCEL. The Print setup window is displayed again. Hiding or showing the Printer information display 1 From the (Print - Sony DPPFP67 | Operating Instructions - Page 32
and then press ENTER. The confirmation window is displayed. 2 Press f/F to select "OK" and press ENTER. The printer settings are reset to their default settings. mass storage-compliant digital camera or photo storage. • If a memory card is inserted in the printer, the printer cannot read the signal - Sony DPPFP67 | Operating Instructions - Page 33
Direct printing Notes • While the access indicator of a USB memory is flashing, never turn off the power of the printer. The data stored in the USB memory may be damaged. We cannot compensate for any damages that may be caused by data loss or damage. • - Sony DPPFP67 | Operating Instructions - Page 34
be completed before connection differ depending on the digital camera. For details, refer to the operating instructions of your digital camera. (In case of Sony Cyber-shot digital camera, for example, select "PictBridge" mode for "USB Connect.") 2 Connect the printer to the AC power source (page 12 - Sony DPPFP67 | Operating Instructions - Page 35
local radio wave regulations and may be subject to penalty. • In some regions, the Sony DPPA-BT1 Bluetooth USB adaptor is not sold. Compatible profiles for Bluetooth communication The DPP-FP67/FP77 supports the following profiles: • BIP (Basic Imaging Profile) Image Push Responder • OPP (Object Push - Sony DPPFP67 | Operating Instructions - Page 36
from a Bluetoothcompliant device, select "Sony DPP-FP67 ##"/"Sony DPP-FP77 ##." "##" stands for the two figures from the right of the address displayed in the LCD screen. When input of Passkey* is required Input "0000." You cannot change the Passkey with the printer. * A Passkey is often referred - Sony DPPFP67 | Operating Instructions - Page 37
CD-ROM The supplied CD-ROM contains the following software: • Printer driver for the DPP-FP67/FP77: The software describes the printer's requirements and enables printing from the PC. • PMB (Picture Motion Browser): Sony's original software application that allows you to handle photographs and - Sony DPPFP67 | Operating Instructions - Page 38
"Setup.exe" file on the CD-ROM. • In Windows Vista, the AutoPlay window may appear. Even if this occurs, select "Setup.exe" execution and install the driver according to the instructions on the screen. 2 Click "Installing Printer Driver." The "InstallShield Wizard" dialog box is displayed. 38 GB - Sony DPPFP67 | Operating Instructions - Page 39
then check to see that "Sony DPP-FP67" or "Sony DPP-FP77" has been added to the "Printers" or "Printers and Faxes." 10 When the installation is complete, remove the CD-ROM from your PC and keep it for future use. To continue the process and install the PMB software, follow the procedures from step - Sony DPPFP67 | Operating Instructions - Page 40
from step 1 again. • After installation, the "Sony DPP-FP67" or "Sony DPP-FP77" is not yet set as the default printer. Set the printer you use for each application. • The supplied CD-ROM will be required when you uninstall or re-install the printer driver. Keep it for possible future use. • Before - Sony DPPFP67 | Operating Instructions - Page 41
PC. The installation window is displayed (page 38). 2 Click "Installing PMB (Picture Motion Browser)." The Install" and follow the instructions on the screen to proceed with installation. When you 3 Select "Sony Picture Utility" and click "Change/Remove." The software uninstallation process starts. Printing - Sony DPPFP67 | Operating Instructions - Page 42
paper. 1 Start the PMB window using either of the following methods: • Double-click (PMB) on the Windows desktop. • Click "Start" - "All Programs" (or "Programs" with Windows 2000) "Sony Picture , "Folders" view windows are used as examples. 3 Click the folder containing the photos you want to print - Sony DPPFP67 | Operating Instructions - Page 43
common printer driver. In the dialog boxes, there are some items that are not used within this printer. 7 In the "Layout" tab, specify the paper orientation or other options. Items Printer Paper size Print Options Properties Functions Select the printer you are using: "Sony DPP-FP67" or "Sony DPP - Sony DPPFP67 | Operating Instructions - Page 44
8 Click "Advanced." The "Sony DPP-FP67/77 Advanced Options" dialog box is displayed. Items Functions Paper/ Output • Paper Size: From the dropdown list box, select the paper size you actually use for printing: P size (post card size)/L size Note: L size print paper is not sold in some regions. • - Sony DPPFP67 | Operating Instructions - Page 45
picture file or RAW data files. Tips • To select a series of still images in the image area of the main window operation, do the following. 1Double-click on the printer icon on the taskbar, and open the "Print" being printed. Doing so may cause a paper jam. Registering a browsing folder PMB does not - Sony DPPFP67 | Operating Instructions - Page 46
/Borderless setting, we suggest you select "ON" for "Borderless Print" in "Printer Features" of the "Sony DPP-FP67/77 Advanced Options" dialog box as the printer driver setting. Print quantity setting Depending on the software application you are using, the print quantity setting of the application - Sony DPPFP67 | Operating Instructions - Page 47
file format and you cannot print it with the printer. c The image is in a compatible file format but its thumbnail data or the data instructions of the USB device you are using. c The printer does not support a USB hub or a drive with a built in USB hub. Connect the device directly to the printer - Sony DPPFP67 | Operating Instructions - Page 48
ink ribbon, consult with your Sony dealer or Sony service facilities. c No print paper or cleaning sheet is set in the paper tray. Set the print paper of the displayed size as follows in the paper tray, insert the paper tray into the printer, and then press PRINT. (.page 10) - P: P size print paper - Sony DPPFP67 | Operating Instructions - Page 49
Error display Meaning/Solutions c No paper tray is inserted in the printer. Set the print paper or cleaning sheet into the paper tray, insert the paper tray into the printer, and then press PRINT. (.page 10) Error messages 49 GB - Sony DPPFP67 | Operating Instructions - Page 50
Troubleshooting If trouble occurs If you run into any problems using the printer, use the following guidance to solve the problem. If the problem persists, consult your Sony dealer. Power Symptom Check The printer memory contain images recorded with a digital camera or other device? c Insert - Sony DPPFP67 | Operating Instructions - Page 51
or horizontally, blank areas may appear in the Edit menu. c The standard aspect ratio of an image shot with a digital camera is 3:4. When you use a recording/editing device other than the printer to edit and save an image, the image is often saved as a printing image wider than 3:4 aspect ration. In - Sony DPPFP67 | Operating Instructions - Page 52
. Check Cause/Solutions • Is the print paper properly set in the paper tray? c If print paper is not properly loaded, the printer may develop trouble. (.page 9, 10) Check the following: • Insert the correct set of print paper and ink ribbon. • Load the print paper in the correct direction in the - Sony DPPFP67 | Operating Instructions - Page 53
, a highly-compressed JPEG file may be also recorded. As the printer does not support the RAW file format, it may use the JPEG file to print an image. A RAW file can be printed from a PC. For details, refer to the operating instructions of the digital camera you are using. What is a RAW file? A RAW - Sony DPPFP67 | Operating Instructions - Page 54
software processing, the printed images will be different. - The date cannot be • Is "Date Print" set to "ON"? c Set "Date Print" to "ON." (."Setting printed. the Date Print" on page 29) • Does the image support DCF? c The "Date Print" function of this unit supports an image that is compatible - Sony DPPFP67 | Operating Instructions - Page 55
paper tray inserted printed at an angle. properly? There are white lines or dots on the printed pictures. - The picture than the printer to paper tray firmly straight in to the end. c The print head or paper path may be soiled. Use the supplied cleaning cartridge Troubleshooting Continued 55 GB - Sony DPPFP67 | Operating Instructions - Page 56
turned on? • Does your digital camera support PictBridge? c Connect the cable correctly. c Turn on the 1 (on/standby) button. c Refer to the manual supplied with your camera, or consult with the manufacturer. c Is a memory card inserted in a slot of the - printer? If there is a memory card - Sony DPPFP67 | Operating Instructions - Page 57
c Please download the printer driver from - the Customer support home page (.page 67). Or contact your Sony dealer. The printer driver • Are you sure that you have cannot be followed the installation installed. procedures correctly? c Follow the procedures in the operating instructions to - Sony DPPFP67 | Operating Instructions - Page 58
the printer shows trouble, do the following: 1. Turn off the 1 (on/standby) button of - the printer. 2. Disconnect the power cable, wait for 5 to 10 seconds, and then connect the cable again. 3. Restart your computer. If these do not solve the problem, consult your Sony dealer or service - Sony DPPFP67 | Operating Instructions - Page 59
to be loaded, remove the slack. (.page 9, 10) c Turn off the printer using the 1 (on/ standby) button and then turn it on again. After the motor sound stops, try to remove the ink ribbon. If this does not solve the problem, contact Sony service facilities or your Sony dealer. Troubleshooting 59 GB - Sony DPPFP67 | Operating Instructions - Page 60
the ejected print paper from the printer. 3 Remove the paper tray and ink ribbon from the printer and check to ensure if there is no jammed print paper inside. Check to see if there is jammed paper. If there is, remove it. Note If you cannot remove the jammed paper, contact your Sony dealer. 60 GB - Sony DPPFP67 | Operating Instructions - Page 61
, or USB cables from the printer. 1 Open the ink ribbon compartment door and if there is an ink ribbon inserted, remove it. 2 Insert the supplied cleaning cartridge into the printer and close the ink ribbon compartment door. 5 Set the paper tray into the printer and press PRINT. The cleaning - Sony DPPFP67 | Operating Instructions - Page 62
, unplug the AC power cord of the printer and do not use the printer for at least one hour. On transport When you transport the printer, remove the ink ribbon, paper tray, AC adaptor, the memory card, or a USB memory from the printer and put the printer and its peripherals in the original box with - Sony DPPFP67 | Operating Instructions - Page 63
The printer supports FAT32. The printer has been demonstrated as operable with a "Memory Stick" media with a capacity of 8 GB or less manufactured by Sony Corporation. However, we do not guarantee the operations of all the "Memory Stick" media media. *2 The printer is equipped with a slot compatible - Sony DPPFP67 | Operating Instructions - Page 64
at the same time, which may cause trouble with the printer. • If you insert a "Memory Stick Micro" media into the printer without an "M2" adaptor, you may Picture Card With the xD-Picture Card slot of the printer, you can use an xD-Picture Card*1. Not all the memory card operations are supported - Sony DPPFP67 | Operating Instructions - Page 65
a card or turn off the printer while the printer is reading or accessing data, or Picture Card slot Compatible image file formats JPEG: DCF 2.0 compatible, Exif 2.21 compatible, JFIF*7 TIFF: Exif 2.21 compatible BMP*8: 1, 4, 8, 16, 24, 32 bit Windows format Some image file formats are not compatible - Sony DPPFP67 | Operating Instructions - Page 66
1/2 inches) longer than the above depth. 66 GB Mass DPP-FP67: Approx. 1.0 kg (2 lb 4 oz) DPP-FP77: Approx. 1.1 kg (2 lb 7 oz) (excluding the paper tray, ink ribbon, AC adaptor) Supplied accessories See page 9 of "Operating Instructions" (this booklet) x AC adaptor AC-S2416 Power requirements - 100 - Sony DPPFP67 | Operating Instructions - Page 67
. *7 Baseline JPEG with 4:4:4, 4:2:2, or 4:2:0 format *8 You cannot print using the PMB. Customer support home page The latest support information is available at the following home page address: http://www.sony.net/ Printing range P size 152.4 mm/6 inches (1 800 dots) 95.5 mm/ 3 7/8 inches - Sony DPPFP67 | Operating Instructions - Page 68
-use printer. The printer supports DPOF printing and can automatically print the preset number of copies of the DPOF preset images. Exif 2.21 (Exif Print) Exif (Exchangeable image file format for digital cameras) Print is a global standard for digital photo printing. A digital camera supporting Exif - Sony DPPFP67 | Operating Instructions - Page 69
source 12 Bluetooth device 35 Digital camera 34 External device 34, Photo 28 Image list 15 Image preview 14 Index Print 26 Initial state 13 Input indications 14 Inserting a memory card 17 Inserting an ink ribbon 9 Inserting the print paper 10 Installing PMB (Picture Motion Browser) 41 Printer driver - Sony DPPFP67 | Operating Instructions - Page 70
the screen display 15 System requirement 37 T Tint 24 Trimming Print 18 Troubleshooting 50 U Uninstalling PMB (Picture Motion Browser) 41 Printer driver 40 USB cable 9, 39 USB connector 8 USB memory 32 V Various printing 19 X xD-Picture Card Insert 17 Notes on use 64 Types 64 Z Zooming in/out - Sony DPPFP67 | Operating Instructions - Page 71
- Sony DPPFP67 | Operating Instructions - Page 72
Printed using VOC (Volatile Organic Compound)-free vegetable oil based ink. Sony Corporation Printed in China
-
 1
1 -
 2
2 -
 3
3 -
 4
4 -
 5
5 -
 6
6 -
 7
7 -
8
-
9
-
10
-
11
-
12
-
13
-
14
-
15
-
16
-
17
-
18
-
19
-
20
-
21
-
22
-
23
-
24
-
25
-
26
-
27
-
28
-
29
-
30
-
31
-
32
-
33
-
34
-
35
-
36
-
37
-
38
-
39
-
40
-
41
-
42
-
43
-
44
-
45
-
46
-
47
-
48
-
49
-
50
-
51
-
52
-
53
-
54
-
55
-
56
-
57
-
58
-
59
-
60
-
61
-
62
-
63
-
64
-
65
-
66
-
67
-
68
-
69
-
70
-
71
-
72
 |
 |
4-129-145-
11
(2)
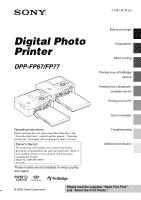
Digital Photo
Printer
DPP-FP67/FP77
© 2009
Sony Corporation
Before you begin
Preparations
Direct printing
Printing from a PictBridge
camera
Printing from a Bluetooth-
compliant device
Printing from a PC
Error messages
Troubleshooting
Additional information
Operating Instructions
Before operating this unit, please read “Read This First” and
“About the Print Packs” supplied and this manual,
“Operating
Instructions,” thoroughly and retain them for future reference.
These models are not available in every country
and region.
Owner’s Record
The model and serial numbers are located on the bottom.
Record the serial number in the space provided below. Refer to
these numbers whenever you call upon your Sony dealer
regarding this product.
Model No. DPP-FP67/FP77
Serial No. ________________________
Please read the supplied “Read This First”
and “About the Print Packs.”