Sony DPPFP67 Operating Instructions - Page 25
Exiting the menu, Making a Layout Print
 |
UPC - 027242766822
View all Sony DPPFP67 manuals
Add to My Manuals
Save this manual to your list of manuals |
Page 25 highlights
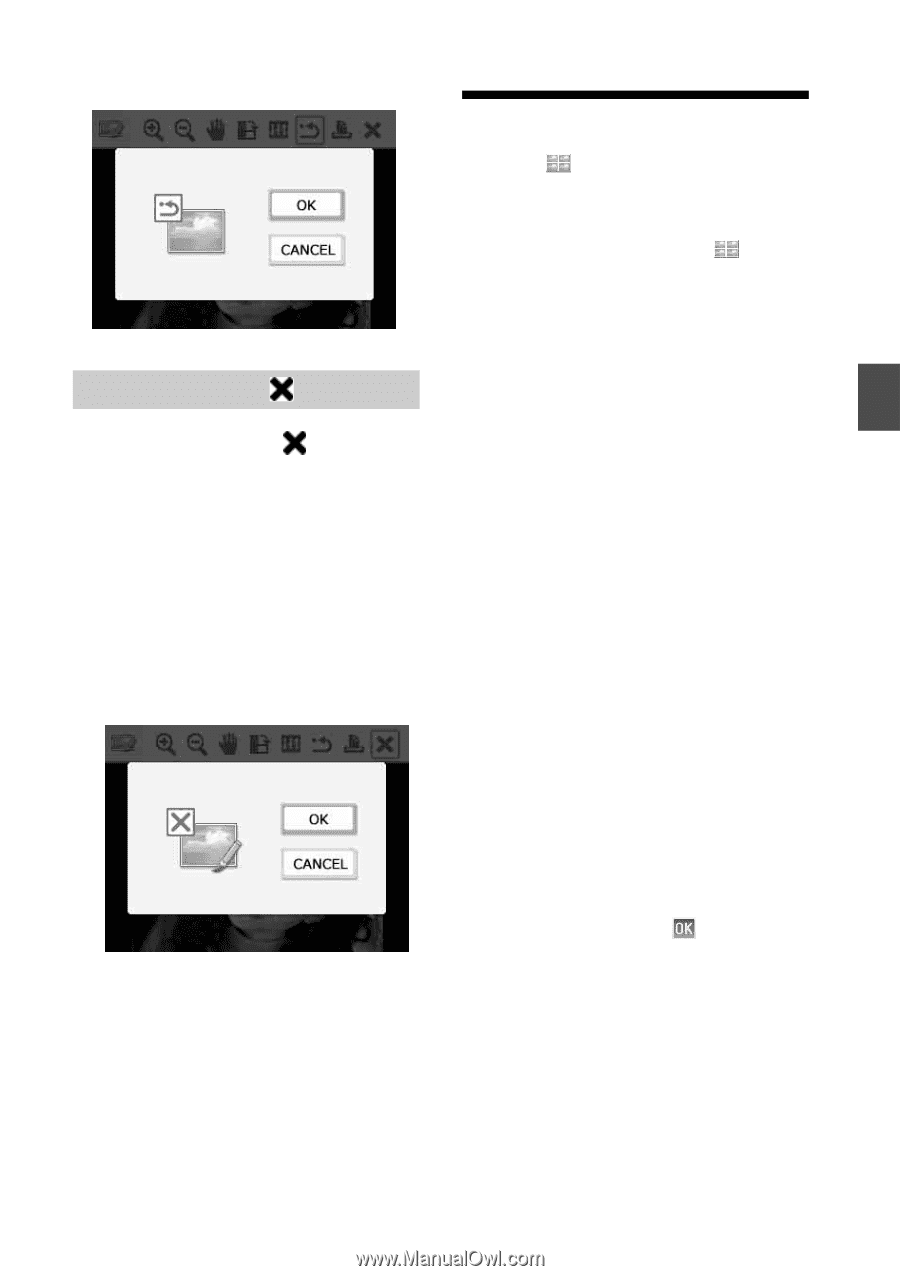
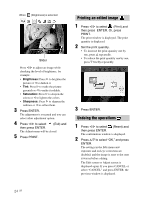
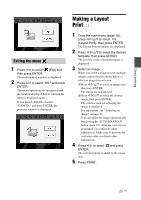
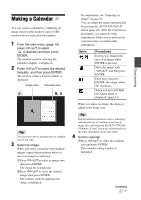
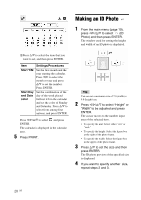
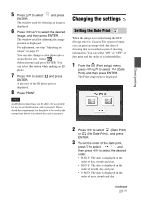
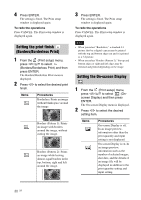
Direct printing Exiting the menu 1 Press g/G to select then press ENTER. (Exit) and The confirmation window is displayed. 2 Press f/F to select "OK," and press ENTER. The menu operations are terminated and the window displayed before entering the menu is displayed again. If you press CANCEL or select "CANCEL" and press ENTER, the previous window is displayed. Making a Layout Print 1 From the main menu (page 19), press g/G/f/F to select (Layout Print), then press ENTER. The Layout Print templates are displayed. 2 Press g/G/f/F to select the desired template, then press ENTER. The preview of the selected template is displayed 3 Select an image. When you select a template with multiple images, repeat the procedures below to select an image for each area. 1Press g/G/f/F to select an image area, then press ENTER. The image list is displayed. 2Press g/G/f/F to select the desired image, then press ENTER. The window used for adjusting the image is displayed. For adjustment, see "Adjusting an image" on page 23. You can adjust the image automatically by pressing the AUTO TOUCH-UP button (page 22). After the correction is performed, you cannot do other adjustments. Make sure to perform the correction after you finish other adjustments. 4 Press g/G to select and press ENTER. The selected image is added to the image area. 5 Press PRINT. 25 GB
-
 1
1 -
2
-
3
-
4
-
5
-
6
-
7
-
8
-
9
-
10
-
11
-
12
-
13
-
14
-
15
-
16
-
17
-
18
-
19
-
 20
20 -
 21
21 -
 22
22 -
 23
23 -
 24
24 -
 25
25 -
 26
26 -
 27
27 -
 28
28 -
 29
29 -
 30
30 -
31
-
32
-
33
-
34
-
35
-
36
-
37
-
38
-
39
-
40
-
41
-
42
-
43
-
44
-
45
-
46
-
47
-
48
-
49
-
50
-
51
-
52
-
53
-
54
-
55
-
56
-
57
-
58
-
59
-
60
-
61
-
62
-
63
-
64
-
65
-
66
-
67
-
68
-
69
-
70
-
71
-
72
 |
 |