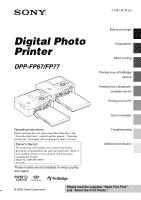
Sony DPPFP67 Operating Instructions - Page 5

Table of Contents, Before you begin, Preparations, Direct printing, Printing from a PictBridge, camera - ink

Page 5 highlights

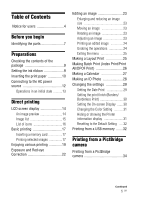
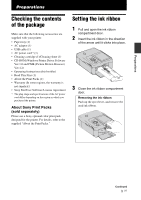
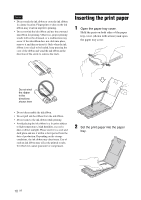
Table of Contents Notice for users 4 Before you begin Identifying the parts 7 Preparations Checking the contents of the package 9 Setting the ink ribbon 9 Inserting the print paper 10 Connecting to the AC power source 12 Operations in an initial state ...........13 Direct printing LCD screen display 14 An image preview 14 Image list 15 List of icons 16 Basic printing 17 Inserting a memory card 17 Printing selected images 17 Enjoying various printing 19 Exposure and Red-eye Correction 22 Editing an image 23 Enlarging and reducing an image size 23 Moving an image 23 Rotating an image 23 Adjusting an image 23 Printing an edited image 24 Undoing the operations 24 Exiting the menu 25 Making a Layout Print 25 Making Batch Print (Index Print/Print All/DPOF Print 26 Making a Calendar 27 Making an ID Photo 28 Changing the settings 29 Setting the Date Print 29 Setting the print finish (Borders/ Borderless Print 30 Setting the On-screen Display ....... 30 Changing the Color Setting 31 Hiding or showing the Printer information display 31 Resetting to the Default Setting ..... 32 Printing from a USB memory .......32 Printing from a PictBridge camera Printing from a PictBridge camera 34 Continued 5 GB

  • 1
  • 2
  • 3
  • 4
  • 5
  • 6
  • 7
  • 8
  • 9
  • 10
  • 11
  • 12
  • 13
  • 14
  • 15
  • 16
  • 17
  • 18
  • 19
  • 20
  • 21
  • 22
  • 23
  • 24
  • 25
  • 26
  • 27
  • 28
  • 29
  • 30
  • 31
  • 32
  • 33
  • 34
  • 35
  • 36
  • 37
  • 38
  • 39
  • 40
  • 41
  • 42
  • 43
  • 44
  • 45
  • 46
  • 47
  • 48
  • 49
  • 50
  • 51
  • 52
  • 53
  • 54
  • 55
  • 56
  • 57
  • 58
  • 59
  • 60
  • 61
  • 62
  • 63
  • 64
  • 65
  • 66
  • 67
  • 68
  • 69
  • 70
  • 71
  • 72

5
GB
Table of Contents
Notice for users
.............................
4
Before you begin
Identifying the parts
........................
7
Preparations
Checking the contents of the
package
..........................................
9
Setting the ink ribbon
.....................
9
Inserting the print paper
...............
10
Connecting to the AC power
source
..........................................
12
Operations in an initial state
...........
13
Direct printing
LCD screen display
.......................
14
An image preview
...........................
14
Image list
.......................................
15
List of icons
...................................
16
Basic printing
...............................
17
Inserting a memory card
.................
17
Printing selected images
................
17
Enjoying various printing
..............
19
Exposure and Red-eye
Correction
.....................................
22
Editing an image
...........................
23
Enlarging and reducing an image
size
...............................................
23
Moving an image
..........................
23
Rotating an image
.........................
23
Adjusting an image
........................
23
Printing an edited image
...............
24
Undoing the operations
.................
24
Exiting the menu
...........................
25
Making a Layout Print
..................
25
Making Batch Print (Index Print/Print
All/DPOF Print)
.............................
26
Making a Calendar
.......................
27
Making an ID Photo
.....................
28
Changing the settings
..................
29
Setting the Date Print
...................
29
Setting the print finish (Borders/
Borderless Print)
............................
30
Setting the On-screen Display
.......
30
Changing the Color Setting
...........
31
Hiding or showing the Printer
information display
.......................
31
Resetting to the Default Setting
.....
32
Printing from a USB memory
.......
32
Printing from a PictBridge
camera
Printing from a PictBridge
camera
..........................................
34
Continued