Sony DPPFP67 Operating Instructions - Page 18
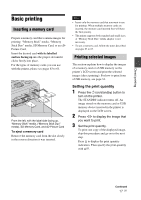
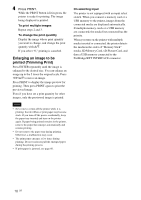
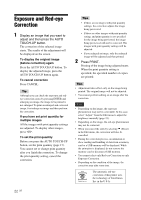
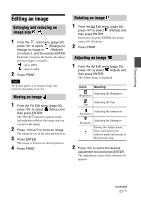
Enlarging an image to be, printed Trimming Print, Press PRINT.
 |
UPC - 027242766822
View all Sony DPPFP67 manuals
Add to My Manuals
Save this manual to your list of manuals |
Page 18 highlights
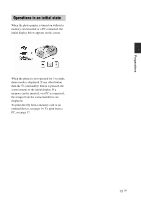
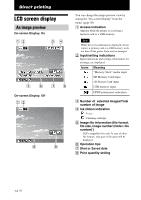
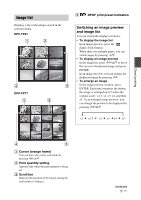
4 Press PRINT. While the PRINT button is lit in green, the printer is ready for printing. The image being displayed is printed. To print multiple images Repeat steps 2 and 3. To change the print quantity Display the image whose print quantity you want to change, and change the print quantity with f/F. If you select "0," printing is canceled. Enlarging an image to be printed (Trimming Print) Press ENTER repeatedly until the image is enlarged to the desired size. You can enlarge an image up to the 5 times the original scale. Press g/G/f/F to move an image. Press PRINT to display the image preview for printing. Then press PRINT again to print the previewed image. Even if you have set a print quantity for other images, only the previewed image is printed. Notes • Never move or turn off the printer while it is printing; the ink ribbon or print paper may become stuck. If you turn off the power accidentally, keep the paper tray inserted and turn on the printer again. If paper being printed remains in the printer, remove the paper that emerges automatically and resume printing. • Do not remove the paper tray during printing. Otherwise, a malfunction may occur. • The print paper emerges a few times during printing. Do not touch nor pull the emerged paper during the printing process. • If print paper is jammed, see page 60. On selecting input The printer is not equipped with an input select switch. When you connect a memory card or a USB memory to the printer, images from the connected media are displayed automatically. If multiple memory cards or a USB memory are connected, the media first connected has the priority. When you turn on the printer with multiple media inserted or connected, the printer detects the media in the order of "Memory Stick" media, SD Memory Card, xD-Picture Card, and then a USB memory connected to the PictBridge/EXT INTERFACE connector. 18 GB
-
 1
1 -
2
-
3
-
4
-
5
-
6
-
7
-
8
-
9
-
10
-
11
-
12
-
 13
13 -
 14
14 -
 15
15 -
 16
16 -
 17
17 -
 18
18 -
 19
19 -
 20
20 -
 21
21 -
 22
22 -
 23
23 -
24
-
25
-
26
-
27
-
28
-
29
-
30
-
31
-
32
-
33
-
34
-
35
-
36
-
37
-
38
-
39
-
40
-
41
-
42
-
43
-
44
-
45
-
46
-
47
-
48
-
49
-
50
-
51
-
52
-
53
-
54
-
55
-
56
-
57
-
58
-
59
-
60
-
61
-
62
-
63
-
64
-
65
-
66
-
67
-
68
-
69
-
70
-
71
-
72
 |
 |