Sony DSC-RX100M4 Help Guide (Printable PDF) - Page 109
] How to Use
 |
View all Sony DSC-RX100M4 manuals
Add to My Manuals
Save this manual to your list of manuals |
Page 109 highlights
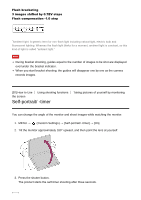
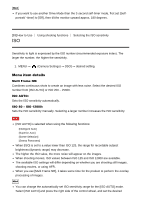
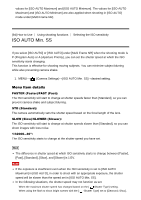
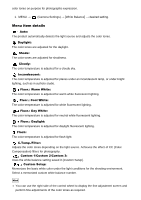
Hint If you want to use another Drive Mode than the 3-second self-timer mode, first set [Selfportrait/ -timer] to [Off], then tilt the monitor upward approx. 180 degrees. [93] How to Use ISO Using shooting functions Selecting the ISO sensitivity Sensitivity to light is expressed by the ISO number (recommended exposure index). The larger the number, the higher the sensitivity. 1. MENU → (Camera Settings) → [ISO] → desired setting. Menu item details Multi Frame NR: Combines continuous shots to create an image with less noise. Select the desired ISO number from [ISO AUTO] or ISO 200 - 25600. ISO AUTO: Sets the ISO sensitivity automatically. ISO 80 - ISO 12800: Sets the ISO sensitivity manually. Selecting a larger number increases the ISO sensitivity. Note [ISO AUTO] is selected when using the following functions: [Intelligent Auto] [Superior Auto] [Scene Selection] [Sweep Panorama] When [ISO] is set to a value lower than ISO 125, the range for recordable subject brightness (dynamic range) may decrease. The higher the ISO value, the more noise will appear on the images. When shooting movies, ISO values between ISO 125 and ISO 12800 are available. The available ISO settings will differ depending on whether you are shooting still images, shooting movies, or using HFR. When you use [Multi Frame NR], it takes some time for the product to perform the overlay processing of images. Hint You can change the automatically set ISO sensitivity range for the [ISO AUTO] mode. Select [ISO AUTO] and press the right side of the control wheel, and set the desired
-
 1
1 -
2
-
3
-
4
-
5
-
6
-
7
-
8
-
9
-
10
-
11
-
12
-
13
-
14
-
15
-
16
-
17
-
18
-
19
-
20
-
21
-
22
-
23
-
24
-
25
-
26
-
27
-
28
-
29
-
30
-
31
-
32
-
33
-
34
-
35
-
36
-
37
-
38
-
39
-
40
-
41
-
42
-
43
-
44
-
45
-
46
-
47
-
48
-
49
-
50
-
51
-
52
-
53
-
54
-
55
-
56
-
57
-
58
-
59
-
60
-
61
-
62
-
63
-
64
-
65
-
66
-
67
-
68
-
69
-
70
-
71
-
72
-
73
-
74
-
75
-
76
-
77
-
78
-
79
-
80
-
81
-
82
-
83
-
84
-
85
-
86
-
87
-
88
-
89
-
90
-
91
-
92
-
93
-
94
-
95
-
96
-
97
-
98
-
99
-
100
-
101
-
102
-
103
-
 104
104 -
 105
105 -
 106
106 -
 107
107 -
 108
108 -
 109
109 -
 110
110 -
 111
111 -
 112
112 -
 113
113 -
 114
114 -
115
-
116
-
117
-
118
-
119
-
120
-
121
-
122
-
123
-
124
-
125
-
126
-
127
-
128
-
129
-
130
-
131
-
132
-
133
-
134
-
135
-
136
-
137
-
138
-
139
-
140
-
141
-
142
-
143
-
144
-
145
-
146
-
147
-
148
-
149
-
150
-
151
-
152
-
153
-
154
-
155
-
156
-
157
-
158
-
159
-
160
-
161
-
162
-
163
-
164
-
165
-
166
-
167
-
168
-
169
-
170
-
171
-
172
-
173
-
174
-
175
-
176
-
177
-
178
-
179
-
180
-
181
-
182
-
183
-
184
-
185
-
186
-
187
-
188
-
189
-
190
-
191
-
192
-
193
-
194
-
195
-
196
-
197
-
198
-
199
-
200
-
201
-
202
-
203
-
204
-
205
-
206
-
207
-
208
-
209
-
210
-
211
-
212
-
213
-
214
-
215
-
216
-
217
-
218
-
219
-
220
-
221
-
222
-
223
-
224
-
225
-
226
-
227
-
228
-
229
-
230
-
231
-
232
-
233
-
234
-
235
-
236
-
237
-
238
-
239
-
240
-
241
-
242
-
243
-
244
-
245
-
246
-
247
-
248
-
249
-
250
-
251
-
252
-
253
-
254
-
255
-
256
-
257
-
258
-
259
 |
 |