Sony DSC-RX100M4 Help Guide (Printable PDF) - Page 165
Protect, Beauty Effect
 |
View all Sony DSC-RX100M4 manuals
Add to My Manuals
Save this manual to your list of manuals |
Page 165 highlights
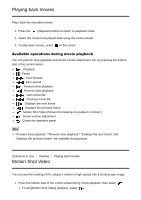
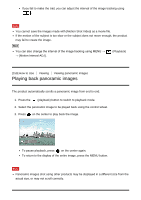
Protect Protects recorded images against accidental erasure. The protected images. mark is displayed on 1. MENU → (Playback) → [Protect] → desired setting. Menu item details Multiple Img.: Applies or cancels the protection of the selected multiple images. (1) Select the image to be protected, then press on the center of the control wheel. The mark is displayed in the check box. To cancel the selection, press again to remove the mark. (2) To protect other images, repeat step (1). (3) MENU → [OK] → Press on the center. All in this Folder: Protects all images in the selected folder. All with this date: Protects all images in the selected date range. Cancel All in this Folder: Cancels the protection of all images in the selected folder. Cancel All with this date: Cancels the protection of all images in the selected date range. Note The menu items that can be selected differ depending on the [View Mode] setting. [166] How to Use Viewing Using viewing functions Beauty Effect Allows you to apply the Beauty Effect to retouch the still image of a person and make it look better, for example, by retouching it for smoother skin, larger eyes, and whiter teeth. You can set the effects from level 1 to level 5. An image on which the Beauty Effect is used is saved as a new file. The original image is retained as it is. 1. MENU → (Playback) → [Beauty Effect].
-
 1
1 -
2
-
3
-
4
-
5
-
6
-
7
-
8
-
9
-
10
-
11
-
12
-
13
-
14
-
15
-
16
-
17
-
18
-
19
-
20
-
21
-
22
-
23
-
24
-
25
-
26
-
27
-
28
-
29
-
30
-
31
-
32
-
33
-
34
-
35
-
36
-
37
-
38
-
39
-
40
-
41
-
42
-
43
-
44
-
45
-
46
-
47
-
48
-
49
-
50
-
51
-
52
-
53
-
54
-
55
-
56
-
57
-
58
-
59
-
60
-
61
-
62
-
63
-
64
-
65
-
66
-
67
-
68
-
69
-
70
-
71
-
72
-
73
-
74
-
75
-
76
-
77
-
78
-
79
-
80
-
81
-
82
-
83
-
84
-
85
-
86
-
87
-
88
-
89
-
90
-
91
-
92
-
93
-
94
-
95
-
96
-
97
-
98
-
99
-
100
-
101
-
102
-
103
-
104
-
105
-
106
-
107
-
108
-
109
-
110
-
111
-
112
-
113
-
114
-
115
-
116
-
117
-
118
-
119
-
120
-
121
-
122
-
123
-
124
-
125
-
126
-
127
-
128
-
129
-
130
-
131
-
132
-
133
-
134
-
135
-
136
-
137
-
138
-
139
-
140
-
141
-
142
-
143
-
144
-
145
-
146
-
147
-
148
-
149
-
150
-
151
-
152
-
153
-
154
-
155
-
156
-
157
-
158
-
159
-
 160
160 -
 161
161 -
 162
162 -
 163
163 -
 164
164 -
 165
165 -
 166
166 -
 167
167 -
 168
168 -
 169
169 -
 170
170 -
171
-
172
-
173
-
174
-
175
-
176
-
177
-
178
-
179
-
180
-
181
-
182
-
183
-
184
-
185
-
186
-
187
-
188
-
189
-
190
-
191
-
192
-
193
-
194
-
195
-
196
-
197
-
198
-
199
-
200
-
201
-
202
-
203
-
204
-
205
-
206
-
207
-
208
-
209
-
210
-
211
-
212
-
213
-
214
-
215
-
216
-
217
-
218
-
219
-
220
-
221
-
222
-
223
-
224
-
225
-
226
-
227
-
228
-
229
-
230
-
231
-
232
-
233
-
234
-
235
-
236
-
237
-
238
-
239
-
240
-
241
-
242
-
243
-
244
-
245
-
246
-
247
-
248
-
249
-
250
-
251
-
252
-
253
-
254
-
255
-
256
-
257
-
258
-
259
 |
 |
