TP-Link TD-W8950N TD-W8950N V1 User Guide 1910010940 - Page 93
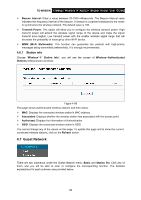
Guest Network
 |
View all TP-Link TD-W8950N manuals
Add to My Manuals
Save this manual to your list of manuals |
Page 93 highlights
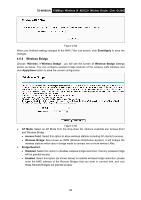
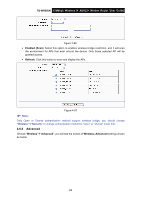
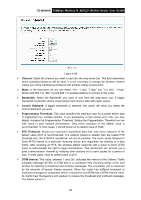
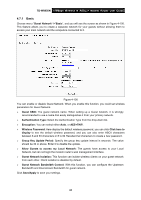
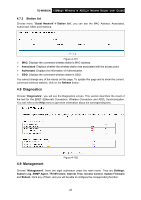
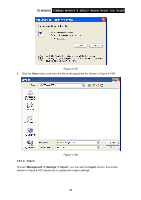
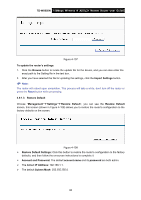
TD-W8950N 150Mbps Wireless N ADSL2+ Modem Router User Guide Beacon Interval: Enter a value between 20-1000 milliseconds. The Beacon Interval value indicates the frequency interval of the beacon. A beacon is a packet broadcast by the router to synchronize the wireless network. The default value is 100. Transmit Power: This option will allow you to configure the wireless transmit power. High transmit power will extend the wireless signal range of the device and make the signal transmit more legible. Low transmit power with the smaller wireless signal range that will decrease the probability of interrupt by other Wi-Fi device. WMM (Wi-Fi Multimedia): This function can guarantee the packets with high-priority messages being transmitted preferentially. It is strongly recommended. 4.6.7 Station info Choose "Wireless"" Station Info", you will see the screen of Wireless--Authenticated Stations setting shown as below. Figure 4-99 This page shows authenticated wireless stations and their status. MAC: Displays the connected wireless station's MAC address. Associated: Displays whether the wireless station has associated with the access point. Authorized: Displays the information of Authentication. SSID: Displays the connected wireless station's SSID. You cannot change any of the values on this page. To update this page and to show the current connected wireless stations, click on the Refresh button. 4.7 Guest Network There are two submenus under the Guest Network menu: Basic and Station list. Click any of them, and you will be able to scan or configure the corresponding function. The detailed explanations for each submenu are provided below. 85
-
 1
1 -
2
-
3
-
4
-
5
-
6
-
7
-
8
-
9
-
10
-
11
-
12
-
13
-
14
-
15
-
16
-
17
-
18
-
19
-
20
-
21
-
22
-
23
-
24
-
25
-
26
-
27
-
28
-
29
-
30
-
31
-
32
-
33
-
34
-
35
-
36
-
37
-
38
-
39
-
40
-
41
-
42
-
43
-
44
-
45
-
46
-
47
-
48
-
49
-
50
-
51
-
52
-
53
-
54
-
55
-
56
-
57
-
58
-
59
-
60
-
61
-
62
-
63
-
64
-
65
-
66
-
67
-
68
-
69
-
70
-
71
-
72
-
73
-
74
-
75
-
76
-
77
-
78
-
79
-
80
-
81
-
82
-
83
-
84
-
85
-
86
-
87
-
 88
88 -
 89
89 -
 90
90 -
 91
91 -
 92
92 -
 93
93 -
 94
94 -
 95
95 -
 96
96 -
 97
97 -
 98
98 -
99
-
100
-
101
-
102
-
103
-
104
-
105
-
106
-
107
-
108
-
109
-
110
-
111
-
112
-
113
-
114
-
115
-
116
 |
 |
