TRENDnet TEW-827DRU Users Guide - Page 16
Guest Network, Auto 20/40MHz 11n or Auto 20/40/80MHz 11ac
 |
View all TRENDnet TEW-827DRU manuals
Add to My Manuals
Save this manual to your list of manuals |
Page 16 highlights
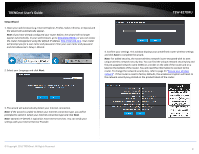
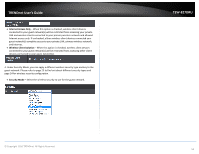
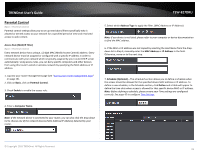
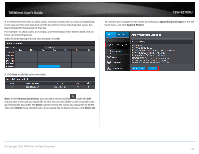
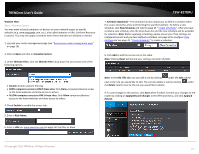
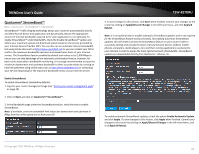
TRENDnet User's Guide Frequency (Channel) - Selecting the AutoSelect option will set your router to scan for the appropriate wireless channel to use automatically. Click the drop-down list and select the desired Channel for wireless communication. The goal is to select the Channel that is least used by neighboring wireless networks. Channel Width: Select the appropriate channel width for your wireless network. This setting only applies to 802.11n and 802.11ac. For greater 802.11n performance, select Auto 20/40MHz (Options: 20MHz or Auto 20/40MHz). It is recommended to use the default channel bandwidth settings. For greater 802.11ac performance, select Auto 20/40/80MHz (Options: 20MHz, Auto 20/40MHz, Auto 20/40/80MHz). It is recommended to use the default channel width settings. Note: Please note that the default settings may provide more stability than the higher channel bandwidth settings such as Auto 20/40/80MHz for connectivity in busy wireless environments where there are several wireless networks in the area. o 20 MHz - This mode operates using a single 20MHz channel for wireless devices connecting at 802.11n on both 2.4GHz and 5GHz. This setting may provide more stability than 20/40MHz (Auto) for connectivity in busy wireless environments where there are several neighboring wireless networks in the area. o Auto 20/40MHz (11n) or Auto 20/40/80MHz (11ac) -When this setting is active, this mode is capable of providing higher performance only if the wireless devices support the channel width settings. Enabling Auto 20/40MHz or Auto 20/40/80 MHz typically results in substantial performance increases when connecting an 802.11ac/n wireless client. TEW-827DRU Guest Network Basic > Guest Network (2.4GHz or 5GHz) Creating an isolated and separate wireless guest network (2.4GHz or 5GHz) allows wireless clients to connect to your network for Internet access only and keep your local LAN network safe by restricting guest access to your LAN network resources such as shared documents and media files on your computers, network storage, and printers. 1. Log into your router management page (see "Access your router management page" on page 10). 2. Click on Basic and click on Guest Network. 3. Review the Guest Zone settings. To save changes to this section, click Save when finished. Commit your changes to the router by clicking on Apply/Discard Changes in the left-hand menu, and click Apply & Reboot. Choose which band to enable the Guest Network (Wireless - 2.4GHz or 5GHz): Radio On/Off - Check this option to enable the wireless guest network. New Schedule - The schedule function allows you to define a schedule when the wireless guest network should be turned on. To define a new schedule, click New Schedule and refer to page 43 " Create Schedules". After you have created a new schedule, click the drop-down list and the new schedule will be available for selection. Note: Before applying scheduling, please ensure your Time settings are configured correct and you have defined a schedule. See page 42 to configure Time Settings and see page 43 " Create Schedules" to create a schedule. Wireless Network Name (SSID) - This acronym stands for Service Set Identifier and is the name of your wireless network. It differentiates your wireless network from others around you. It is recommended to use a different name from your primary wireless network to a name that you can easily identify and differentiate from the primary. You can reference your guests to access this network instead of the primary. © Copyright 2016 TRENDnet. All Rights Reserved. 13
-
 1
1 -
2
-
3
-
4
-
5
-
6
-
7
-
8
-
9
-
10
-
 11
11 -
 12
12 -
 13
13 -
 14
14 -
 15
15 -
 16
16 -
 17
17 -
 18
18 -
 19
19 -
 20
20 -
 21
21 -
22
-
23
-
24
-
25
-
26
-
27
-
28
-
29
-
30
-
31
-
32
-
33
-
34
-
35
-
36
-
37
-
38
-
39
-
40
-
41
-
42
-
43
-
44
-
45
-
46
-
47
-
48
-
49
-
50
-
51
-
52
-
53
-
54
-
55
-
56
-
57
-
58
-
59
-
60
-
61
-
62
-
63
-
64
-
65
-
66
-
67
-
68
-
69
-
70
-
71
-
72
-
73
-
74
-
75
-
76
-
77
-
78
-
79
-
80
-
81
-
82
-
83
-
84
-
85
-
86
-
87
 |
 |
