TRENDnet TEW-827DRU Users Guide - Page 39
Advanced Router Settings, Change your router login password - default login
 |
View all TRENDnet TEW-827DRU manuals
Add to My Manuals
Save this manual to your list of manuals |
Page 39 highlights
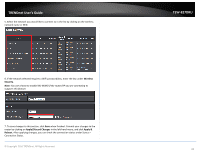
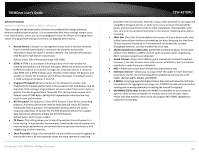
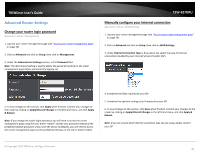
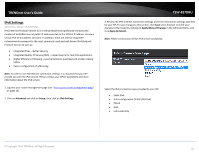
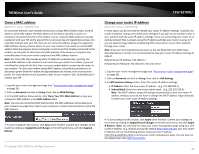
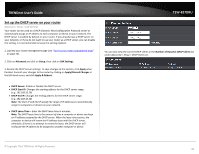
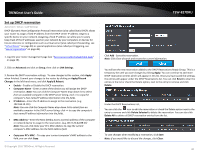
TRENDnet User's Guide Advanced Router Settings Change your router login password Advanced > Setup > Management 1. Log into your router management page (see "Access your router management page" on page 10). 2. Click on Advanced and click on Setup, then click on Management. 3. Under the Administrator Settings section, in the Password field. Note: The idle timeout setting is used to define the period of inactivity in the router management page before automatically logging out. TEW-827DRU Manually configure your Internet connection Advanced > Setup > WAN Settings 1. Log into your router management page (see "Access your router management page" on page 10). 2. Click on Advanced and click on Setup, then click on WAN Settings. 3. Under Internet Connection Type in drop-down list, select the type of Internet connection provided by your Internet Service Provider (ISP). 4. To save changes to this section, click Apply when finished. Commit your changes to the router by clicking on Apply/Discard Changes in the left-hand menu, and click Apply & Reboot. Note: If you change the router login password, you will need to access the router management page using the User Name "admin" and the new password instead of the predefined default password. If you reset the device to defaults, you will need to access the router management page use the predefined settings on the side or bottom labels. 4. Complete the fields required by your ISP. 5. Complete the optional settings only if required by your ISP. 6. To save changes to this section, click Save when finished. Commit your changes to the router by clicking on Apply/Discard Changes in the left-hand menu, and click Apply & Reboot. Note: If you are unsure which Internet connection type you are using, please contact your ISP. © Copyright 2016 TRENDnet. All Rights Reserved. 36
-
 1
1 -
2
-
3
-
4
-
5
-
6
-
7
-
8
-
9
-
10
-
11
-
12
-
13
-
14
-
15
-
16
-
17
-
18
-
19
-
20
-
21
-
22
-
23
-
24
-
25
-
26
-
27
-
28
-
29
-
30
-
31
-
32
-
33
-
 34
34 -
 35
35 -
 36
36 -
 37
37 -
 38
38 -
 39
39 -
 40
40 -
 41
41 -
 42
42 -
 43
43 -
 44
44 -
45
-
46
-
47
-
48
-
49
-
50
-
51
-
52
-
53
-
54
-
55
-
56
-
57
-
58
-
59
-
60
-
61
-
62
-
63
-
64
-
65
-
66
-
67
-
68
-
69
-
70
-
71
-
72
-
73
-
74
-
75
-
76
-
77
-
78
-
79
-
80
-
81
-
82
-
83
-
84
-
85
-
86
-
87
 |
 |
