TRENDnet TEW-827DRU Users Guide - Page 20
Website Filter, Apply/Discard Changes
 |
View all TRENDnet TEW-827DRU manuals
Add to My Manuals
Save this manual to your list of manuals |
Page 20 highlights
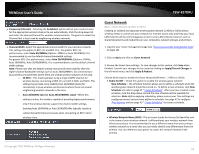
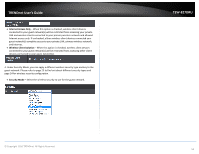
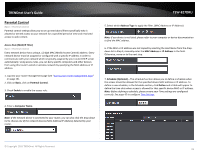
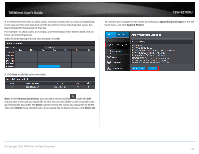
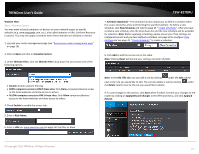
TRENDnet User's Guide Website Filter Basic > Parental Control You may want to block computers or devices on your network access to specific websites (e.g. www.xxxxxxxxx.com, etc.), also called domains or URLs (Uniform Resource Locators). You may also apply a schedule when these websites are allowed or denied. 1. Log into your router management page (see "Access your router management page" on page 10). 2. Click on Basic and click on Parental Control. 3. Under Website Filter, click the Website Filter drop-down list and choose one of the following options. TEW-827DRU 7. Schedule (Optional) - The schedule function allows you to define a schedule when the access should be active and blocking the specified website. To define a new schedule, click New Schedule and refer to page 43 " Create Schedules". After you have created a new schedule, click the drop-down list and the new schedule will be available for selection. Note: Before applying scheduling, please ensure your Time settings are configured correct and you have defined a schedule. See page 42 to configure Time Settings and see page 43 " Create Schedules" to create a schedule. 8. Click Add to add the access rule to the table. Note: Clicking Reset will discard your settings and clear all fields. Disable disables website filtering. DENY computers access to ONLY these sites: Only Deny computers/devices access to the listed websites and allow access to others. ALLOW computers access to ONLY these sites: Only Allow computers/devices access to the listed websites and deny access to others. 4. Check Enable to enable the access rule. 5. Enter a Rule Name. 6. Enter a URL (ex. www.xxxxxxxx.com) to apply for the filter or block Note: In the URL Fille List, you can edit a rule by clicking under the Edit column next to the rule you would like to edit. You can also delete a rule by clicking the Delete column next to the rule you would like to delete. under 9. To save changes to this section, click Save when finished. Commit your changes to the router by clicking on Apply/Discard Changes in the left-hand menu, and click Apply & Reboot. © Copyright 2016 TRENDnet. All Rights Reserved. 17
-
 1
1 -
2
-
3
-
4
-
5
-
6
-
7
-
8
-
9
-
10
-
11
-
12
-
13
-
14
-
 15
15 -
 16
16 -
 17
17 -
 18
18 -
 19
19 -
 20
20 -
 21
21 -
 22
22 -
 23
23 -
 24
24 -
 25
25 -
26
-
27
-
28
-
29
-
30
-
31
-
32
-
33
-
34
-
35
-
36
-
37
-
38
-
39
-
40
-
41
-
42
-
43
-
44
-
45
-
46
-
47
-
48
-
49
-
50
-
51
-
52
-
53
-
54
-
55
-
56
-
57
-
58
-
59
-
60
-
61
-
62
-
63
-
64
-
65
-
66
-
67
-
68
-
69
-
70
-
71
-
72
-
73
-
74
-
75
-
76
-
77
-
78
-
79
-
80
-
81
-
82
-
83
-
84
-
85
-
86
-
87
 |
 |
