Toshiba Portege M300 User Manual - Page 84
System Recovery Options, Create Optical Recovery Discs
 |
View all Toshiba Portege M300 manuals
Add to My Manuals
Save this manual to your list of manuals |
Page 84 highlights
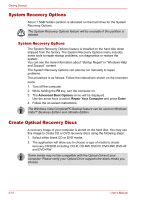
Getting Started System Recovery Options About 1.5GB hidden partition is allocated on the hard drive for the System Recovery Options. The System Recovery Options feature will be unusable if this partition is deleted. System Recovery Options The System Recovery Options feature is installed on the hard disk when shipped from the factory. The System Recovery Options menu includes some tools to repair startup problems, run diagnostics or restore the system. You can see the more information about "Startup Repair" in "Windows Help and Support" content. The System Recovery Options can also be run manually to repair problems. The procedure is as follows. Follow the instructions shown on the onscreen menu. 1. Turn off the computer. 2. While holding the F8 key, turn the computer on. 3. The Advanced Boot Options menu will be displayed. Use the arrow keys to select Repair Your Computer and press Enter. 4. Follow the on-screen instructions. The Windows Vista CompletePC Backup feature can be used on Windows Vista™ Business Edition and Ultimate Edition. Create Optical Recovery Discs A recovery image of your computer is stored on the hard disk. You may use this image to create CD or DVD recovery discs using the following steps: 1. Select either blank CD or DVD media. 2. The application will allow you to choose a type of media to create recovery CD/DVD including: CD-R, CD-RW, DVD-R, DVD-RW, DVD+R and DVD+RW. Some media may not be compatible with the Optical Drive of your computer. Please verify your Optical Drive supports the blank media you choose. 3-10 User's Manual
-
 1
1 -
2
-
3
-
4
-
5
-
6
-
7
-
8
-
9
-
10
-
11
-
12
-
13
-
14
-
15
-
16
-
17
-
18
-
19
-
20
-
21
-
22
-
23
-
24
-
25
-
26
-
27
-
28
-
29
-
30
-
31
-
32
-
33
-
34
-
35
-
36
-
37
-
38
-
39
-
40
-
41
-
42
-
43
-
44
-
45
-
46
-
47
-
48
-
49
-
50
-
51
-
52
-
53
-
54
-
55
-
56
-
57
-
58
-
59
-
60
-
61
-
62
-
63
-
64
-
65
-
66
-
67
-
68
-
69
-
70
-
71
-
72
-
73
-
74
-
75
-
76
-
77
-
78
-
 79
79 -
 80
80 -
 81
81 -
 82
82 -
 83
83 -
 84
84 -
 85
85 -
 86
86 -
 87
87 -
 88
88 -
 89
89 -
90
-
91
-
92
-
93
-
94
-
95
-
96
-
97
-
98
-
99
-
100
-
101
-
102
-
103
-
104
-
105
-
106
-
107
-
108
-
109
-
110
-
111
-
112
-
113
-
114
-
115
-
116
-
117
-
118
-
119
-
120
-
121
-
122
-
123
-
124
-
125
-
126
-
127
-
128
-
129
-
130
-
131
-
132
-
133
-
134
-
135
-
136
-
137
-
138
-
139
-
140
-
141
-
142
-
143
-
144
-
145
-
146
-
147
-
148
-
149
-
150
-
151
-
152
-
153
-
154
-
155
-
156
-
157
-
158
-
159
-
160
-
161
-
162
-
163
-
164
-
165
-
166
-
167
-
168
-
169
-
170
-
171
-
172
-
173
-
174
-
175
-
176
-
177
-
178
-
179
-
180
-
181
-
182
-
183
-
184
-
185
-
186
-
187
-
188
-
189
-
190
-
191
-
192
-
193
-
194
-
195
-
196
-
197
-
198
-
199
-
200
-
201
-
202
-
203
-
204
-
205
-
206
-
207
-
208
-
209
-
210
-
211
-
212
-
213
-
214
-
215
-
216
-
217
-
218
-
219
-
220
-
221
-
222
-
223
-
224
 |
 |
