Xerox 7300B Study Guide - Page 18
Select Printer Defaults - network setup
 |
UPC - 095205780079
View all Xerox 7300B manuals
Add to My Manuals
Save this manual to your list of manuals |
Page 18 highlights
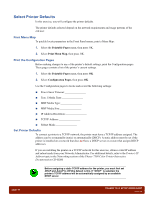
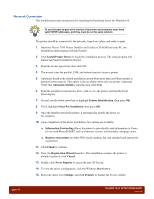
Select Printer Defaults In this exercise, you will configure the printer defaults. The printer defaults selected depend on the network requirements and usage patterns of the end user. Print Menu Map To quickly locate parameters in the Front Panel menus, print a Menu Map: 1. Select the Printable Pages menu, then press OK. 2. Select Print Menu Map, then press OK. Print the Configuration Pages Before making changes to any of the printer's default settings, print the Configuration pages. These pages contain a list of the printer's current settings. 1. Select the Printable Pages menu, then press OK. 2. Select Configuration Pages, then press OK. Use the Configuration pages to locate and record the following settings: ■ Power Saver Timeout ■ Tray 1 Media Type ■ MBF Media Type ■ MBF Media Size ■ IP Address Resolution ■ TCP/IP Address ■ Subnet Mask Set Printer Defaults To connect a printer to a TCP/IP network, the printer must have a TCP/IP address assigned. The address can be set manually (static) or automatically (DHCP). A static address must be set if the printer is installed on a network that does not have a DHCP server or a router that assigns DHCP addresses. If you are installing the printer on a TCP/IP network for this exercise, obtain a valid IP address and subnet mask from your Network Administrator. For additional details, refer to the Printer's IP Address topic in the Networking section of the Phaser 7300 Color Printer Interactive Documentation CD-ROM. Before assigning a static TCP/IP address for the printer, you must first set DHCP and AutoIP to Off (the default is On). If "DHCP" is selected, the printer's TCP/IP address will be automatically assigned by an available DHCP server. page 14 PHASER 7300 SETUP WORKSHEET version 1.0
-
 1
1 -
2
-
3
-
4
-
5
-
6
-
7
-
8
-
9
-
10
-
11
-
12
-
 13
13 -
 14
14 -
 15
15 -
 16
16 -
 17
17 -
 18
18 -
 19
19 -
 20
20 -
 21
21 -
 22
22 -
 23
23 -
24
-
25
-
26
-
27
-
28
-
29
-
30
-
31
-
32
-
33
-
34
-
35
-
36
-
37
-
38
-
39
-
40
-
41
-
42
-
43
-
44
-
45
-
46
-
47
-
48
-
49
-
50
-
51
-
52
-
53
-
54
-
55
-
56
-
57
-
58
-
59
-
60
-
61
-
62
-
63
-
64
-
65
-
66
-
67
-
68
 |
 |
