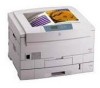
Xerox 7300B Study Guide - Page 27
Imaging Units - black toner
 |
UPC - 095205780079
View all Xerox 7300B manuals
Add to My Manuals
Save this manual to your list of manuals |
Page 27 highlights
Remove and Replace Toner Cartridges In this exercise, you will remove and replace Toner Cartridges and clean the LED assembly lenses. To avoid damage to the Imaging Units that degrades print quality, do not expose them to light for more than 10 minutes. Refer to the Toner Cartridge instruction sheet on the Phaser 7300 Customer Support Training CD-ROM for Information on replacing Toner Cartridges. 1. Using the Toner Cartridge instruction sheet, remove and replace the black Toner Cartridge while observing the procedure closely. 2. Remove and replace the magenta Toner Cartridge. 3. Using a lint-free cloth, clean the lens area on the LED assemblies. The LED assemblies should be cleaned to remove toner dust, which causes light or dark vertical lines to appear on prints. A lint-free cloth is packaged with each replacement Toner Cartridge. Toner Cartridge Life Expectancy There are two types of Toner Cartridges available for the printer: standard and high-capacity. The life expectancy of each Toner Cartridge is based on an average 5% coverage per color: ■ Standard cartridge - 7,500 images ■ High capacity cartridge - 15,000 images As the toner coverage for prints increases, the life expectancy of the Toner Cartridge decreases proportionately. Therefore, if the toner coverage doubles to 10%, the life expectancy of a standard cartridge drops to 3,750, half of the standard life. Multiple short print jobs (less than 5 pages) reduce the life expectancy of the Toner Cartridges. A single print job of 100 pages uses less toner than 100 individual single-page print jobs. Toner Cartridge life expectancy is also reduced each time the top cover is opened and closed, and when the printer is turned off and then on. Imaging Units The four LED assemblies neutralize the negative charge on the Imaging Units to form latent images. Toner is then applied to the neutralized areas to develop the image. The images are transferred directly to the paper, where the images are overlaid to form the composite color image. Each Imaging Unit is keyed using a plastic tab on the right side, which ensures it is installed only into the correct location within the printer. Front Panel messages indicate when the Imaging Units should be replaced. PHASER 7300 CARE WORKSHEET 0 page 23
-
 1
1 -
2
-
3
-
4
-
5
-
6
-
7
-
8
-
9
-
10
-
11
-
12
-
13
-
14
-
15
-
16
-
17
-
18
-
19
-
20
-
21
-
 22
22 -
 23
23 -
 24
24 -
 25
25 -
 26
26 -
 27
27 -
 28
28 -
 29
29 -
 30
30 -
 31
31 -
 32
32 -
33
-
34
-
35
-
36
-
37
-
38
-
39
-
40
-
41
-
42
-
43
-
44
-
45
-
46
-
47
-
48
-
49
-
50
-
51
-
52
-
53
-
54
-
55
-
56
-
57
-
58
-
59
-
60
-
61
-
62
-
63
-
64
-
65
-
66
-
67
-
68
 |
 |
