Xerox 7300B Study Guide - Page 20
Network Connection - firmware
 |
UPC - 095205780079
View all Xerox 7300B manuals
Add to My Manuals
Save this manual to your list of manuals |
Page 20 highlights
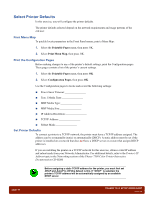
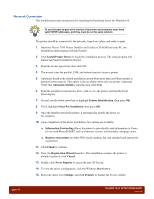
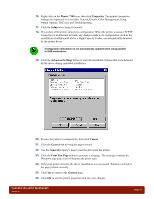
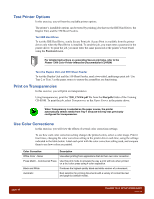
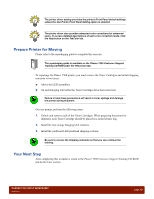
Network Connection This worksheet provides instructions for installing the PostScript driver for Windows 98. To use the peer-to-peer print monitor, the printer and computer must have valid TCP/IP addresses, and they must be on the same network. The printer should be connected to the network, turned on, online, and ready to print. 1. Insert the Phaser 7300 Printer Installer and Utilities CD-ROM into your PC; the installation setup program will auto-launch. 2. Click Install Printer Driver to begin the installation process. The setup program will launch the Printer Installation Wizard. 3. Read the license agreement, then click OK. 4. The wizard scans the parallel, USB, and network ports to locate a printer. 5. Automatic Install is the default installation option when more than one Phaser printer is detected on the network. This option is also available when only one printer is detected. Verify that Automatic Install is selected, then click Next. 6. Read the installation instructions. First, walk over to the printer and find the Front Panel display. 7. Second, use the down arrow key to highlight Printer Identification, then press OK. 8. Third, highlight Select For Installation, then press OK. 9. Once the Installer detects the printer, it automatically installs the driver on the computer. 10. Upon completion of the driver installation, two options are available. ■ Information Forwarding allows the printer to periodically send information to Xerox for use with PhaserSMART, such as firmware version, serial number, and page count. ■ Register your printer provides Web, email, modem, fax, and standard mail options for registration. 11. Click Finish to continue. 12. Next, the Registration Wizard launches. This installation assumes the printer is already registered; click Cancel. 13. Finally, click Never Register to access the exit CD Screen. 14. To view the driver configuration, click the Windows Start button. 15. Roll your cursor over Settings, and click Printers to display the Printers folder. page 16 PHASER 7300 SETUP WORKSHEET version 1.0
-
 1
1 -
2
-
3
-
4
-
5
-
6
-
7
-
8
-
9
-
10
-
11
-
12
-
13
-
14
-
 15
15 -
 16
16 -
 17
17 -
 18
18 -
 19
19 -
 20
20 -
 21
21 -
 22
22 -
 23
23 -
 24
24 -
 25
25 -
26
-
27
-
28
-
29
-
30
-
31
-
32
-
33
-
34
-
35
-
36
-
37
-
38
-
39
-
40
-
41
-
42
-
43
-
44
-
45
-
46
-
47
-
48
-
49
-
50
-
51
-
52
-
53
-
54
-
55
-
56
-
57
-
58
-
59
-
60
-
61
-
62
-
63
-
64
-
65
-
66
-
67
-
68
 |
 |
