Xerox 7300B Study Guide - Page 21
Phaser 7300, Properties, Setup, Advanced Settings, Cancel, General, Print Test - drivers windows 7
 |
UPC - 095205780079
View all Xerox 7300B manuals
Add to My Manuals
Save this manual to your list of manuals |
Page 21 highlights
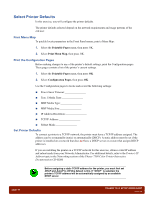
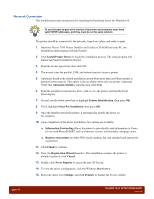
16. Right-click on the Phaser 7300 icon, then click Properties. The printer's properties settings are organized in seven tabs: General, Details, Color Management, Setup, Output Options, TekColor, and Troubleshooting. 17. Click the Setup tab to bring it forward. 18. The picture of the printer depicts its configuration. When the printer is using a TCP/IP connection to an Ethernet network, any changes made to its configuration, such as the installation of additional RAM or a High-Capacity Feeder, are automatically detected by the printer driver. Configuration information is not automatically updated when using parallel or USB connections. 19. Click the Advanced Settings button to view the Installable Options that were detected by the driver during simulated installation. 20. Review the printer's configuration, then click Cancel. 21. Click the General tab to bring the page forward. 22. Use the General property's page to test the driver and the printer. 23. Click the Print Test Page button to generate a test page. The test page contains the Windows logo and a list of filenames the driver uses. 24. If the page prints correctly, the driver installation was successful. Windows will ask if the page printed correctly. 25. Click Yes to return to the General page. 26. Click OK to exit the printer properties and save any changes. PHASER 7300 SETUP WORKSHEET version 1.0 page 17
-
 1
1 -
2
-
3
-
4
-
5
-
6
-
7
-
8
-
9
-
10
-
11
-
12
-
13
-
14
-
15
-
 16
16 -
 17
17 -
 18
18 -
 19
19 -
 20
20 -
 21
21 -
 22
22 -
 23
23 -
 24
24 -
 25
25 -
 26
26 -
27
-
28
-
29
-
30
-
31
-
32
-
33
-
34
-
35
-
36
-
37
-
38
-
39
-
40
-
41
-
42
-
43
-
44
-
45
-
46
-
47
-
48
-
49
-
50
-
51
-
52
-
53
-
54
-
55
-
56
-
57
-
58
-
59
-
60
-
61
-
62
-
63
-
64
-
65
-
66
-
67
-
68
 |
 |
