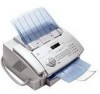
Xerox F110 User Manual - Page 17
Print cartridge, Connecting the Telephone Cable, Connecting the Power Cord - toner cartridge
 |
UPC - 095205004762
View all Xerox F110 manuals
Add to My Manuals
Save this manual to your list of manuals |
Page 17 highlights
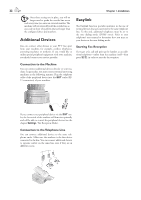
English Chapter 1. Installation 17 Connecting the Telephone Cable Connect the telephone cable to the machine by plugging it into the outlet located on the rear side of the machine and designated by the word LINE. Insert the telephone plug into your PTT line outlet. Connecting the Power Cord Insert the power cord into the connection located on the rear side of the machine. Connect the power cord to the electrical outlet. Print cartridge New Print cartridge Before you can receive documents, make copies, or print, a print cartridge must be inserted into the machine. For this reason, a starter cartridge is supplied with the machine (this cartridge has a capacity of approximately 1,000 pages). e toner level memory for this starter cartridge was set at the factory. e starter cartridge need not be updated with a Plug'n'Print card. For each additional print cartridge that you insert into your machine, you must update the toner level memory with the Plug'n'Print card provided. ¡In order to guarantee a good print quality, use only original XEROX print cartridges. Other print cartridges can cause damage to the machine. 1 Open the cover by taking hold of both document guides and tipping the cover backward. Once the machine is connected to the power supply, the quick install process will immediately commence. You will be asked to select your country and to enter your number and name as well as the date and time (see chapter on Settings). If you would like to perform a quick install again, simply press ¨, and select it with [ or ] help page: 2 installation. Confirm with OK. 2 Remove the old print cartridge, by gripping it at the recess in the middle and pulling it upward. Connecting the USB Cable ÆFIRST INSTALL THE SOFTWARE. e device may not be connected to the PC before this. After the software installation, the PC must be restarted, only then should you connect your PC and the laser machine with a USB cable. For detailed information see chapter PC Connection. ÆCarefully remove the print cartridge from the device so that no toner dust spills out. Take care where you place the print cartridge, escaping toner dust may soil the surface. Store opened or used print cartridges in their original packing or in a plastic bag in order to prevent toner dust from escaping. Dispose of old print cartridges by turning them in at specialised shops or 1. Installation
-
 1
1 -
2
-
3
-
4
-
5
-
6
-
7
-
8
-
9
-
10
-
11
-
 12
12 -
 13
13 -
 14
14 -
 15
15 -
 16
16 -
 17
17 -
 18
18 -
 19
19 -
 20
20 -
 21
21 -
 22
22 -
23
-
24
-
25
-
26
-
27
-
28
-
29
-
30
-
31
-
32
-
33
-
34
-
35
-
36
-
37
-
38
-
39
-
40
-
41
-
42
-
43
-
44
-
45
-
46
-
47
-
48
-
49
-
50
-
51
-
52
-
53
-
54
-
55
-
56
-
57
-
58
-
59
-
60
-
61
-
62
-
63
-
64
-
65
-
66
-
67
-
68
-
69
-
70
-
71
-
72
-
73
-
74
-
75
-
76
-
77
-
78
-
79
-
80
-
81
-
82
-
83
-
84
-
85
-
86
-
87
-
88
-
89
-
90
-
91
-
92
-
93
-
94
-
95
-
96
-
97
-
98
-
99
-
100
-
101
-
102
-
103
-
104
-
105
-
106
-
107
-
108
-
109
-
110
-
111
-
112
-
113
-
114
-
115
-
116
-
117
-
118
-
119
-
120
-
121
-
122
-
123
-
124
-
125
-
126
-
127
-
128
-
129
-
130
-
131
-
132
-
133
-
134
-
135
-
136
-
137
-
138
-
139
-
140
-
141
-
142
-
143
-
144
-
145
-
146
-
147
-
148
 |
 |
