Xerox F110 User Manual - Page 23
Settings, Setting the Country, Setting the Language, Setting the Date and Time
 |
UPC - 095205004762
View all Xerox F110 manuals
Add to My Manuals
Save this manual to your list of manuals |
Page 23 highlights
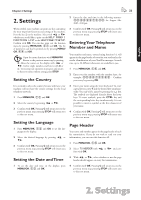
English Chapter 2. Settings 23 2. Settings 2 Enter the date and time in the following manner: 08 08 05 14 00 for August 8th, 2005, 2:00 pm. When needed, your machine can print out lists containing the most important functions and settings of the machine. Press the key ¨ on the machine. Select with [ or ] whether you would like to print out the help page: 1 functions list or the help page: 5 setup. Confirm with OK. You can also print out the function menu by pressing MENU/OK, 41 and OK. e list of parameters can also be printed out by pressing MENU/ OK, 44 and OK. ¡Open the menu functions with MENU/OK. Return to the previous menu step by pressing C. Move the cursor on the display with [ or ]. Delete single numbers and letters with C or \. To interrupt an operation in progress and return to the root menu without saving, press STOP. Setting the Country 3 Confirm with OK. Pressing C will return you to the previous menu step; pressing STOP will return you to the root menu. Entering Your Telephone Number and Name Your number and name, entered using function 14, will appear in the page header of every fax you send and as the sender identification of your Text2Fax messages. In each case, up to 20 different characters are available to you. 1 Press MENU/OK, 14 and OK. 2 Enter your fax number with the number keys, for example, 00 44 123 45... Confirm your entry by pressing OK. It is essential to select the country because otherwise your machine will not have the correct settings for the local telephone network. 1 Press MENU/OK, 11 and OK. 2 Select the country by pressing [ or ]. 3 Confirm with OK. Pressing C will return you to the previous menu step; pressing STOP will return you to the root menu. Setting the Language 1 Press MENU/OK, 12 and OK to set the language on the display. 2 Select the desired language by pressing [ or ]. 3 Confirm with OK. Pressing C will return you to the previous menu step; pressing STOP will return you to the root menu. 3 Enter your name using the letter keyboard. To enter capital letters, press + and the desired key simultaneously. You may add a space by pressing the 1⁄2 key. e symbols are displayed directly above the letter keys. To enter symbols, press the CTRL key and the corresponding letter key simultaneously. It is not possible to insert a symbol as the first character of your name. 4 Confirm with OK. Pressing C will return you to the previous menu step; pressing STOP will return you to the root menu. Page Header Your name and number appear in the page header of each fax transmission. If you do not wish to send out your information, you can turn this function off. 1 Press MENU/OK, 16 and OK. 2 Select tx header with [ or ] and confirm with OK. Setting the Date and Time 3 With [ or ], select whether or not the page header should appear on every fax transmission. 1 To set the date and time on the display, press MENU/OK, 13 and OK. 4 Confirm with OK. Pressing C will return you to the previous menu step; pressing STOP will return you to the root menu. 2. Settings
-
 1
1 -
2
-
3
-
4
-
5
-
6
-
7
-
8
-
9
-
10
-
11
-
12
-
13
-
14
-
15
-
16
-
17
-
 18
18 -
 19
19 -
 20
20 -
 21
21 -
 22
22 -
 23
23 -
 24
24 -
 25
25 -
 26
26 -
 27
27 -
 28
28 -
29
-
30
-
31
-
32
-
33
-
34
-
35
-
36
-
37
-
38
-
39
-
40
-
41
-
42
-
43
-
44
-
45
-
46
-
47
-
48
-
49
-
50
-
51
-
52
-
53
-
54
-
55
-
56
-
57
-
58
-
59
-
60
-
61
-
62
-
63
-
64
-
65
-
66
-
67
-
68
-
69
-
70
-
71
-
72
-
73
-
74
-
75
-
76
-
77
-
78
-
79
-
80
-
81
-
82
-
83
-
84
-
85
-
86
-
87
-
88
-
89
-
90
-
91
-
92
-
93
-
94
-
95
-
96
-
97
-
98
-
99
-
100
-
101
-
102
-
103
-
104
-
105
-
106
-
107
-
108
-
109
-
110
-
111
-
112
-
113
-
114
-
115
-
116
-
117
-
118
-
119
-
120
-
121
-
122
-
123
-
124
-
125
-
126
-
127
-
128
-
129
-
130
-
131
-
132
-
133
-
134
-
135
-
136
-
137
-
138
-
139
-
140
-
141
-
142
-
143
-
144
-
145
-
146
-
147
-
148
 |
 |
