Yamaha DTX502 Owner's Manual - Page 56
Setting Procedure, Storing your settings, Mixer, Voice, >Ki, snareHd, Layer=s, V1* snareHd
 |
View all Yamaha DTX502 manuals
Add to My Manuals
Save this manual to your list of manuals |
Page 56 highlights
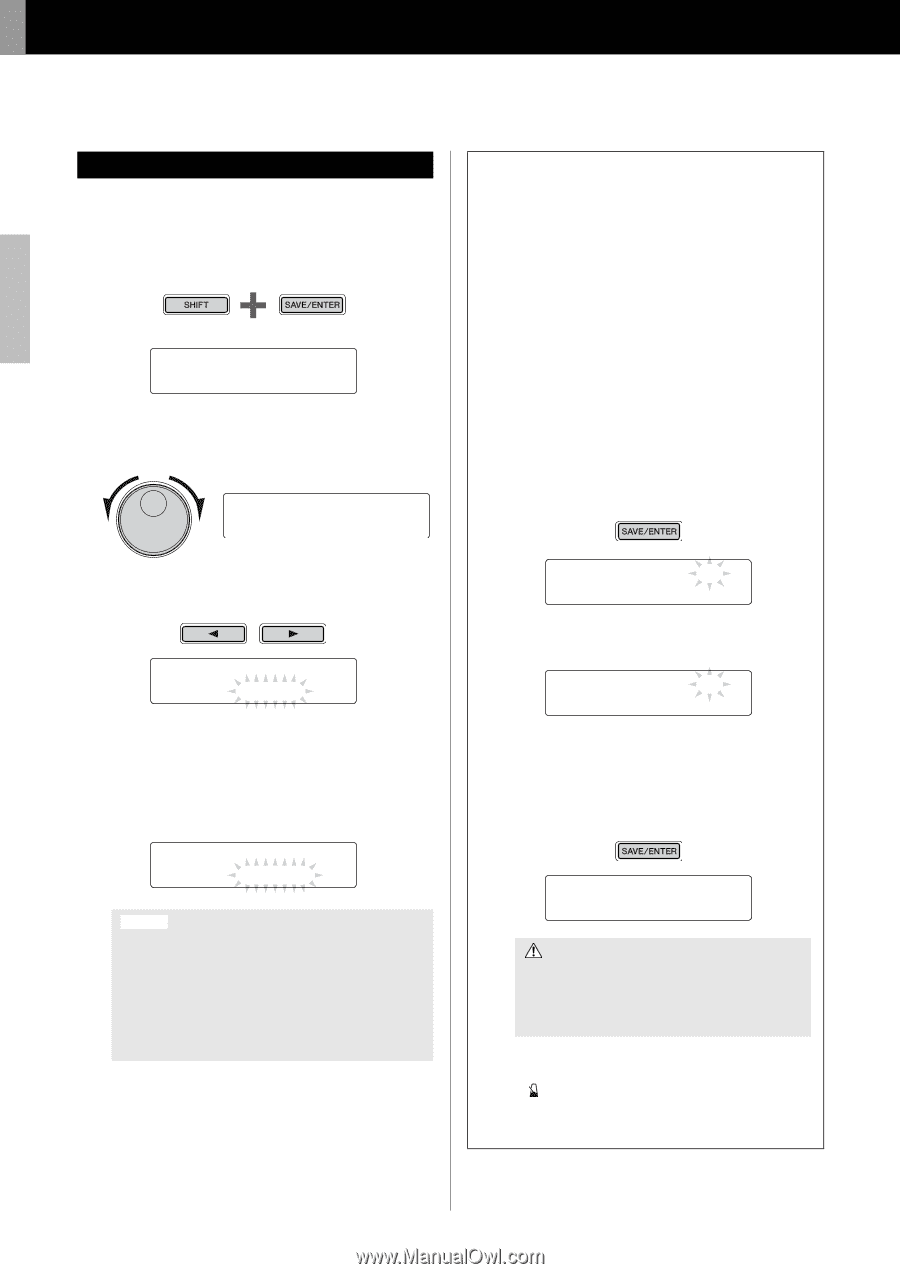
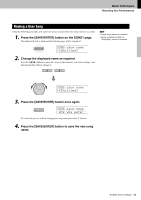
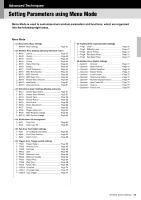
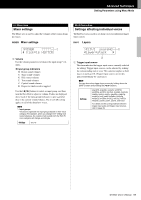
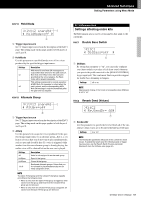
Advanced Techniques Setting Parameters using Menu Mode Setting Procedure Use the following procedure in Menu Mode to select parameters and change their settings. 1. Hold down the [SHIFT] button and press the [SAVE/ ENTER] button to access Menu Mode. Hold MENU 01:Mixer , 2. Turn the Data Dial to select the area containing the parame- ter you wish to set. MENU 02:KitVoice , 3. Use the [] buttons to select the parameter. >KitV1 snareHd "Layer=stack , NOTE When a number of parameters are contained in a single page, you can move the cursor between them using the [] buttons. 4. Turn the Data Dial to change the parameter's setting. >KitV1* snareHd "Layer=XFade1 , NOTICE Whenever you change a parameter setting in the KitVoice area, the KitCommon area, the KitJob area, or on one of pages TRG2 to TRG12 from the Trigger area, an asterisk will be displayed after the page name (i.e., "TRG2*"). This is to remind you that parameters have been changed but not yet stored. To store your settings, follow the procedure described in the column on the right. The asterisk will disappear when you store your settings. Parameter values from pages where an asterisk is not displayed are stored automatically. Storing your settings If you change a parameter setting in the KitVoice area, the KitCommon area, the KitJob area, or on one of pages TRG2 to TRG12 from the Trigger area, you will need to store the new setting in the drum module's internal memory as described below. NOTE If you switch to another kit or trigger setup or turn off the drum module without storing your new settings, the parameters in question will revert to their previously stored settings. Procedure As an example, the following describes how to store modified trigger settings. Note that trigger settings are stored as part of a User trigger setup. Meanwhile, settings from the KitVoice, KitCommon, and KitJob areas are stored as part of one of the User kits, which are numbered 51 to 100 (page 25). 1. After changing trigger parameter settings, press the [SAVE/ENTER] button. The page for storing trigger setup data will be displayed. tRG saVe to 15 :[DtX522K ] 2. Turn the Data Dial to select the User trigger setup (15 to 30) in which you wish to store your settings. tRG saVe to 16 :[DtX522K ] 3. To rename the trigger setup, move the cursor using the [] buttons and turn the Data Dial to change the selected character. 4. Press the [SAVE/ENTER] button once again. You will be asked to confirm that you wish to store your settings. tRG saVe to 16 Are you sure? CAUTION When you store trigger setup data, all of the data in the selected trigger setup will be overwritten with your new settings. Before proceeding, therefore, you should ensure that the trigger setup in question contains no irreplaceable settings. 5. Press the [SAVE/ENTER] button to store your settings. To cancel the process without storing any settings, press the [ ] button. 6. When your settings have been successfully stored, the message "Completed." will be displayed. 56 DTX502 Owner's Manual
-
 1
1 -
2
-
3
-
4
-
5
-
6
-
7
-
8
-
9
-
10
-
11
-
12
-
13
-
14
-
15
-
16
-
17
-
18
-
19
-
20
-
21
-
22
-
23
-
24
-
25
-
26
-
27
-
28
-
29
-
30
-
31
-
32
-
33
-
34
-
35
-
36
-
37
-
38
-
39
-
40
-
41
-
42
-
43
-
44
-
45
-
46
-
47
-
48
-
49
-
50
-
 51
51 -
 52
52 -
 53
53 -
 54
54 -
 55
55 -
 56
56 -
 57
57 -
 58
58 -
 59
59 -
 60
60 -
 61
61 -
62
-
63
-
64
-
65
-
66
-
67
-
68
-
69
-
70
-
71
-
72
-
73
-
74
-
75
-
76
-
77
-
78
-
79
-
80
-
81
-
82
-
83
-
84
-
85
-
86
-
87
-
88
-
89
-
90
-
91
-
92
 |
 |