ZyXEL GS-1548 User Guide - Page 70
Change Number of Queues, 11.4 Advanced QoS Settings
 |
View all ZyXEL GS-1548 manuals
Add to My Manuals
Save this manual to your list of manuals |
Page 70 highlights
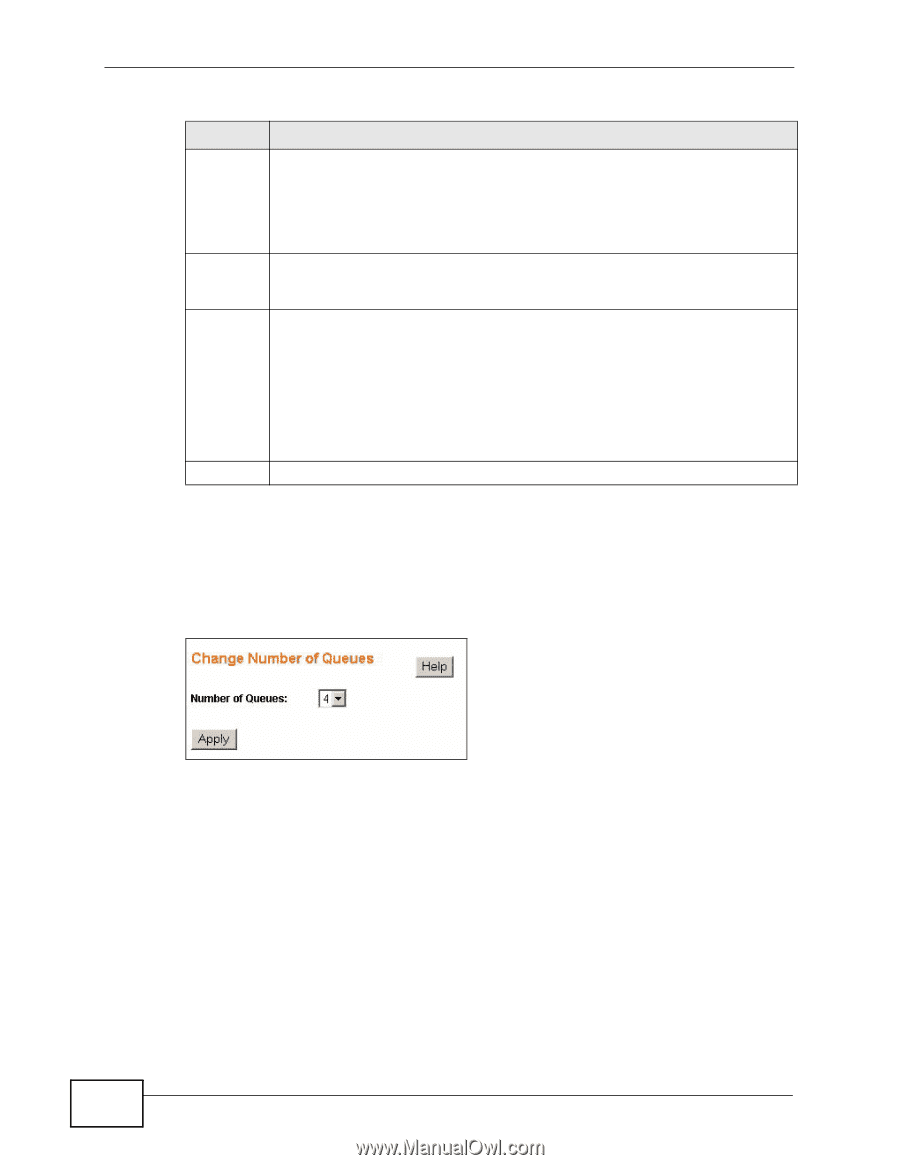
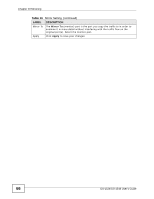
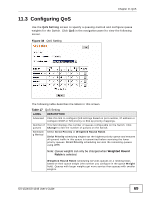
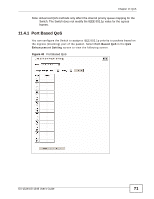
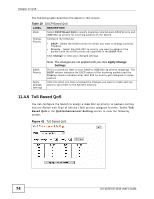
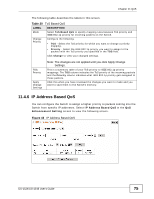
Chapter 11 QoS Table 17 QoS Setting (continued) LABEL DESCRIPTION Priority This value indicates packet priority and is retrieved from the priority tag field of incoming packets. The values range from 0 (lowest priority) to 7 (highest priority). Click the options below the priority values to send packets of a specific priority to a particular queue. You can also set this priority based on criteria you configure in the Advanced QoS screens. See the sections later in this chapter for more information. Queue 0 ... Queue 3 This field indicates which Queue (0 to 3) you are configuring. Queue 0 has the lowest priority and Queue 3 the highest priority. Weight You can only configure the queue weights when Weighted Round Robin is selected. Bandwidth is divided across the different traffic queues according to their weights. Apply Note: If you want to use Strict Priority but want to change the weights for the queues, configure them with Weighted Round Robin selected first and then change the scheduling method to Strict Priority. Click Apply to save your changes. 11.3.1 Change Number of Queues Use the Change Number of Queues screen to edit the number of queues on the Switch. Click Change in the QoS Setting screen to view the following screen. Figure 39 Change Number of Queues Select the number of queues from the Number of Queues drop down list box and click Apply to save your settings to the Switch. 11.4 Advanced QoS Settings The following sections describe additional methods for setting priority for incoming packets on the ports. The Switch allows you to choose one of the following methods: 70 GS-1524/GS-1548 User's Guide
-
 1
1 -
2
-
3
-
4
-
5
-
6
-
7
-
8
-
9
-
10
-
11
-
12
-
13
-
14
-
15
-
16
-
17
-
18
-
19
-
20
-
21
-
22
-
23
-
24
-
25
-
26
-
27
-
28
-
29
-
30
-
31
-
32
-
33
-
34
-
35
-
36
-
37
-
38
-
39
-
40
-
41
-
42
-
43
-
44
-
45
-
46
-
47
-
48
-
49
-
50
-
51
-
52
-
53
-
54
-
55
-
56
-
57
-
58
-
59
-
60
-
61
-
62
-
63
-
64
-
 65
65 -
 66
66 -
 67
67 -
 68
68 -
 69
69 -
 70
70 -
 71
71 -
 72
72 -
 73
73 -
 74
74 -
 75
75 -
76
-
77
-
78
-
79
-
80
-
81
-
82
-
83
-
84
-
85
-
86
-
87
-
88
-
89
-
90
-
91
-
92
-
93
-
94
-
95
-
96
-
97
-
98
-
99
-
100
-
101
-
102
-
103
-
104
-
105
-
106
-
107
-
108
-
109
-
110
-
111
-
112
-
113
-
114
-
115
-
116
-
117
-
118
-
119
-
120
-
121
-
122
-
123
-
124
-
125
-
126
-
127
-
128
-
129
-
130
-
131
-
132
-
133
-
134
-
135
-
136
-
137
-
138
-
139
-
140
-
141
-
142
-
143
-
144
-
145
-
146
-
147
-
148
-
149
-
150
-
151
-
152
-
153
-
154
-
155
-
156
-
157
-
158
-
159
-
160
-
161
-
162
-
163
-
164
-
165
-
166
-
167
-
168
-
169
-
170
 |
 |