ZyXEL GS1910-24 User Guide - Page 19
Transceiver Removal,
 |
View all ZyXEL GS1910-24 manuals
Add to My Manuals
Save this manual to your list of manuals |
Page 19 highlights
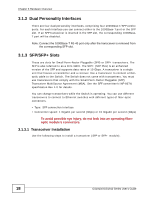
Chapter 3 Hardware Overview 1 Insert the transceiver into the slot with the exposed section of PCB board facing down. Figure 14 Transceiver Installation Example 2 Press the transceiver firmly until it clicks into place. 3 The Switch automatically detects the installed transceiver. Check the LEDs to verify that it is functioning properly. Figure 15 Installed Transceiver 3.1.3.2 Transceiver Removal Use the following steps to remove a transceiver (SFP or SFP+ module). 1 Open the transceiver's latch (latch styles vary). Figure 16 Opening the Transceiver's Latch Example GS1910/XGS1910 Series User's Guide 19
-
 1
1 -
2
-
3
-
4
-
5
-
6
-
7
-
8
-
9
-
10
-
11
-
12
-
13
-
 14
14 -
 15
15 -
 16
16 -
 17
17 -
 18
18 -
 19
19 -
 20
20 -
 21
21 -
 22
22 -
 23
23 -
 24
24 -
25
-
26
-
27
-
28
-
29
-
30
-
31
-
32
-
33
-
34
-
35
-
36
-
37
-
38
-
39
-
40
-
41
-
42
-
43
-
44
-
45
-
46
-
47
-
48
-
49
-
50
-
51
-
52
-
53
-
54
-
55
-
56
-
57
-
58
-
59
-
60
-
61
-
62
-
63
-
64
-
65
-
66
-
67
-
68
-
69
-
70
-
71
-
72
-
73
-
74
-
75
-
76
 |
 |
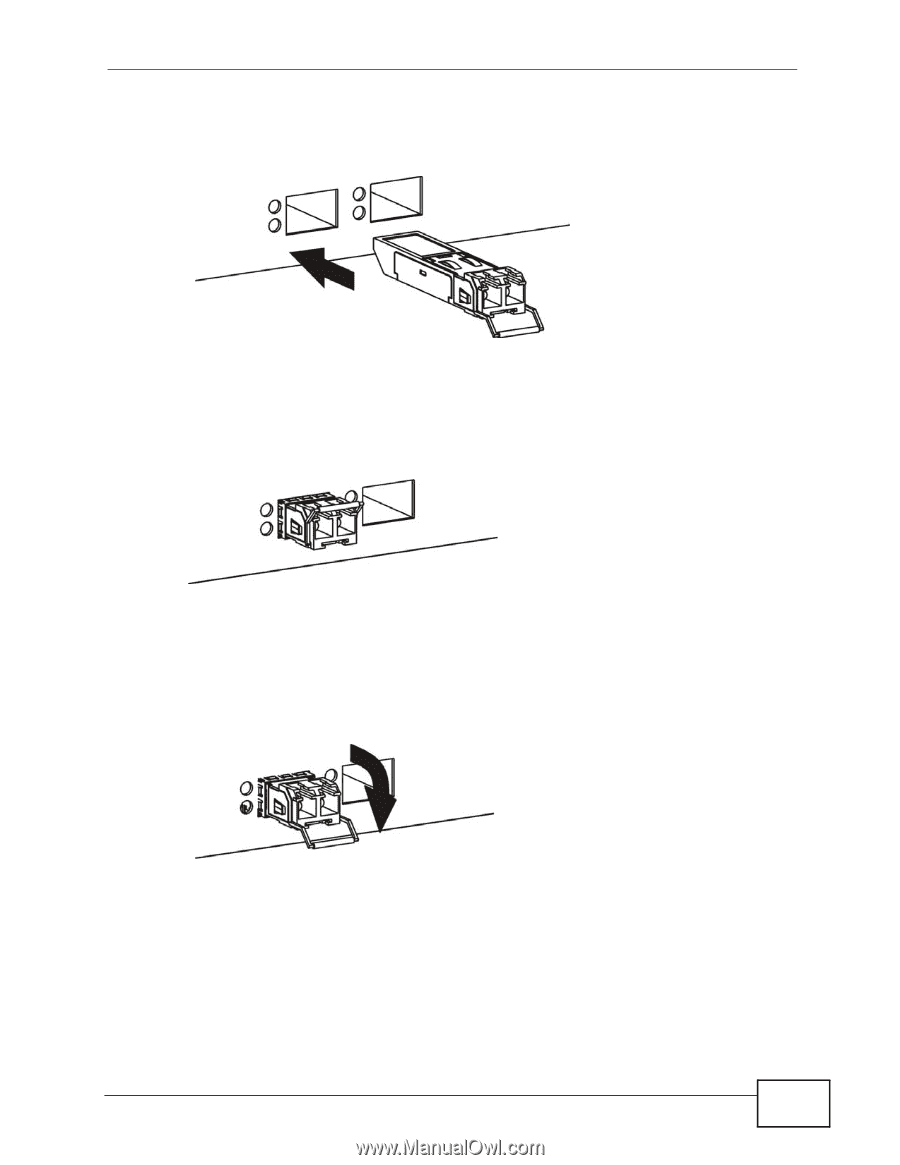
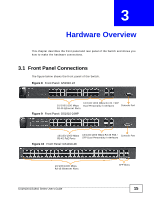
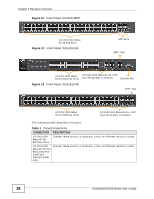
Chapter 3 Hardware Overview
GS1910/XGS1910 Series User’s Guide
19
1
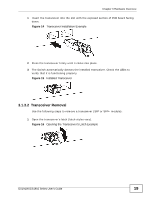
Insert the transceiver into the slot with the exposed section of PCB board facing
down.
Figure 14
Transceiver Installation Example
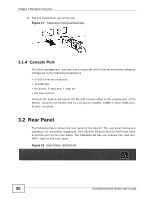
2
Press the transceiver firmly until it clicks into place.
3
The Switch automatically detects the installed transceiver. Check the LEDs to
verify that it is functioning properly.
Figure 15
Installed Transceiver
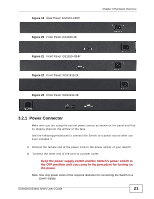
3.1.3.2
Transceiver Removal
Use the following steps to remove a transceiver (SFP or SFP+ module).
1
Open the transceiver’s latch (latch styles vary).
Figure 16
Opening the Transceiver’s Latch Example