ZyXEL GS1910-24 User Guide - Page 34
How to Con Login Accounts and Privilege Levels - user manual
 |
View all ZyXEL GS1910-24 manuals
Add to My Manuals
Save this manual to your list of manuals |
Page 34 highlights
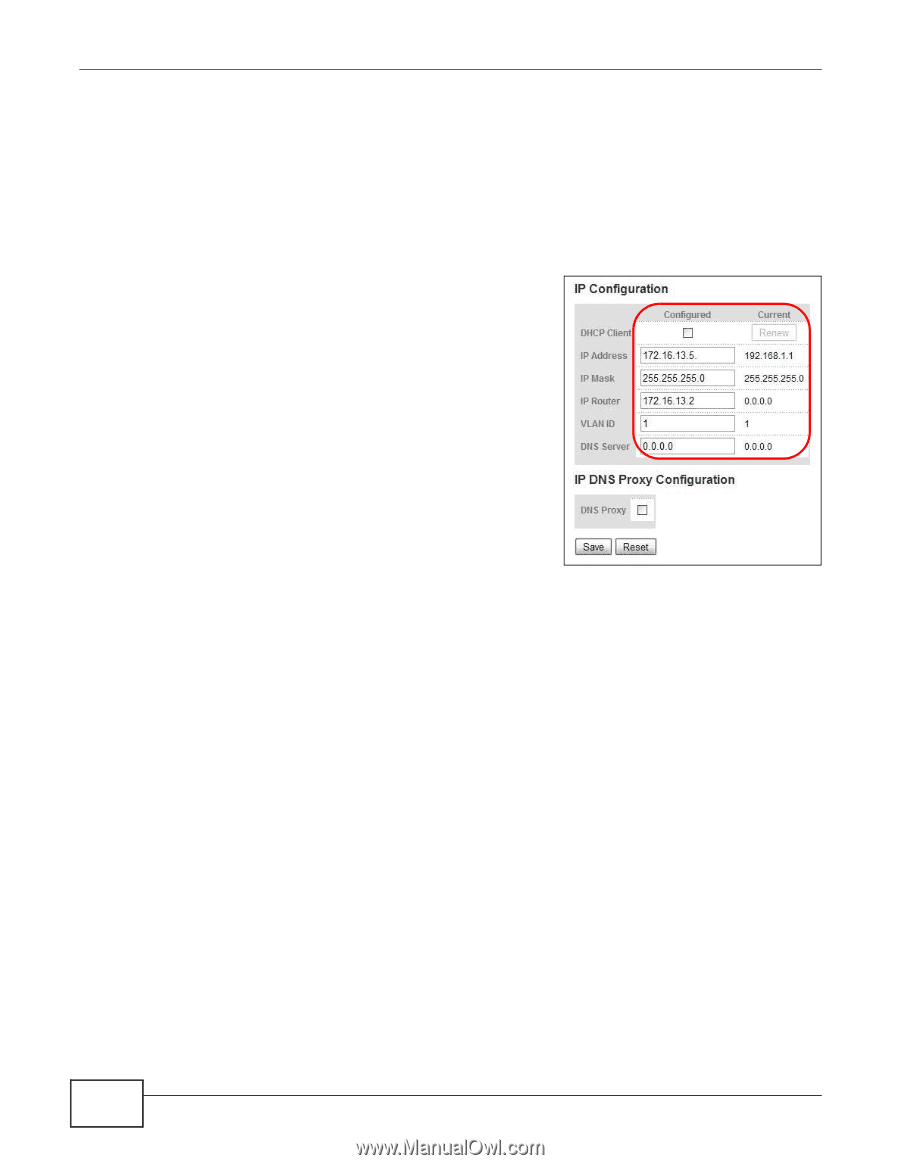
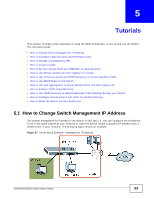
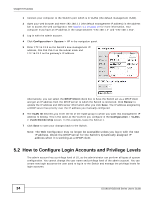
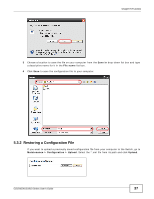
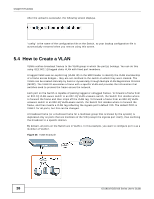
Chapter 5 Tutorials 1 Connect your computer to the Switch's port which is in VLAN1 (the default management VLAN). 2 Open your web browser and enter 192.168.1.1 (the default management IP address) in the address bar to access the web configurator. See Section 4.2 on page 25 for more information. Your computer must have an IP address in the range between "192.168.1.2" and "192.168.1.254". 3 Log in with the admin account. 4 Click Configuration > System > IP in the navigation panel. 5 Enter 172.16.13.5 as the Switch's new management IP address, 255.255.255.0 as the subnet mask and 172.16.13.2 as the gateway's IP address. Alternatively, you can select the DHCP Client check box to have the Switch act as a DHCP client and get an IP address from the DHCP server to which the Switch is connected. Click Renew to update the IP address and DNS server information after you click Save. The IP address assigned by a DHCP server has priority over the IP address you manually configured. 6 The VLAN ID field lets you enter the ID of the VLAN group to which you want this management IP address to belong. This is the same as the VLAN ID you configure in the Configuration > VLANs > VLAN Membership screen. In this example, leave the field at 1. 7 Click Save to save your changes back to the Switch. Note: The Web Configurator may no longer be accessible unless you log in with the new IP address. Check the DHCP server for the Switch's dynamically assigned IP address when it is working as a DHCP client. 5.2 How to Configure Login Accounts and Privilege Levels The admin account has a privilege level of 15, so the administrator can perform all types of system configuration. You cannot change the user name and privilege level of the admin account. You can create new login accounts the user used to log in to the Switch and manage the privilege levels for login accounts. 34 GS1910/XGS1910 Series User's Guide
-
 1
1 -
2
-
3
-
4
-
5
-
6
-
7
-
8
-
9
-
10
-
11
-
12
-
13
-
14
-
15
-
16
-
17
-
18
-
19
-
20
-
21
-
22
-
23
-
24
-
25
-
26
-
27
-
28
-
 29
29 -
 30
30 -
 31
31 -
 32
32 -
 33
33 -
 34
34 -
 35
35 -
 36
36 -
 37
37 -
 38
38 -
 39
39 -
40
-
41
-
42
-
43
-
44
-
45
-
46
-
47
-
48
-
49
-
50
-
51
-
52
-
53
-
54
-
55
-
56
-
57
-
58
-
59
-
60
-
61
-
62
-
63
-
64
-
65
-
66
-
67
-
68
-
69
-
70
-
71
-
72
-
73
-
74
-
75
-
76
 |
 |