Brother International HL-720 Service Manual - Page 130
Ch4 Troubleshooting, 1. Inspection Mode, DRUM + ALARM
 |
View all Brother International HL-720 manuals
Add to My Manuals
Save this manual to your list of manuals |
Page 130 highlights
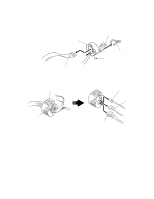
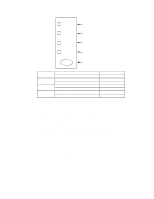
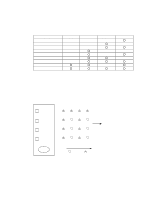
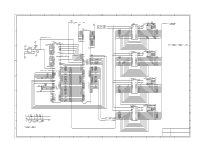
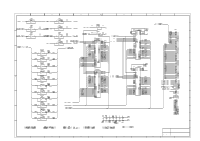
CHAPTERIV TROUBLESHOOTING 1. INSPECTION MODE 1.1 Inbuilt Inspection Modes The printer incorporates the following inspection modes such as the factory inspection mode and the test print mode. Factory inspection mode, Continuous grid pattern print mode, 3 patterns print mode, NVRAM value dump mode, ROM code update (FLASH rom only), RAM check and 4% density test print.. The operation of the inspection mode is as follows. (1) Turn off the power to the printer. (2) With the top cover open, turn on the power while holding down the button on the operation panel. When entering this mode, the DRUM LED is ON. Holding down the button causes the LEDs to turn ON in the order DRUM -> ALARM -> READY -> DATA -> DRUM. When you release the button, a mode is selected. The mode selected is indicated by the LED which is ON when you release the button. The inspection modes are assigned to the respective LEDs as shown below. LED DRUM ALARM READY DATA DRUM + ALARM ALARM + READY READY + DATA Type of inspection Factory inspection mode Continuous grid pattern print mode 3 patterns print mode (grid horizontal lines and black) NV-RAM value dump mode The ROM code update (only when flash memory is mounted) RAM check 4% density printing Details of the factory inspection mode are as follows. This mode is used to check if the sensors in the printer function correctly. In the process of this inspection, the LEDs and buttons are also checked. On entering this mode, the LEDs show the status of the respective sensors as follows. IV-1
-
 1
1 -
2
-
3
-
4
-
5
-
6
-
7
-
8
-
9
-
10
-
11
-
12
-
13
-
14
-
15
-
16
-
17
-
18
-
19
-
20
-
21
-
22
-
23
-
24
-
25
-
26
-
27
-
28
-
29
-
30
-
31
-
32
-
33
-
34
-
35
-
36
-
37
-
38
-
39
-
40
-
41
-
42
-
43
-
44
-
45
-
46
-
47
-
48
-
49
-
50
-
51
-
52
-
53
-
54
-
55
-
56
-
57
-
58
-
59
-
60
-
61
-
62
-
63
-
64
-
65
-
66
-
67
-
68
-
69
-
70
-
71
-
72
-
73
-
74
-
75
-
76
-
77
-
78
-
79
-
80
-
81
-
82
-
83
-
84
-
85
-
86
-
87
-
88
-
89
-
90
-
91
-
92
-
93
-
94
-
95
-
96
-
97
-
98
-
99
-
100
-
101
-
102
-
103
-
104
-
105
-
106
-
107
-
108
-
109
-
110
-
111
-
112
-
113
-
114
-
115
-
116
-
117
-
118
-
119
-
120
-
121
-
122
-
123
-
124
-
 125
125 -
 126
126 -
 127
127 -
 128
128 -
 129
129 -
 130
130 -
 131
131 -
 132
132 -
 133
133 -
 134
134 -
 135
135 -
136
-
137
-
138
-
139
-
140
-
141
-
142
-
143
-
144
-
145
-
146
-
147
-
148
-
149
-
150
-
151
-
152
-
153
-
154
 |
 |
