Brother International HL-720 Service Manual - Page 67
All black, See item I-2.
 |
View all Brother International HL-720 manuals
Add to My Manuals
Save this manual to your list of manuals |
Page 67 highlights
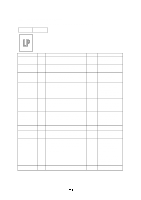
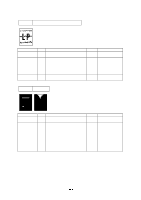
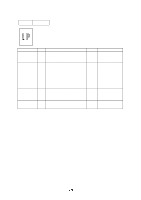
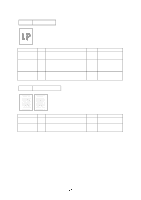
I-4 All black Possible cause Corona failure Ditto Ditto Step 1 2 3 Check Is the drum unit corona wire broken? Are the charging terminal spring at the printer body side and the electrode on the bottom face of the drum unit dirty? When printing is performed with the interlocks defeated, is the specified voltage measured at the charging spring at the printer body side? Ditto 4 Perform the same check as in step 3. Result No Yes Remedy Replace the drum unit. Clean the charging wire at the both sides. Yes Check the connection of the harness between the high-voltage power supply and the panel sensor PCB. No Replace the panel sensor PCB. I-4 All black Possible cause Soiled fixing unit Step 1(A) Check Is the area of about 50mm from the top on the back of paper soiled? Soiling of the transfer roller Fogging 1(B) Is other area rather than the above soiled? 2 Is the transfer roller soiled? 3 Is the back of the paper fogged? Result Yes Yes Yes Yes Remedy No failure on the fixing unit, clean the transfer roller. (See below.) Replace the fixing unit. Replace the drum unit. See item I-2.
-
 1
1 -
2
-
3
-
4
-
5
-
6
-
7
-
8
-
9
-
10
-
11
-
12
-
13
-
14
-
15
-
16
-
17
-
18
-
19
-
20
-
21
-
22
-
23
-
24
-
25
-
26
-
27
-
28
-
29
-
30
-
31
-
32
-
33
-
34
-
35
-
36
-
37
-
38
-
39
-
40
-
41
-
42
-
43
-
44
-
45
-
46
-
47
-
48
-
49
-
50
-
51
-
52
-
53
-
54
-
55
-
56
-
57
-
58
-
59
-
60
-
61
-
 62
62 -
 63
63 -
 64
64 -
 65
65 -
 66
66 -
 67
67 -
 68
68 -
 69
69 -
 70
70 -
 71
71 -
 72
72 -
73
-
74
-
75
-
76
-
77
-
78
-
79
-
80
-
81
-
82
-
83
-
84
-
85
-
86
-
87
-
88
-
89
-
90
-
91
-
92
-
93
-
94
-
95
-
96
-
97
-
98
-
99
-
100
-
101
-
102
-
103
-
104
-
105
-
106
-
107
-
108
-
109
-
110
-
111
-
112
-
113
-
114
-
115
-
116
-
117
-
118
-
119
-
120
-
121
-
122
-
123
-
124
-
125
-
126
-
127
-
128
-
129
-
130
-
131
-
132
-
133
-
134
-
135
-
136
-
137
-
138
-
139
-
140
-
141
-
142
-
143
-
144
-
145
-
146
-
147
-
148
-
149
-
150
-
151
-
152
-
153
-
154
 |
 |
